This document is an owner's manual for an LG IPS LED Monitor, which is an LCD monitor with LED backlighting. The manual provides comprehensive instructions for assembling, using, and maintaining the monitor, as well as troubleshooting common issues.
Function Description
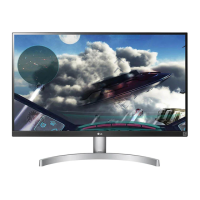
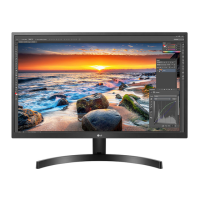
The LG IPS LED Monitor is designed to display digital video and audio signals from various sources such as PCs and AV devices. It features an IPS (In-Plane Switching) panel, which typically offers wide viewing angles and accurate color reproduction. The monitor supports multiple input types, including HDMI, DisplayPort, and USB-C, allowing for versatile connectivity with different devices. It also includes a USB hub function, enabling the connection of peripheral devices like keyboards, mice, and external storage directly to the monitor. The integrated speakers or headphone port provide audio output.
Usage Features
Assembly and Setup:
The manual details a step-by-step process for assembling the monitor, starting with placing a soft cloth on a surface to protect the screen. Users are guided to assemble the stand body and base, ensuring proper attachment and securing with screws. The monitor can be installed on a table, with recommendations for maintaining sufficient ventilation by placing it at least 100 mm away from a wall. For wall mounting, specific instructions and screw specifications are provided, emphasizing the use of VESA standard components and caution against excessive force.
Connectivity:
The monitor offers various connection options:
- Connecting to a PC:
- HDMI Connection: Transmits digital video and audio signals. Users are advised to use certified HDMI cables to avoid compatibility issues or image noise.
- DisplayPort Connection: Also transmits digital video and audio signals. The manual recommends using DisplayPort 1.2 cables for Mini DP to DP connections.
- USB-C Connection: Transmits digital video and audio signals, and supports PD (Power Delivery) and DP Alternate Mode. It's clarified that the USB-C port is for PC power source, not monitor power source.
- Connecting to AV Devices: HDMI connection is used for AV devices, similar to PC connection, with the same recommendations for certified cables.
- Connecting Peripherals (USB Hub): The monitor's USB ports act as a hub. Users connect the monitor's upstream USB port to their PC using a USB-C to USB-C or USB-C to USB-A cable. Depending on the cable type, the downstream ports support USB 2.0 or USB 3.0. It's important to install the latest Windows OS service pack and note that some USB devices might not be recognized without external power.
- Connecting Headphones: A headphone port is available for audio output. The manual suggests using straight earphones to avoid issues with connecting other external devices.
The monitor is controlled via a joystick button located at the bottom.
- Power On/Off: A single press turns the monitor on; a long press turns it off.
- Volume Control: Moving the joystick left/right adjusts the volume.
- Main Menu Access: Pressing the joystick button activates the main menu, allowing navigation through settings by moving the joystick up/down and left/right.
Adjustments and Features:
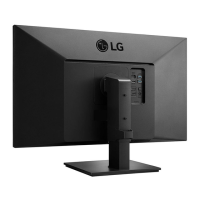
- Angle Adjustment: The screen angle can be adjusted forwards or backwards for comfortable viewing, with a range of 20° to -5°. Users are cautioned not to hold the lower part of the monitor frame or touch the screen during adjustment.
- Stand Height Adjustment: The monitor height can be adjusted up to 110.0 mm. Safety instructions advise handling the monitor with both hands and avoiding placing fingers between the screen and the base.
- Pivot Feature: The monitor can be rotated 90° clockwise for vertical viewing. Users must raise the monitor to its maximum height and adjust the angle before pivoting to avoid scratching the stand base. The manual notes that the Auto Pivot feature is not supported, but screen rotation can be managed via Windows operating system shortcut keys.
- Kensington Lock: A security system connector is provided at the back of the monitor for attaching a Kensington lock, which is an optional accessory.
The OSD (On Screen Display) menu offers extensive customization:
- Quick Settings:
- Brightness/Contrast: Adjusts screen luminance and contrast.
- Volume: Adjusts audio output level.
- Color Temp: Offers presets (Warm, Medium, Cool) and a Custom option for adjusting red, green, and blue levels.
- MaxxAudio: Enables or disables studio-quality sound tools.
- Input: Selects the active input mode (HDMI, DisplayPort, USB-C).
- Picture:
- Picture Mode (SDR/Non-HDR): Includes modes like Custom, Reader (for documents), Photo, Cinema, HDR Effect, Dark Room 1/2, Color Weakness, FPS Game 1/2, RTS Game, Custom (Game), EBU, REC709, SMPTE-C, and Calibration 1/2. These modes optimize the display for different content types and environments.
- Picture Mode (HDR): Offers HDR Vivid, HDR Standard, HDR Game, and HDR Cinema modes for HDR content.
- Picture Adjust:
- Brightness/Contrast/Sharpness: Fine-tunes image quality.
- SUPER RESOLUTION+: Enhances sharpness for low-resolution pictures, with High, Middle, Low, and Off options.
- Black Level: Adjusts the offset level for HDMI inputs, controlling the darkest color the monitor can display.
- HDMI ULTRA HD Deep Color: Provides sharper images for ULTRA HD Deep Color devices. Users are advised to set this option for each HDMI port separately and to turn it off if compatibility issues arise.
- DFC (Digital Fine Contrast): Automatically adjusts brightness.
- Game Adjust:
- Response Time: Sets the pixel response time (Faster, Fast, Normal, Off) to reduce motion blur.
- FreeSync: Synchronizes vertical frequency with the input signal to provide seamless images, supported over DisplayPort and HDMI with compatible AMD graphics cards. Offers Extended, Basic, and Off modes.
- Black Stabilizer: Enhances visibility in dark scenes by brightening low gray level areas.
- Gamma: Adjusts the gamma value, affecting image lightness/darkness.
- Color Temp: Similar to Quick Settings, but within the Game Adjust menu.
- Red/Green/Blue: Customizes individual color levels.
- Six Color: Allows fine-tuning of hue and saturation for six primary colors (Red, Green, Blue, Cyan, Magenta, Yellow).
- General:
- Language: Sets the OSD menu language.
- SMART ENERGY SAVING: Reduces power consumption with High, Low, or Off settings.
- Power LED: Turns the power indicator LED on or off.
- Automatic Standby: Automatically turns off the monitor after a period of inactivity (Off, 4H, 6H, 8H).
- DisplayPort 1.2: Enables or disables DisplayPort 1.2 features, important for compatibility with graphics cards.
- Buzzer: Controls the sound generated when the monitor powers on.
- OSD Lock: Disables OSD menu configuration and adjustment, preventing accidental changes.
- OSD Size: Selects OSD display size (Large or Small).
- Deep Sleep Mode: Minimizes power consumption in standby mode, but disables USB HUB functions.
- Information: Displays monitor details like model, serial number, and total power-on time.
- Reset: Returns all settings to default.
Maintenance Features
Safety and Handling:
The manual provides crucial safety information for handling and maintaining the monitor:
- Moving and Lifting: Always hold the top and bottom of the monitor frame, not the screen. Disconnect power and cables before moving. It's recommended to use the original box for transportation. Avoid strong shocks or vibrations.
- Screen Protection: Do not touch the monitor screen directly, as this can cause damage or pixel issues. When holding the monitor, face the screen away from you to prevent scratches.
- Stand Stability: Ensure the monitor is stable, especially when using the panel without the stand base, to prevent falls and damage.
- Cable Management: Use the provided cable holder to arrange cables neatly, preventing tangles and potential damage.
- Power Cord: Always use the supplied, grounded power cord. Unplug the power cord before moving or installing the monitor to prevent electric shock.
Troubleshooting:
The manual includes a dedicated section for troubleshooting common issues:
- No Display: Checks if the power cord is plugged in, the power LED is on, and the correct input is selected. Addresses "OUT OF RANGE" and "No Signal" messages by checking signal frequency and cable connections.
- OSD Lock: Explains how to unlock the OSD menu if functions are unavailable.
- Image Sticking: Advises using a screensaver and avoiding prolonged display of still images to extend monitor lifetime.
- Unstable/Shaky Display: Recommends selecting the appropriate resolution and changing interlaced resolutions (e.g., HDMI 1080i) to progressive ones (1080P).
- Abnormal Color: Suggests setting color depth to 24-bit or higher, checking signal cable connections, and notes that pixilated spots are normal for LCD screens.
- "Unrecognized monitor" Message: Directs users to install the display driver from the LG website and verify Plug&Play support.
- No Sound: Recommends increasing monitor volume and setting the monitor as the default audio output device in Windows.
General Notes:
- The manual emphasizes using genuine components and supplied cables to ensure safety and product performance.
- It states that specifications are subject to change without notice.
- Information regarding energy saving data and luminance changes with SMART ENERGY SAVING settings is provided.
- For European markets, the monitor is set to automatically turn off after 4 hours of inactivity, a setting that can be disabled in the OSD menu.