24
OPERATION
4
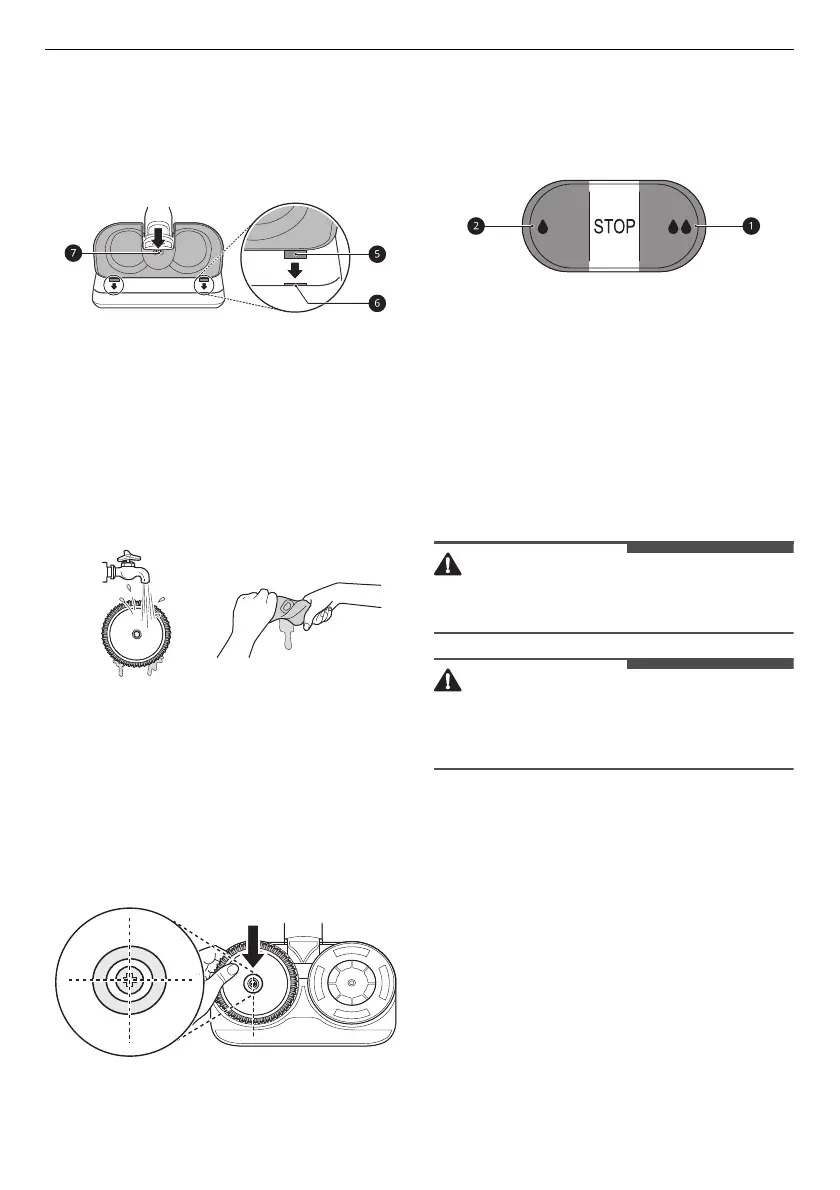
Attach the water tank to the mop nozzle again.
• Insert the 2 tabs
e
at the front of the water
tank into the slots
f
on the top of the mop
nozzle. Press down at the centre
g
to lock
the tank in place.
Attaching the Mop Pads
1
Wet both sides of the mop pads with water
then squeeze out any excess water before
attaching the pads.
• Do not attach pads while they are dripping
wet.
• Attaching and using mop pads while they
are dry may affect the cleaning results.
2
Place the mop nozzle upside down on the floor.
3
Align and attach the centre of the mop pad
with the centre of the mop attachment plate.
• Attach the Velcro on the mop pad to the mop
plate. Attaching the mop pad upside down
or improperly may affect the cleaning
results.
4
Attach the mop nozzle to the appliance.
Adjusting the Amount of Water
Press the water adjustment buttons to adjust the
amount of water released onto the mop pad to
either
High Mode
or
Low Mode
.
•
High Mode
: Press the
High Mode
button
a
all
the way down to clean ingrained dirt or supply a
large amount of water.
•
Low Mode
: Press the
Low Mode
button
b
all the
way down to supply a small amount of water for
cleaning wood or other flooring that can be
damaged by too much water.
•
STOP
: Press the
Low Mode
or
High Mode
button halfway to toggle back to the
STOP
position. This stops the supply of water so you
can go over areas that are already wet.
• To avoid injury, do not attach the mop pad while
the mop attachment plate is rotating.
• Do not let the appliance stand on the floor while
the wet mop pads are attached. Doing so may
result in damage or swelling to wood flooring.
Using with the Mop Nozzle
1
Attach the water tank and mop pads to the
mop nozzle.
2
Set the water adjustment button to the
STOP
position.
3
Press the
Power
button to start cleaning.
 Loading...