S
Shelley MyersAug 7, 2025
Why is my LG LS-L1261NL leaking refrigerant?
- EEric RangelAug 7, 2025
If your LG Air Conditioner experiences refrigerant leakage, it could stem from a clog in the refrigeration cycle or a defective compressor.
Why is my LG LS-L1261NL leaking refrigerant?
If your LG Air Conditioner experiences refrigerant leakage, it could stem from a clog in the refrigeration cycle or a defective compressor.
Why doesn't the high pressure rise quickly at the beginning of operation in my LG LS-L1261NL Air Conditioner?
If your LG Air Conditioner's high pressure doesn't rise quickly at the start, it might be due to an excessive amount of refrigerant.
What causes low current in my LG Air Conditioner?
If the current is low in your LG Air Conditioner, this could be caused by a defective compressor or a defective 4-way reverse valve.
Why does my LG Air Conditioner have higher suction pressure and normal temperature?
If your LG Air Conditioner has higher suction pressure and normal temperature, it might be due to an excessive amount of refrigerant. In this case, high pressure does not quickly rise at the beginning of operation.
What causes higher suction pressure and high temperature in my LG LS-L1261NL?
If your LG Air Conditioner has higher suction pressure and high temperature, this could be caused by a defective compressor or a defective 4-way reverse valve. The current is low.
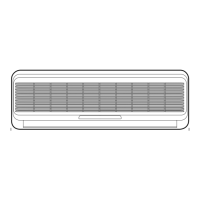
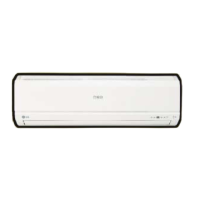
Details various operational functions of the indoor unit, including fan control, modes, and indicators.
Details operational functions of the outdoor unit, including controls, protection, and fan operation.
Explains the function of each button and indicator on the remote control for operating the air conditioner.
Lists key performance specifications like cooling/heating capacity, moisture removal, power source, and noise levels.
Provides detailed measurements and diagrams for the indoor unit, including piping hole locations.
Provides detailed measurements and diagrams for the outdoor unit, including various dimension labels.
Illustrates the path of refrigerant through the indoor and outdoor units for cooling and heating cycles.
Shows wiring configurations for different indoor unit models (LS-_NL, LS-_NM/NN, LS-K18612L).
Illustrates wiring configurations for outdoor units corresponding to different indoor unit models.
Explains the meaning of various LED indicators on the indoor unit for different operating states and errors.
Details how to interpret the power display on the indoor unit and its relation to compressor operating frequency.
Describes the system's protection mechanisms against evaporator pipe frosting and indoor fan droplet formation.
Explains how compressor operating frequency is determined based on temperature differences in cooling mode.
Details the operation of the Healthy Dehumidification mode, including intake air temperature adjustments.
Explains how compressor operating frequency is determined based on temperature differences in heating mode.
Describes the selection and operation of the Fuzzy mode, including cooling and dehumidification aspects.
Details Fuzzy operation specifics for heating and dehumidification modes, including temperature and fan speed settings.
Explains Jet Cool mode operation and Chaos swing modes for cooling and heating across different series.
Describes how Chaos swing operates during Fuzzy mode operation based on 1/f fluctuation.
Details sleep timer operations for both cooling and heating cycles, including temperature adjustments over time.
Explains auto-restart functionality and how to operate the unit using the forced operation switch.
Details protection mechanisms related to total current control and DC peak current errors.
Describes protection measures against overheating of the power module and compressor.
Explains the defrosting control process, including conditions and operational sequences.
Covers selecting the best location for indoor and outdoor units and piping length/elevation guidelines.
Details how to fix the installation plate and drill the necessary hole in the wall for piping.
Explains the correct procedure for flaring copper pipes and connecting them to prevent gas leakage.
Guides the connection of piping and drain hose to the indoor unit, including taping and unit installation.
Details wrapping insulation material, routing pipes, and bundling them for indoor unit connections.
Continues indoor unit installation steps, focusing on connecting cables, taping, and final unit mounting.
Guides the connection of pipes to the outdoor unit, including tightening flare nuts and rerouting hoses.
Details connecting the power cable between the indoor unit and the power source, including specifications.
Guides connecting the control cable to the outdoor unit and specifies circuit breaker requirements.
Provides a schematic diagram illustrating the electrical connection between indoor and outdoor units.
Covers checking drainage, forming piping, and creating traps to prevent water entry.
Explains the procedure for air purging using a vacuum pump, including leak testing and preparation.
Details the evacuation process using a vacuum pump and the final steps for finishing the job.
Outlines steps for test running the unit, evaluating performance, and performing a pump-down procedure.
Lists and describes the functions of various buttons on the remote control for operating the air conditioner.
Provides a detailed explanation of each button on the remote control, including optional functions.
Details steps for removing the indoor unit's front grille and internal sensor/conductor components.
Guides the removal of the control box and the evaporator from the indoor unit.
Explains the procedure for removing the cross-flow fan from the indoor unit.
Summarizes the correct positions of 2-way and 3-way valves for various works like purging, pumping, and charging.
Provides a step-by-step guide for air purging, including leak checks and valve stem operations.
Details the procedure for pumping down the air conditioner, including valve settings and gauge readings.
Explains the air purging process specifically for re-installation, including valve and nut tightening.
Describes the procedure to balance refrigerant by adjusting the 2-way and 3-way valves.
Details the steps for evacuating the system, including vacuum pump connection and gauge readings.
Guides the process of charging the system with refrigerant, covering hose connection and charging methods.
Provides methods for analyzing operational troubles by checking temperature differences and pressures.
Lists error codes, causes of malfunction, indicators, and operating states for the indoor unit.
Lists error codes, causes of malfunction, indicators, and operating states for the outdoor unit.
Advises on safety precautions before performing checks or repairs on the unit.
Outlines the general procedure for diagnosing problems, including voltage checks and self-diagnosis.
Provides troubleshooting steps for when the product does not operate at all, checking power and connections.
Guides troubleshooting for when the product does not operate with the remote controller.
Details troubleshooting steps when the compressor or outdoor fan fails to drive.
Provides steps for troubleshooting when the indoor fan does not operate.
Guides troubleshooting for when the horizontal louver does not operate.
Details troubleshooting steps for when the outdoor unit does not operate at all.
Guides troubleshooting for compressor malfunction related to DC Peak Error (Error Code ).
Details troubleshooting for compressor malfunction due to communication errors between indoor and outdoor units (Error Code ).
Guides troubleshooting for compressor malfunction related to CT Error (Error Code ).
Lists problems arising from missing or faulty connectors on the indoor main PCB assembly.
Lists problems associated with missing connectors on outdoor main and sub PCB assemblies.
Shows the electronic control device layout for the indoor main PCB assembly, including component identification.
Shows the electronic control device layout for the outdoor main PCB assembly, including component identification.
Shows the electronic control device layout for the outdoor sub PCB assembly, including component identification.
Shows the electronic control device layout for the display assembly, including PCB and component identification.
Provides the schematic diagram for the indoor unit of LS-_NL series models (7k, 9k, 12k).
Provides the schematic diagram for the indoor unit of LS-_NM/NN series models (7k, 9k, 12k).
Provides the schematic diagram for the indoor unit of the 18k series.
Provides the schematic diagram for the outdoor unit of 7k, 9k, and 12k series models.
Provides the schematic diagram for the outdoor unit of the 18k series.
Shows an exploded view of the indoor unit with numbered parts for identification.
Lists replacement parts for the indoor unit, including location numbers, descriptions, and part numbers.
Continues the parts list for the indoor unit, detailing various components and their part numbers.
Shows exploded views of the outdoor unit for 18K and 7K, 9K, 12K series with numbered parts.
Lists replacement parts for the outdoor unit, including location numbers, descriptions, and part numbers.
Continues the parts list for the outdoor unit, detailing various components and their part numbers.
| Brand | LG |
|---|---|
| Model | LS-L1261NL |
| Category | Air Conditioner |
| Language | English |