13
EN
CAUTION
• Under normal circumstances, this drain cap should
not be removed. The drain cap allows water removal
if the air conditioner is being stored for the season
or if a technician needs to remove the water.
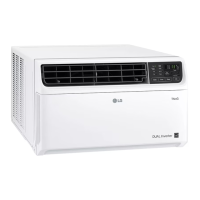
Bottom ViewBottom View
OutdoorOutdoor
Drain CapDrain Cap
2
Extend the guide panels to fill the window
opening and use 4 type B screws to secure
them to the window.
Screws Screws
(Type B)(Type B)
3
Cut the non-adhesive foam strip to the proper
length and insert it between the upper window
sash and the lower window sash.
Foam Strip Foam Strip
(Non-adhesive)(Non-adhesive)
4
To prevent broken glass or damage to windows,
on vinyl or other similarly constructed windows,
attach the L bracket with a type A screw.
Screw Screw
(Type A)(Type A)
L BracketL Bracket
VinylVinyl
Screw Screw
(Type A)(Type A)
WoodWood
5
Remove the screw from the bottom right of the
cabinet. Attach the support bracket using the screw
you just removed. Secure the support bracket to
the inner window sill using a type B screw.
Support BracketSupport Bracket
Screws Screws
(Type B)(Type B)
6
After the air conditioner is installed, measure
the curtain panel on each side and cut the
adhesive-backed heatproof foam to fit each
panel. The size of the panels may differ.
Remove the backing from the heatproof foam
and attach the foam to the curtain panels.
H
W2
W1
W2
W
H
W
H
H
Heatproof FoamHeatproof Foam
(Adhesive Backed)(Adhesive Backed)
NOTE
• Heatproof foam improves the cooling capability
of the air conditioner.
• See the Electrical Data section for information
on attaching the power cord to an electrical
outlet.
 Loading...