4-3. Tiling Displays : How to Join Sets - Installing Set 1
The numbers assigned in this example (#1,#2, #3, #4) are used to demonstrate the
installation procedure to ensure it is easy to follow. These numbers have nothing to do
with the Set ID that is used to operate the remote control.
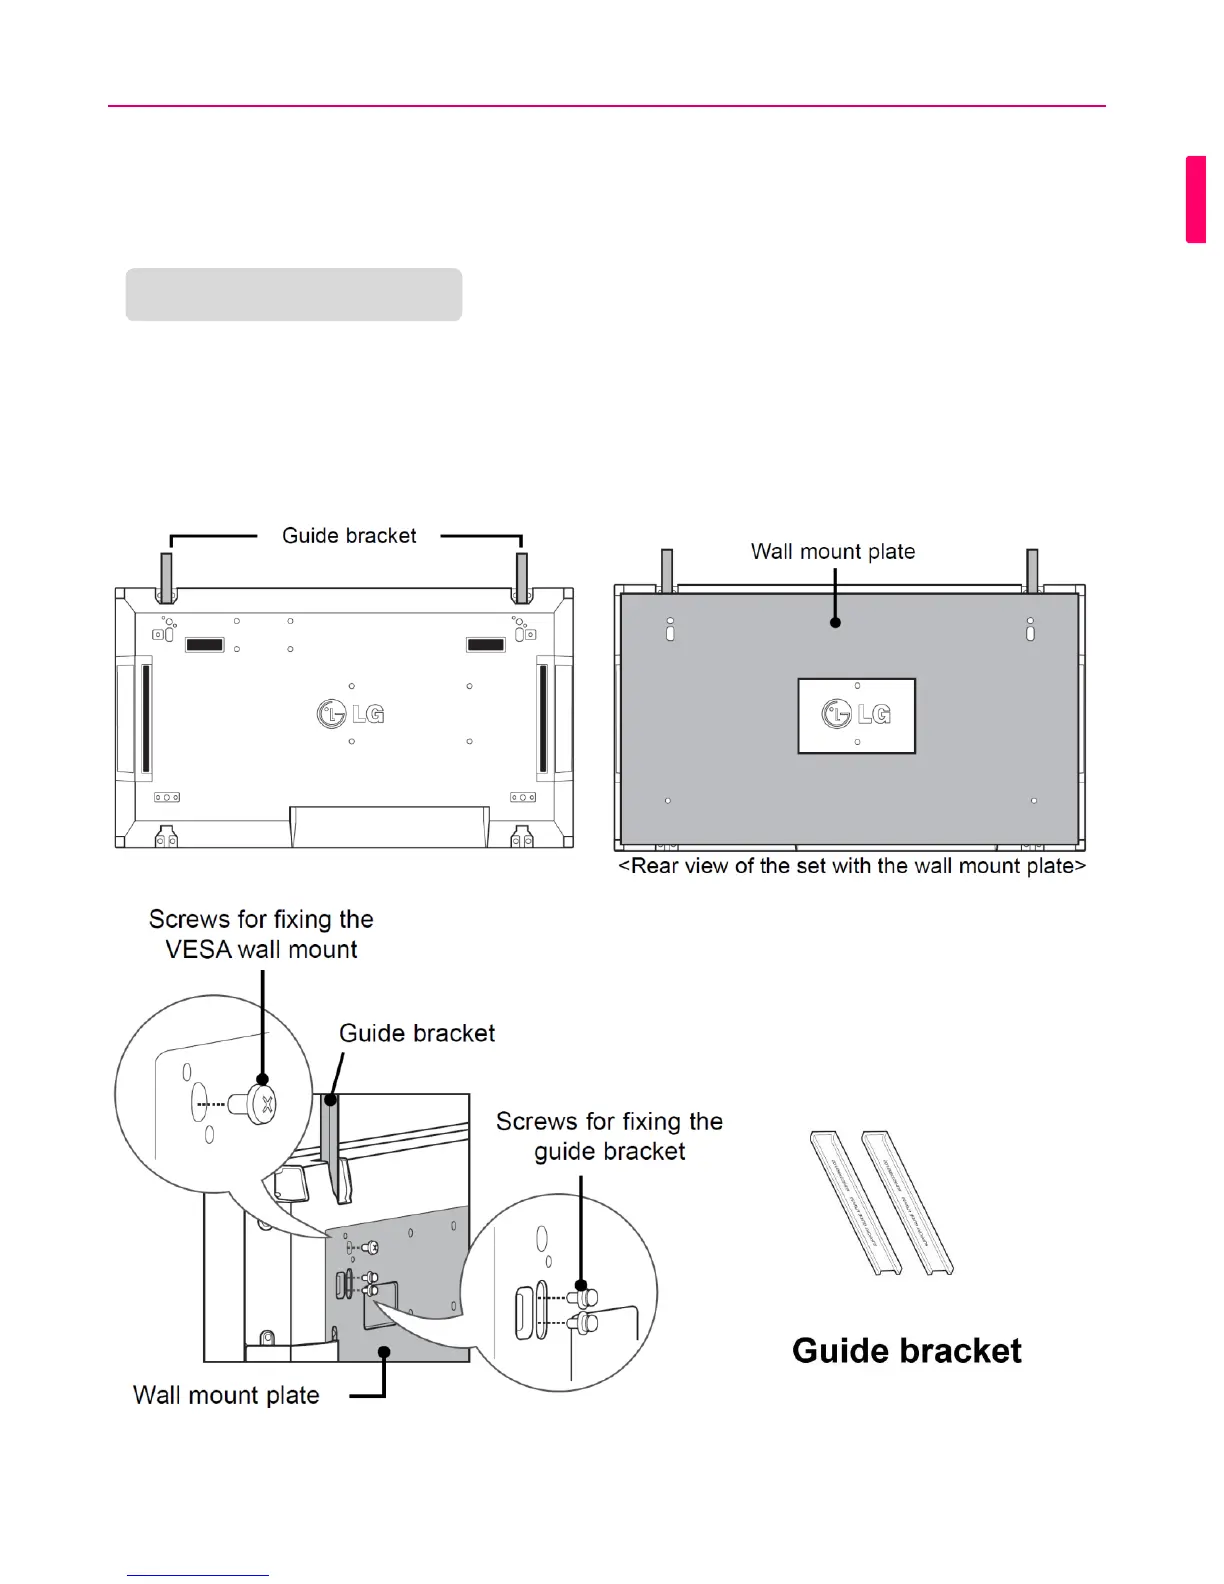
Set the guide bracket into the bracket groove using screws and mount the set to the wall
mount plate or the wall.
Example of 2 x 2 tiling
The wall mount plate is shaded in gray in the illustration to help you see it.