7
ENGLISH
The depth is adjustable. The default depth is 38 mm and the adjusted depth is 64 mm.
If more space is needed for the cable connection, adjust the depth referring to the "How to adjust the
depth of the lower spacer" section above.
When installing the cable to use the set, make sure that the set is installed at a sufficient distance from
the wall to avoid the damage to the cable.
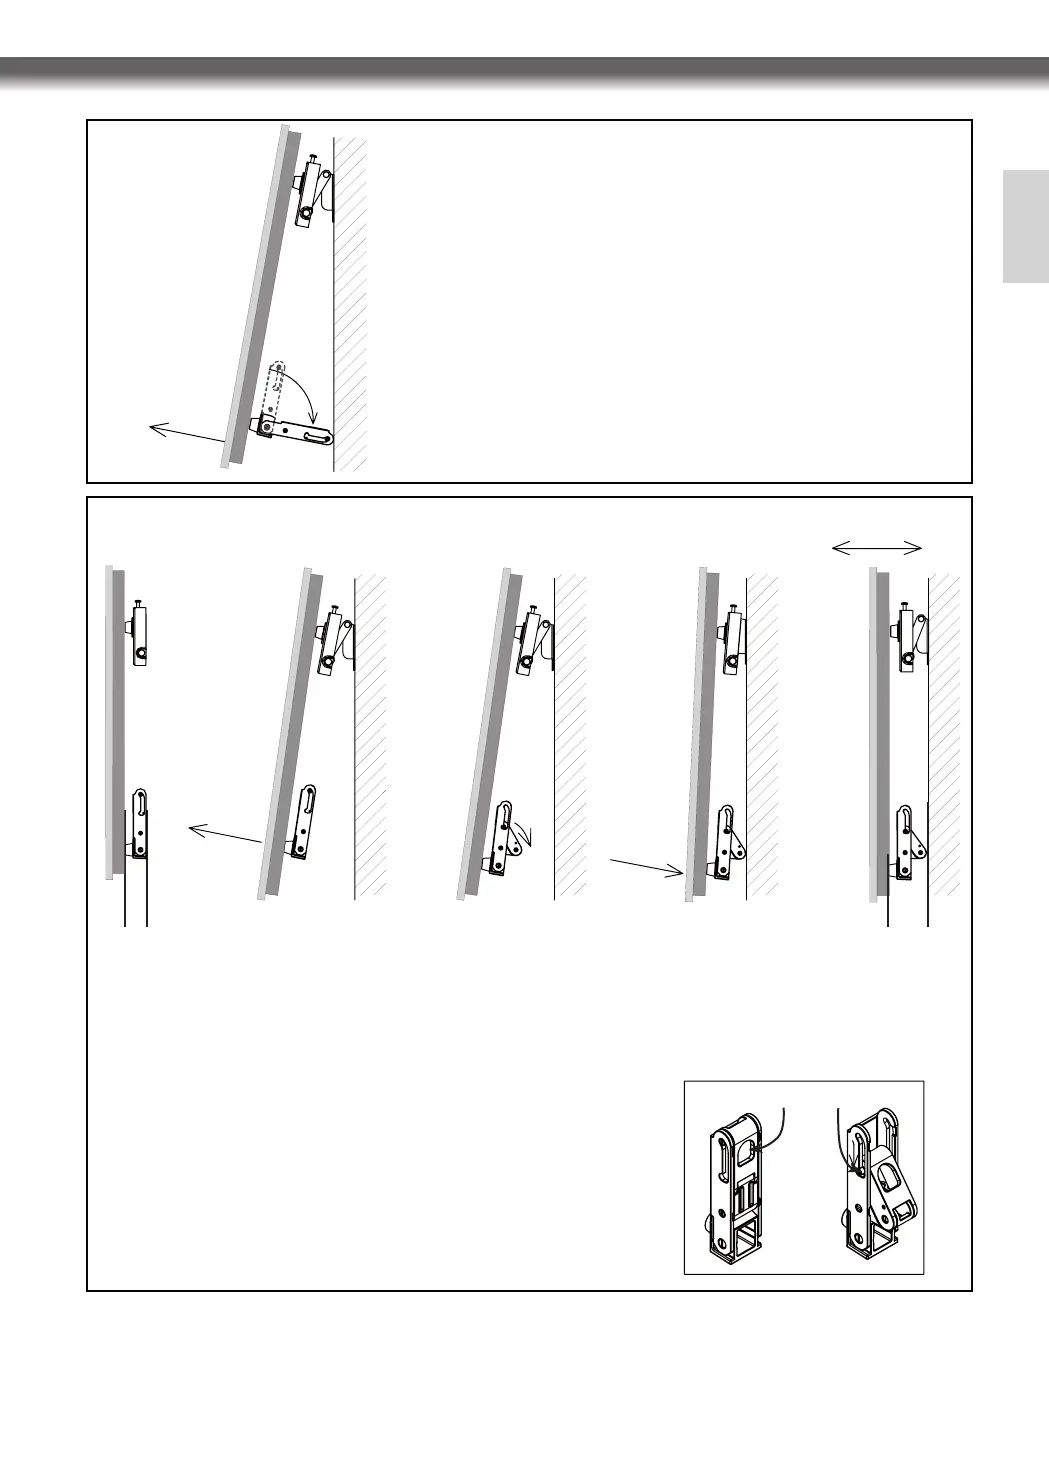
Lift the set as shown in the left figure to attach cables.
Pull the lower part of the set forward as shown in ❶,
Turn the lower spacer brackets to 90 degrees as shown in ❷.
Make sure that the set maintains this angle.
After the installation, follow the instructions in reverse order (❷ ❶)
to make the set screen parallel to the wall.
Do not use excessive force when pulling out at the bottom of the set
(away from the wall) to install cables or wires. The spacers can be
adjusted if more space is needed.
❶
❷
<Attaching Cables>
<Adjusting the angle>
Depth adjusting hole
Depth setting hole
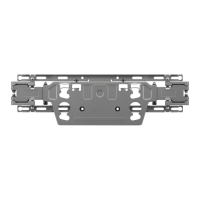
1. How to adjust the depth of the lower spacer (See the
right figure) : Hang your finger on the depth adjusting
hole and pull it down to set the protrusion to the depth
fixing hole.
Then, pull the upper part of the set forward to ensure
that the set screen is parallel to the wall.
2. The upper part of the set is adjustable. Adjust it
properly.
Depth : 64 mm
Pull the lower part of the set forward as shown in ❶.
Turn the thickness adjusting lever of the lower spacers to 90 degrees as shown in ❷.
Take your hands off the lower part of the set when it touches the wall as shown in ❸.
Adjust the screen angle by pushing or pulling the upper part of the set as shown in ❹.
The recommended default angle is 90 degrees (the screen must be perpendicular to the floor surface).
❶
❸
❹
❷
Depth : 38 mm