Installation Manual 13
ENGLISH
Mounting the installation plate(Wall Mounting)
The wall you select should be strong and solid
enough to prevent vibration
1. Mount the installation plate on the wall with
type "A" screws. If mounting the unit on a
concrete wall, use anchor bolts.
• Mount the installation plate horizontally by
aligning the centerline using a level.
2. Measure the wall and mark the centerline. It
is also important to use caution concerning
the location of the installation plate-routing
of the wiring to power outlets is through the
walls typically. Drilling the hole through the
wall for piping connections must be done
safely.
Installation
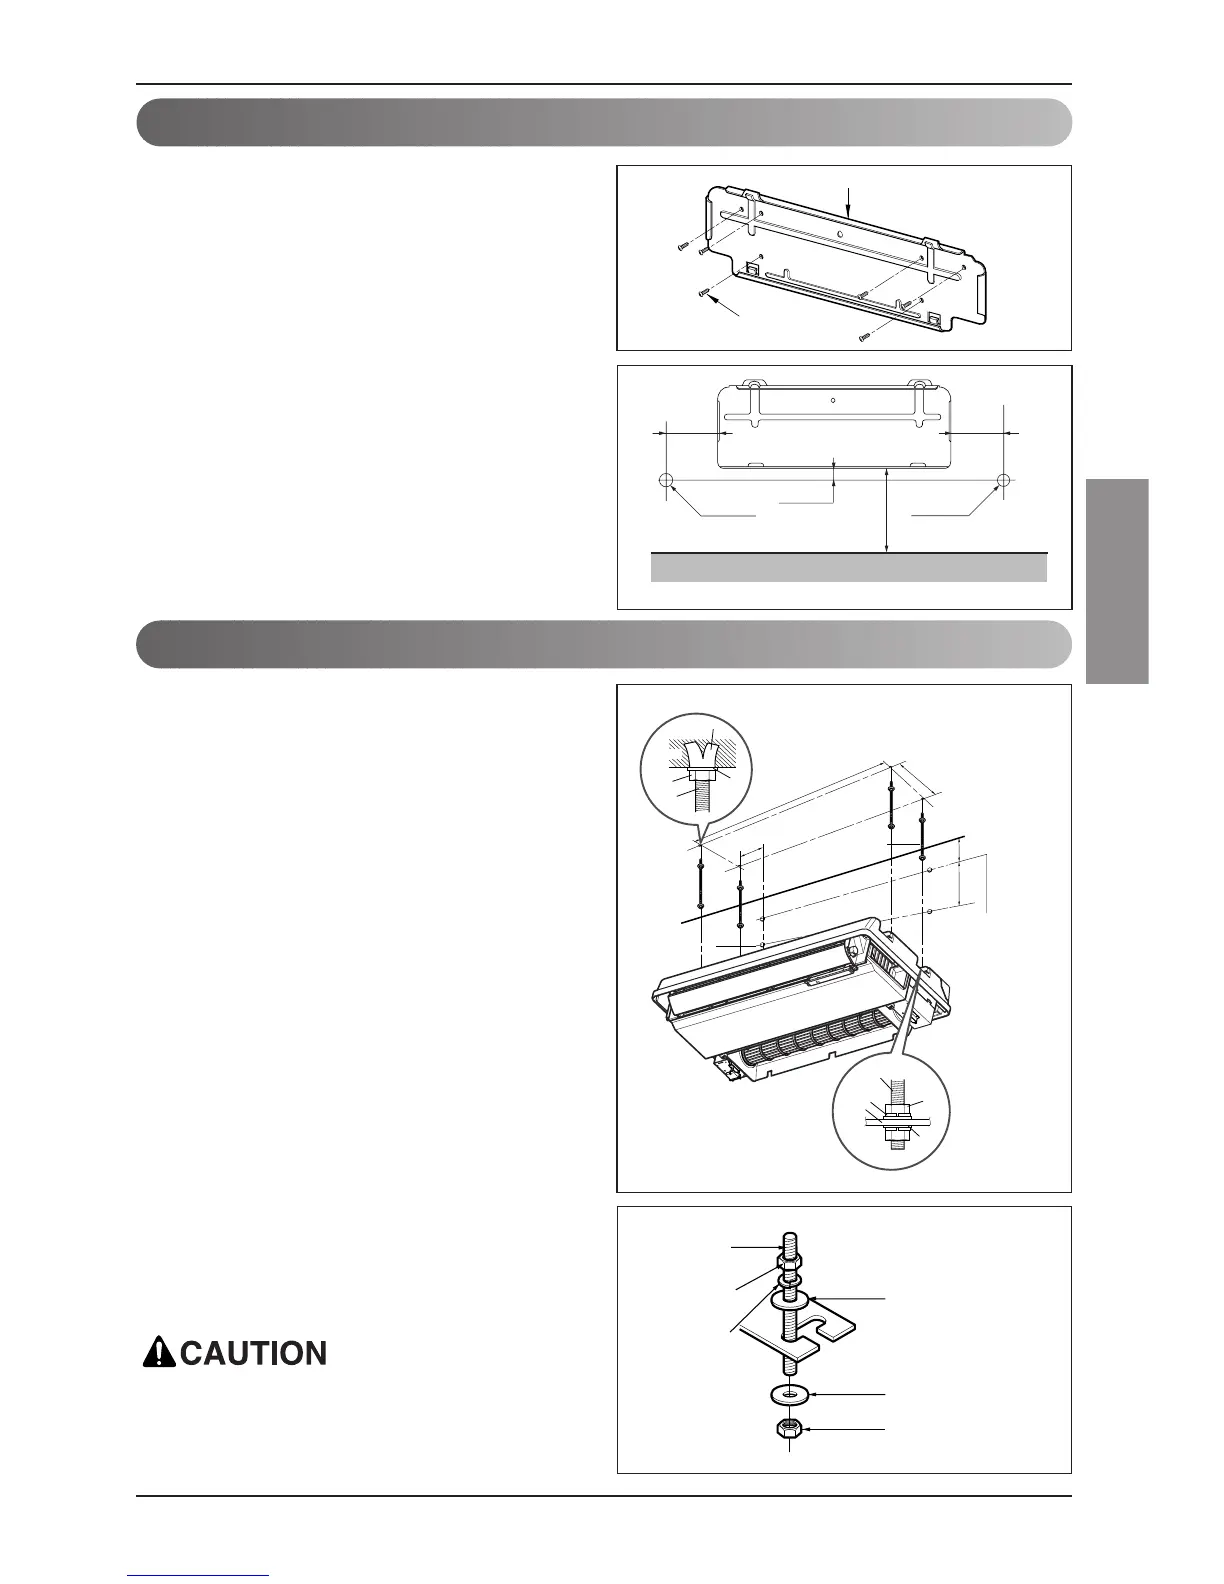
Mounting the anchor Nut & Bolt(Ceiling Mounting)
• Prepare 4 suspension bolts. (Each bolts
length should be same.)
• Measure and mark the position for the
Suspension bolts and the piping hole.
• Drill the hole for anchor nut on the ceiling.
• Insert the nuts and washer onto the
suspension bolts for locking the suspension
bolts on the ceiling.
• Mount the suspension bolts to the anchor-
nuts firmly.
• Secure the hangers onto the Suspension
bolts (adjust level roughly.) using nuts,
washers and spring washers.
• Adjust a level with a level gauge on the
direction of left-right, back-forth by adjusting
suspension bolts.
• Adjust a level on the direction of top-bottom
by adjusting supension bolts. Then the unit
will be declined to the bottomside so as to
drain well.