11
EN
3
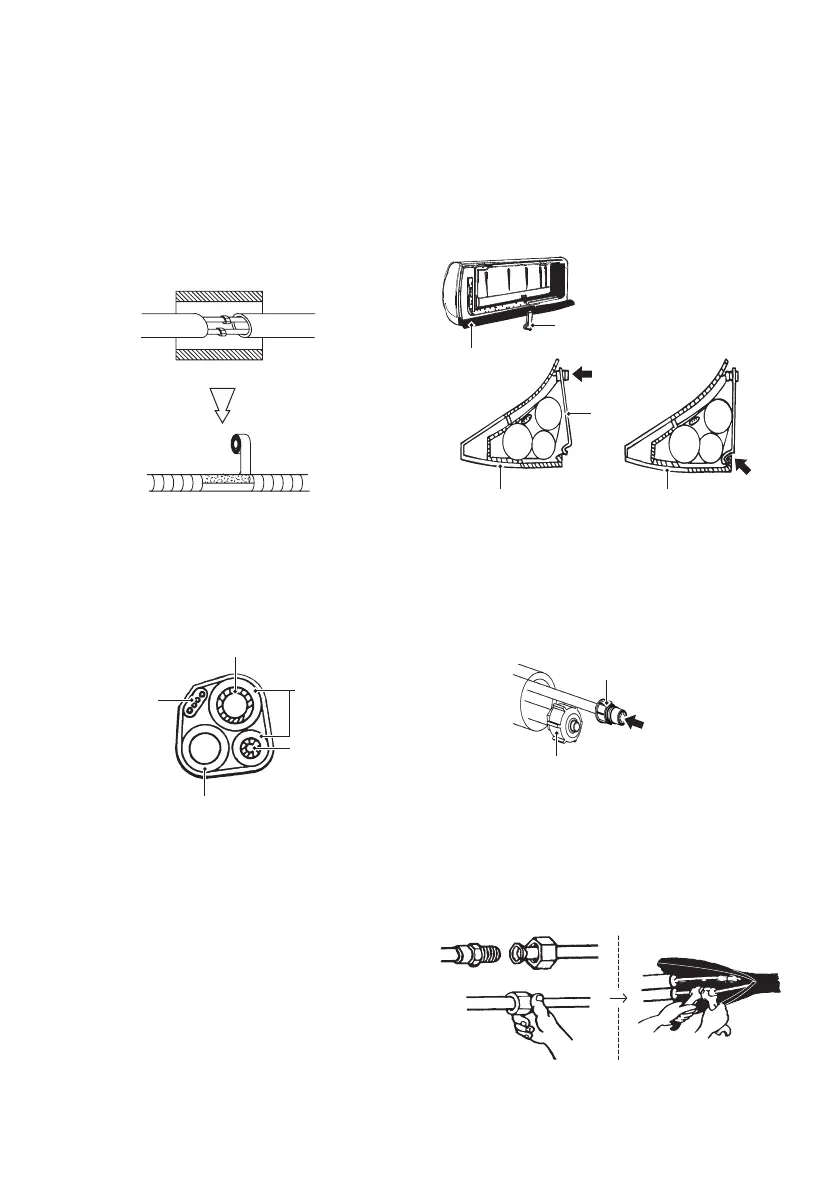
After connecting pipe as required, install the
drain hose. Then connect the power cords. After
connecting, wrap the pipes, cords and drain
hose together with thermal insulation materials.
Pipe Joints Thermal Insulation
• Wrap the pipes joints with thermal insulation
materials and then wrap with a vinyl tape.
Thermal insulation
Wrapped with vinyl type
Pipes Thermal Insulation
a. Place the drain hose under the pipes.
b. Insulation material uses polythene foam over
6mm in thickness.
Drain hose
(prepared by user)
Power cord
(just a
schematic)
Small pipe
Large pipe
Thermal
insulation
tube
NOTE
• Drain hose is prepared by user.
• Drain pipe should point downward for easy
drain flow. Do not arrange the drain pipe twisted,
sticking out or wave around, do not immerse the
end of it in water.
• If an extension drain hose is connected to the
drain pipe, make sure to thermal insulated when
passing along the indoor unit.
• When the pipes is directed to the right, pipes,
power cord and drain pipe should be thermal
insulated and fixed onto the back of the unit with
a pipe fixer.
a. Insert the pipe fixer to the slot.
b. Press to hook the pipe fixer onto the base.
Insert here
Pipe fixer
Pipe fixer
Base
large
pipe
large
pipe
drain
hose
drain
hose
small
pipe
small
pipe
Base
Base
Hook here
Piping Connection
a. Before unscrewing the big and the small
sealing caps, press the small sealing cap with
the finger until the exhaust noise stops, and
then loosen the finger.
Big sealing cap
Small sealing cap
Press here
b. Connect indoor unit pipes with two wrenches.
Pay special attention to the allowed torque
as shown below to prevent the pipes,
connectorsand flare nuts from being deformed
and damaged.
Pre-tighten them with fingers at first, then use
the wrenches.
NOTE
• If you don’t hear the exhaust noise, please contact
with the merchant.
 Loading...