Section 5. Maintenance
Replacing a fuse
The power supply and terminal strip are both protected by fuses. The instrument has
one extra fuse (Littelfuse 476 Series Nano
2®
3 amp 125 V fuse) that can be used in
the event that one of the fuses blows. If you are able to power on the instrument
using one of these two ways—but not the other—a fuse may be blown. If you can't
power the instrument using either way, both fuses may be blown (or you may have
a power supply issue).
Before simply replacing a fuse, be sure to identify the problem that caused the fuse
to blow in the first place. Otherwise, you'll just blow the spare fuse, in which case,
you'll still have the problem and you'll be out of spare fuses. After identifying and
solving the problem that caused the fuse to blow, replace the fuse:
1
Open the case.
Loosen each of the six top cover screws until the top cover is free of the bottom. If
your instrument has a display, carefully rotate the top cover out of the way without
straining the cable, and then unplug the display cable. Set the cover aside.
2
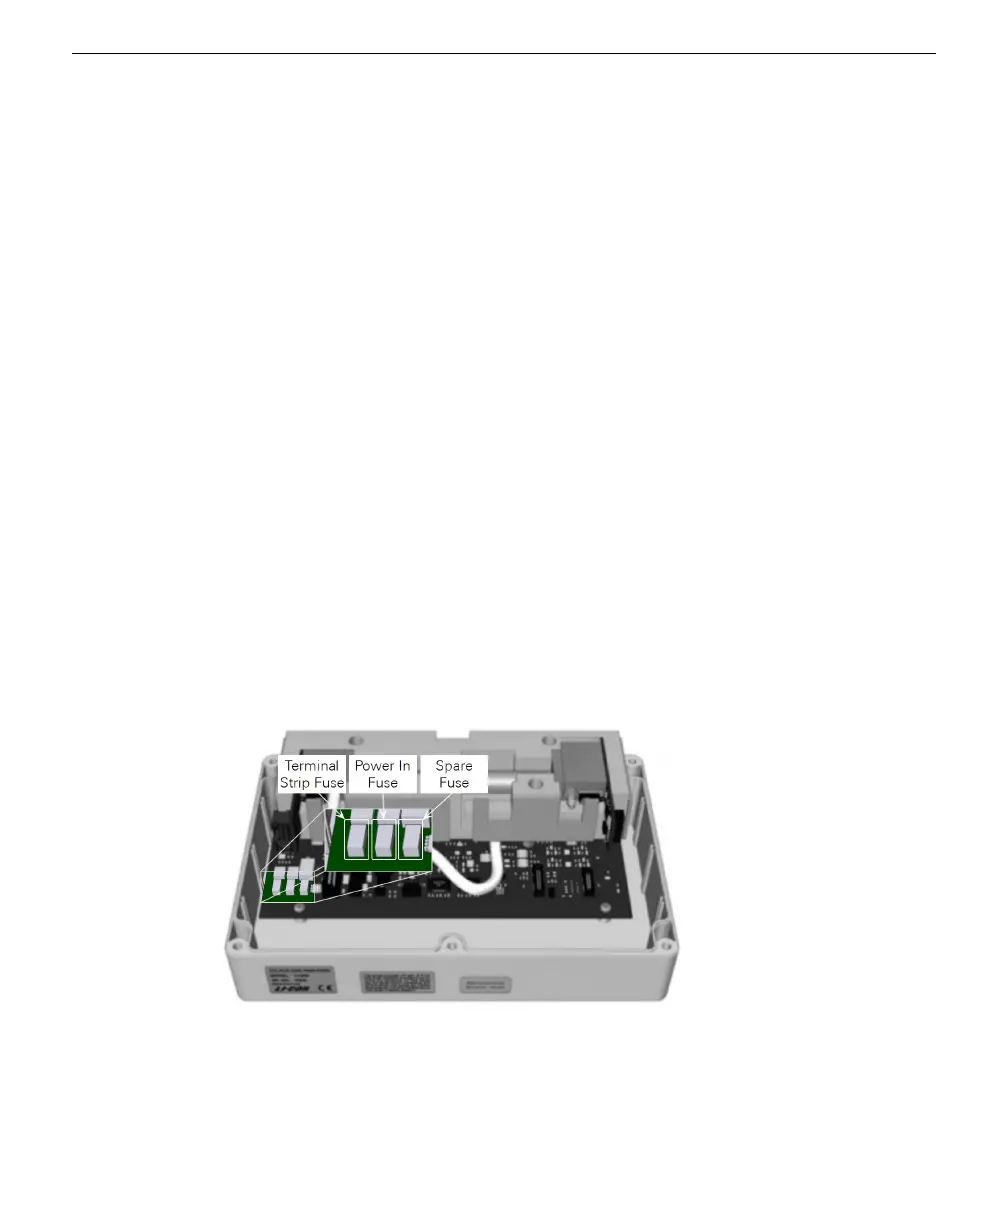
Locate the fuses.
With the air-in and -out ports facing away from you, the fuses are mounted to the
lower left corner of the lowest circuit board. In the image, ribbon cables and tubes
have been removed for clarity.
3
Using a needle-nose pliers, grasp the blown fuse and remove it from the holder.
4
Replace it with a spare fuse.
5
Power on the instrument to verify that the issue is resolved.
5-6 Using the LI-830 and LI-850 Gas Analyzers
 Loading...