Wellness Recovery Collection 13 12 RelievaCup User Manual Lifepro
OPERATING INSTRUCTIONS
Please read the operating instructions before using the
RelievaCup. Keep this manual for reference.
CHARGING THE BATTERY
WARNING: Do not charge the device for more than 8 hours.
• Fully charge the battery, for up to 4 hours, before using it
for the first time.
• To charge the battery:
1. Connect the charging adapter to the charging jack on
the top of the RelievaCup.
2. Plug the charging cable into a USB outlet or device,
such as a laptop or computer. Alternately, you may
insert the USB connector into a standard mobile phone
5V–1A or 5V–2A USB charging adapter and then plug
the adapter into a wall outlet. The LED indicators will
all flash.
3. The device is fully charged when the LED indicators
stop flashing.
• Average run-time on a full battery charge is 2 hours.
• After the first charge, it will typically take 3–4 hours to
charge the battery.
• Disconnect the charging cable immediately after charging
and before cleaning or storing.
NOTE: The RelievaCup may not be used while it is charging.
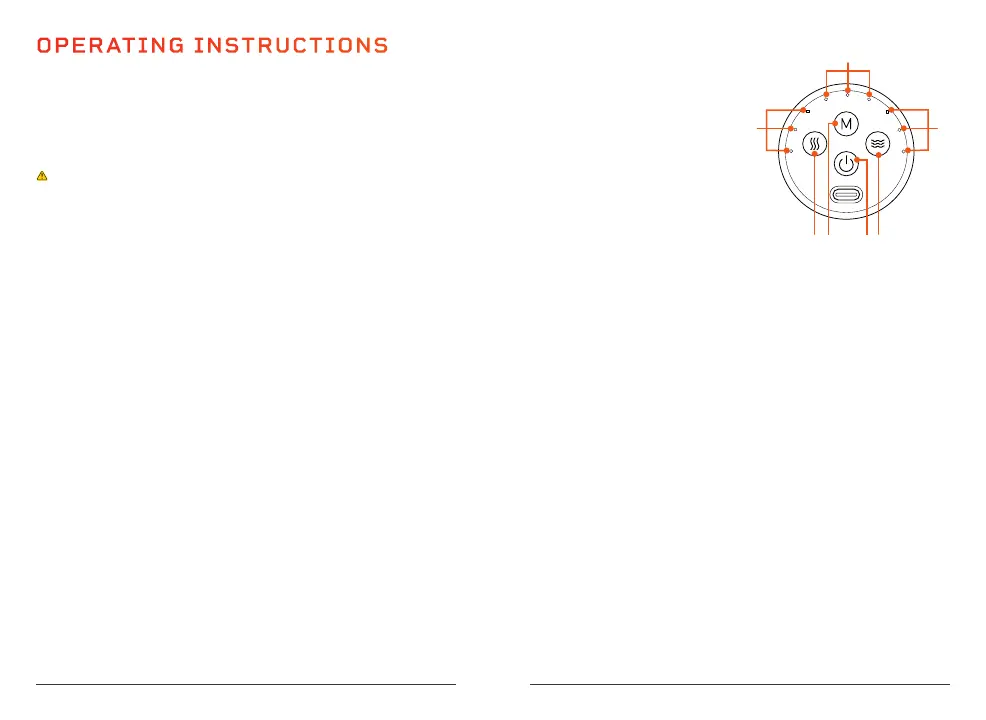
USING THE CONTROL PANEL
1. Heat Button: Press to
toggle through heat
settings, low, medium,
high, and off. Low heat is
selected by default.
2. Mode Button: Press to
toggle through modes
1–3. Mode 1 is selected
by default.
3. On/Off/Suction Release Button: Long press the button
for 3 seconds to turn the device on or off. During the
session, short press to release the suction. Short press
again to resume suction.
4. Massage Button: Press to toggle through the massage
intensity levels low, medium, and high. Low intensity is
selected by default.
5. Massage Intensity Indicators (Blue LEDs): One LED
indicates low massage intensity, two LEDs indicate
medium, and three LEDs indicate high.
6. Mode Indicators (Green LEDs): One LED indicates Mode 1
is selected, two LEDs indicate Mode 2, and three LEDs
indicate Mode 3.
7. Heat Level Indicators (Red LEDs): One LED indicates low
heat, two LEDs indicate medium heat, three LEDs indicate
high heat. When all LEDs are off, heat is off.
NOTE: Settings (except the working time) may be adjusted at
any time during the session.
1 2 3 4
5
6
7