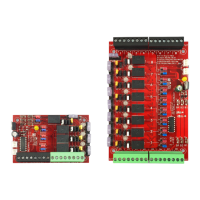
C4,C4P / C8, C8P Installation Manual
4 5
Jumper B - BLUE (Input Invert)
This jumper is used to select a fail-safe or fail-secure input.
Adjust this jumper so that the zone's output LED is FLASH-
ING when the door is unlocked.
Pos. 1 (Fail Safe) Use this position for a NC contact input
(contact OPENS to unlock door) or for a voltage
input where the voltage is REMOVED to unlock
the door.
Pos. 2 (Fail Secure) Use this position for a NO contact input
(contact CLOSES to unlock door) or for a voltage in-
put where the voltage is APPLIED to unlock the door.
Jumpers C & E - BLACK (Wet or Dry Output Selection)
These jumpers select whether the output is a relay con-
tact output or a voltage output. BOTH jumpers must be
set to the same position for proper operation.
I The outputs of the C4 and C8 have built-in reverse protection di-
odes across each output. If a delay is present on lock release, or when
using as a dry relay contact output, the diode can be removed from the
circuit. See page 6 for more information.
Pos. 1 (Relay Contact Output) By placing both jumpers
in Position 1, the zone's output is set as a relay
contact output.
Pos. 2 (Voltage Output) By placing both jumpers in posi-
tion 2, the zone's output is set to output the volt-
age of the buss selected by Jumper D (See below).
Jumper D - YELLOW (Voltage Buss Selection)
The C4 and C8 can each accept up to two power supply
inputs connected to B1 and B2. This jumper selects which
of the two power supply inputs are used for the zone's
output. If only a single power supply is being used, set
this jumper for Position 1. (Note: if the zone's output is
set as a relay contact output, this jumper has no effect.)
Pos. 1 (B1 Buss) This position selects the power supply
connected to the B1 input of the C4 or C8 board.
Pos. 2 (B2 Buss) This position selects the power supply
connected to the B2 input of the C4 or C8 board.
Jumper F - WHITE (Output Invert)
This jumper is used to select a fail-safe or fail-secure
output. Adjust this jumper so that the door is UNLOCKED
when the zone output LED is flashing (Zone Active).
Pos. 1 (NO / Voltage when input is activated) When in Po-
sition 1, the output terminals will connect through
the NC contact if set for a relay contact output or
will output a voltage when the input is activated.
Pos. 2 (NC / Voltage when input is deactivated) When in
Position 2, the output terminals will connect through
the NO contact if set for a relay contact output or will
not output a voltage when the input is activated. This
position is typically used for Mag Locks.
5
Output Fuses (F1 – F8) – Optional
When using the fused version of the C4/C8, these are the
fuses for each zone output. Fuse numbers correspond with
the zone number (e.g. F1 is the fuse for OUT1). When using
the PTC version of the C4/C8, the fuse will be replaced with
a soldered-in PTC. Fuses or PTCs are not in the circuit when
the zone is configured as a relay contact output.
6
Output LEDs (01 – 08) – Green
These LEDs indicate the status of the output. LED numbers
correspond with the zone number (e.g. O1 is for Output 1).
• On SteadyDoor Locked (Fuse or PTC Intact)
• FlashingDoor Unlocked (Either due to Zone Input or FAI)
• OffFuse or PTC open
These LEDs are bi-color and indicate the output voltage for
each output as follows:
• Green – 12V Output
• Blue – 24V Output
I
NOTE LED colors are range based. Voltage Less than 13V
will show Green. Voltage above 20V will show Blue. Voltage
between 13 and 20 may show either voltage or a combination
Green & Blue. Always verify voltage with a voltmeter.
I Note that if an Output LED is operating opposite from
expected (flashing in normal state, steady when the in-
put is activated), but the output terminals are behaving
as expected, then jumpers B and F should be placed
into the opposite position.
7
Zone Outputs (01 – 04/08)
These are the output terminal strips. These terminals are
removable and accept wire sizes from AWG14 – AWG22.
The terminals are labeled on the PC board near the terminal
strip. See the Output Wiring section for more information.
• Relay Contact Outputs are across the A and B terminals. The
selection for NO or NC is made by jumper F
• Voltage (Wet) Outputs are across the A and B terminals.
– Positive is terminal B
– DC Common is terminal A
IThe C4 and C8 have reverse protection diodes across
each output. If a delay is present on lock release, or when
using as a dry relay contact output, the diode can be re-
moved from the circuit. See page 6 for more information.
8
BR Connectors (J4 & J5)
The DC Common buss in the system. All DC boards in
the system must have their BR fastons wired together for
proper operation.
9
B2 Connectors (J6 & J7)
These are for connection to the B2 buss in the system. The
voltage on the B2 buss comes from an FPO power supply or a
B100 secondary supply in dual voltage systems. This voltage
will be directed to any outputs whose yellow jumper (Jumper
D) is set in the B2 position. If the C4/C8 is being used in a
single voltage system, these fastons can be left unused.
bk
B1 Connectors (J2 & J3)
These are for connection to the B1 buss in the system. The
voltage on the B1 buss comes from an FPO power supply.
This voltage will be directed to any outputs whose yellow
jumper (Jumper D) is set in the B1 position.
 Loading...