13
6. Mounting Instructions
To mount the smoke alarm:
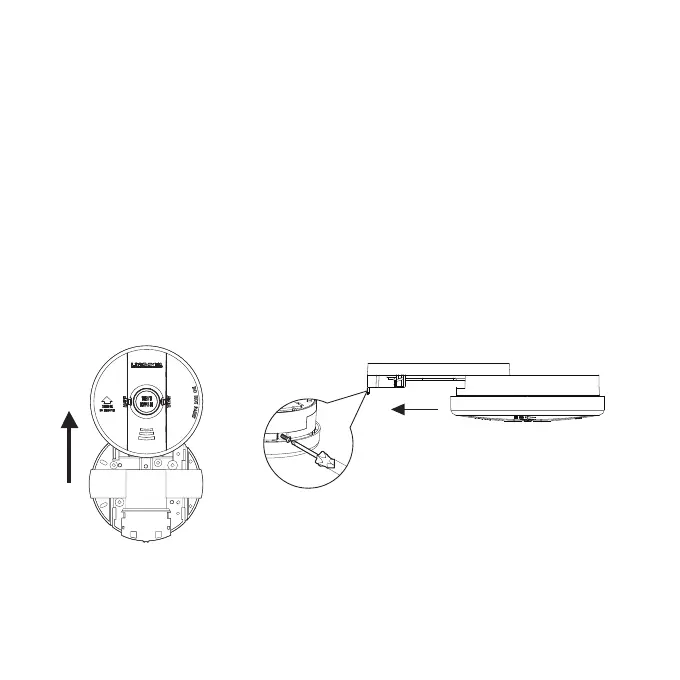
1. Separate the Smoke Alarm from its mounting base - by sliding the Smoke Alarm in direction of
arrow, while holding the back of the mounting base (See Figure 2).
NOTE: AC power should be turned off at this stage.
2. Connect supply cable to terminal block and fix terminal cover. Install the mounting base to the
ceiling or wall.
3. Align and slide smoke alarm up onto mounting base (Figure 3) then slide in the reverse direction
of arrow to ensure proper connection.
4. Switch on power and check the green LED. It should be lit when mains power is switched on
indicating that the smoke alarm is properly connected to the mounting base.
5. Secure Tamper Locking screw (supplied) to smoke alarm if required (see Figure 3).
6. Test the Smoke Alarm by pressing Test button.
Figure 2: To remove smoke alarm
Figure 3: To connect smoke alarm
Slide smoke alarm carefully away from
the base plate to remove the smoke
alarm.
1. Place smoke alarm in line with the base plate.
2. Push smoke alarm towards connector (A).
Ensure the smoke alarm slides fully into the
connector.
3. Green AC power light will come on when
connected to mains.
A