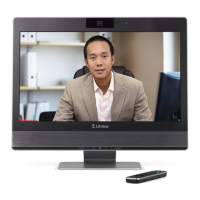
8 LifeSize Room Installation Guide
You can enter the hostname or IP address of a Network Time Protocol (NTP) server to set
the system date and time automatically. The LifeSize system ignores the value you specify
for the NTP Server Hostname if the DHCP preference is set to Enabled and the DHCP
server can pass an NTP server address to the LifeSize system.
Network Time Protocol (NTP): ____________________________________________
Audio Preferences
The default for Active Microphone is Auto. The system detects attached audio devices and
makes one of them the active microphone in this order: phone, microphone in, active
camera, inactive camera.
You also can manually set one of them to be the active microphone. The system cannot
detect a device attached to Line In. You must select it manually in Active Microphone.
Note: If you choose Line In as the active microphone, and a device is not connected to the
appropriate connector on the codec, the No Active Microphone indicator does not
appear in the user interface and the System Information page shows Line In as the
status for Active Microphone.
If you plan to use display speakers for audio in both video and voice calls, ensure that the
Video Call Audio Output and Voice Call Audio Output preferences are set to Line Out. If
you are using LifeSize Phone for audio, set these preferences to Phone. By default, Video
Call Audio Output is set to Line Out; Voice Call Audio Output is set to Phone.
You can also test your primary output speakers for the appropriate audio level or to ensure
they are working properly. Select Auto for Primary Audio Output Test to cycle through a
test on your available speakers. The test continues until you select Off.
To set the audio level for the active microphone, select Active Microphone Volume and
press OK. An audio meter appears. Position yourself the same distance from the
microphone as participants would be in the room during a video conference. Anything that
appears below red is acceptable at normal speaking volume. Audio in the yellow range is
appropriate if someone is shouting or speaking loudly.
Audio meters are also available for setting levels on Line In, should you choose to use it for
audio input.
 Loading...