19
SET-UP & OPERATION
Using Your Microphone as a Wireless Audio Link
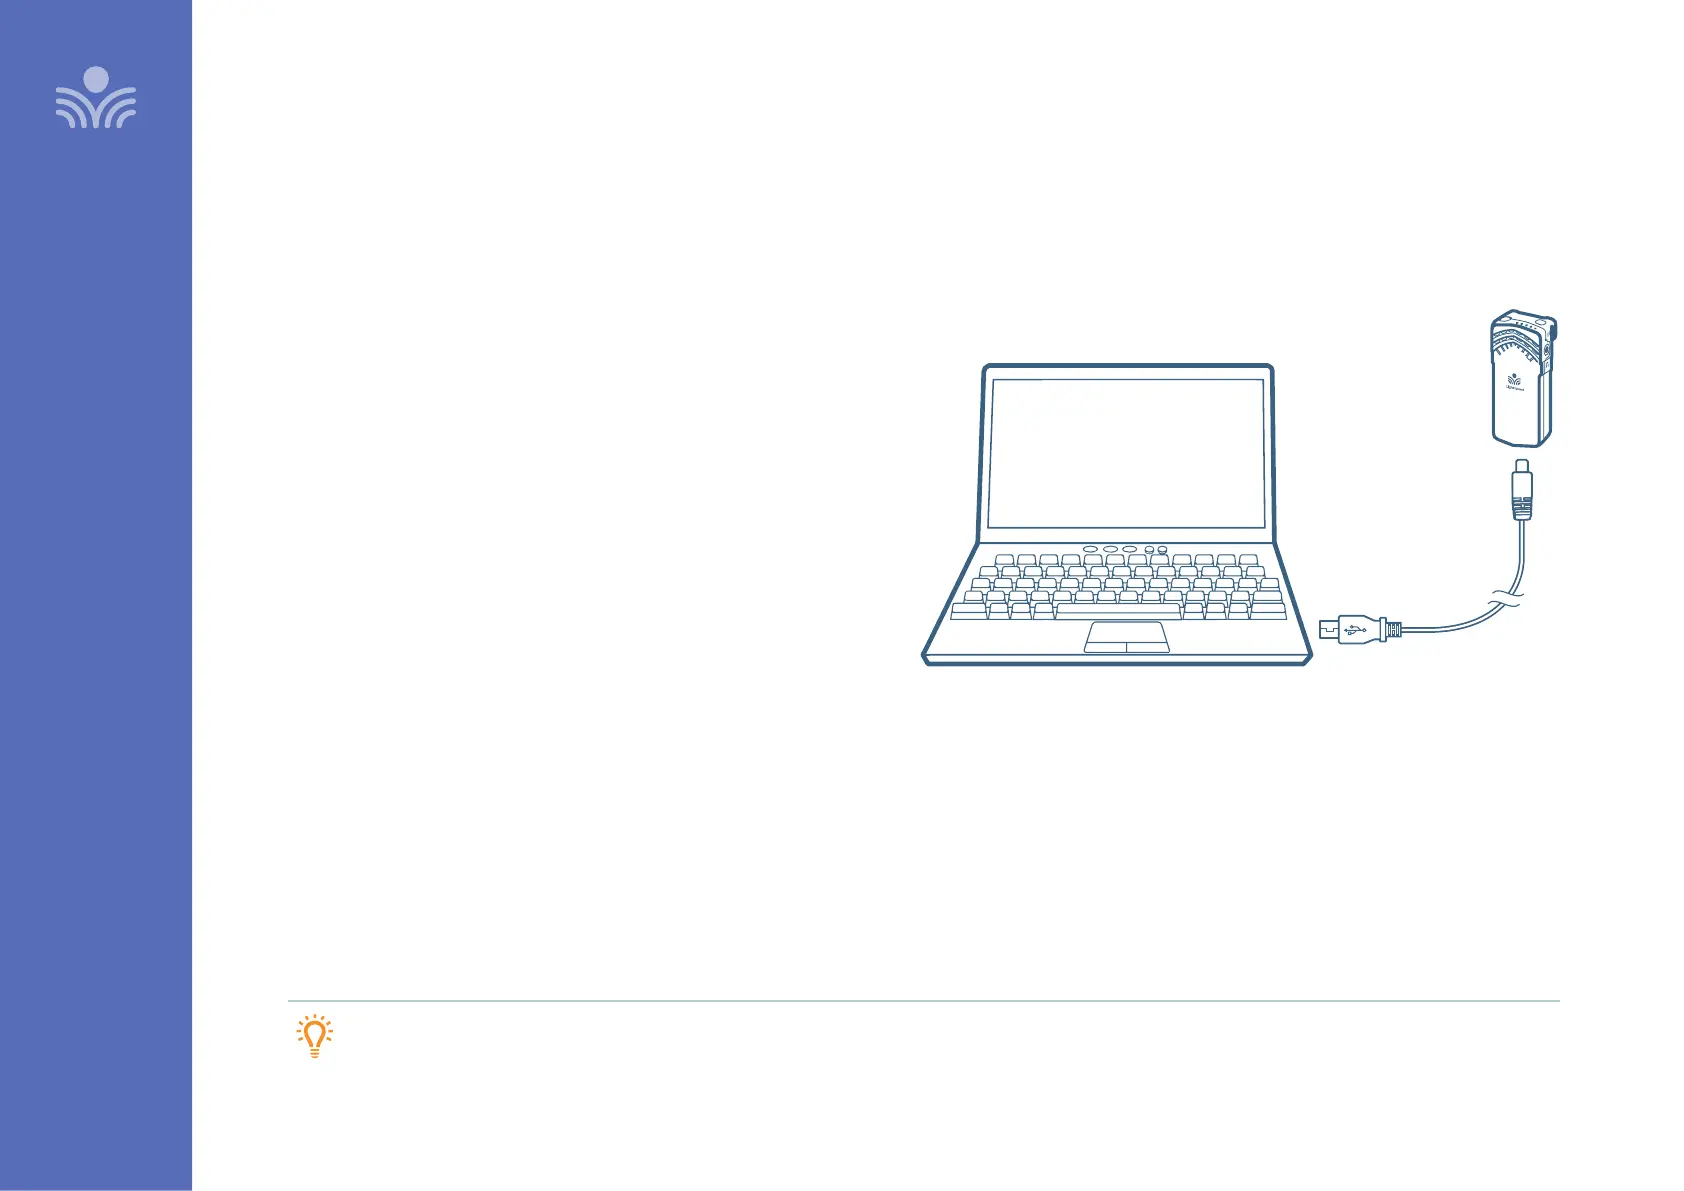
You can connect your 2nd (or 3rd) microphone to your computer’s USB
port to enable a wireless 2-way audio link.
SEND AUDIO FROM THE COMPUTER to the 975 to ensure all audio from
the computer (videos, video conferencing, audio books, music, etc) can be
played through the Lightspeed 975 system and speakers.
SEND AUDIO TO THE COMPUTER from the 975 to ensure the teacher’s
Flexmike and any student microphones are clearly picked up by a video
conferencing solution.
1. With the appropriate USB cable (USB-C for Flexmike/Sharemike)
connect your microphone to your computer’s USB port.
This will also power/charge your microphone.
2. Open sound settings on your computer:
• Select Lightspeed Audio as the Output source to send all
computer audio to the 975 system
• Select Lightspeed Audio as the Input source to use the Lightspeed
microphones as the computer microphone audio for video
conferencing and recording applications.
3. You may also need to select Lightspeed Audio as the speaker and
microphone audio in your video conferencing application the first
time you use it.
Plug your external
audio equipment,
such as a computer,
into the USB input
on the bottom of
the Flexmike
USB cable sold separately.
Lightspeed oers a USB-A
to USB-C cable for sale
(part #USBC)
2-WAY USB
2-WAY USB
AUDIO OUTPUT
TIP: If your system includes two Flexmikes, you can use one mic for
instruction and the second mic to transmit audio through the system.