Page Number - 4
Form 404031
To avoid damaging reel components,
always make sure hose clamp is prop-
erly installed.
Position hose clamp so that approxi-
mately 1/2 loop of hose remains on reel
and latching does not occur when hose
is fully extended.
Slide ball stop over free end of hose
and position slightly below roller outlet.
Tighten screws to secure ball stop to
hose.
Power spring is now set to maximum
tension.
ADJUSTING SPRING
TENSION
To prevent premature power spring fail-
ure, spring tension should be adjusted
so that it requires at least two full turns
of the reel sheave before the spring is
wound tight.
Should less spring tension be desired,
pull hose out from roller outlet to provide
slack and latch reel.
Unwind one loop of hose from reel. Pull
excess hose out through roller outlet and
unlatch reel to retract hose.
Check tension and repeat above proce-
dure until desired tension is
obtained.
Reattach/assemble outboard support to
reel. (See Page 3, Steps 0 thru 0).
ATTACHING CONNECTING
HOSES
To prevent damage to connecting hose
when installing hose to reel, sufficient
clearance must be provided from out-
side edge of sheave.
See Figure (2). Reconnect inlet adapter
to swivel body and replace U-keeper.
Connect other end of connecting hose
to material supply line source or con-
nection.
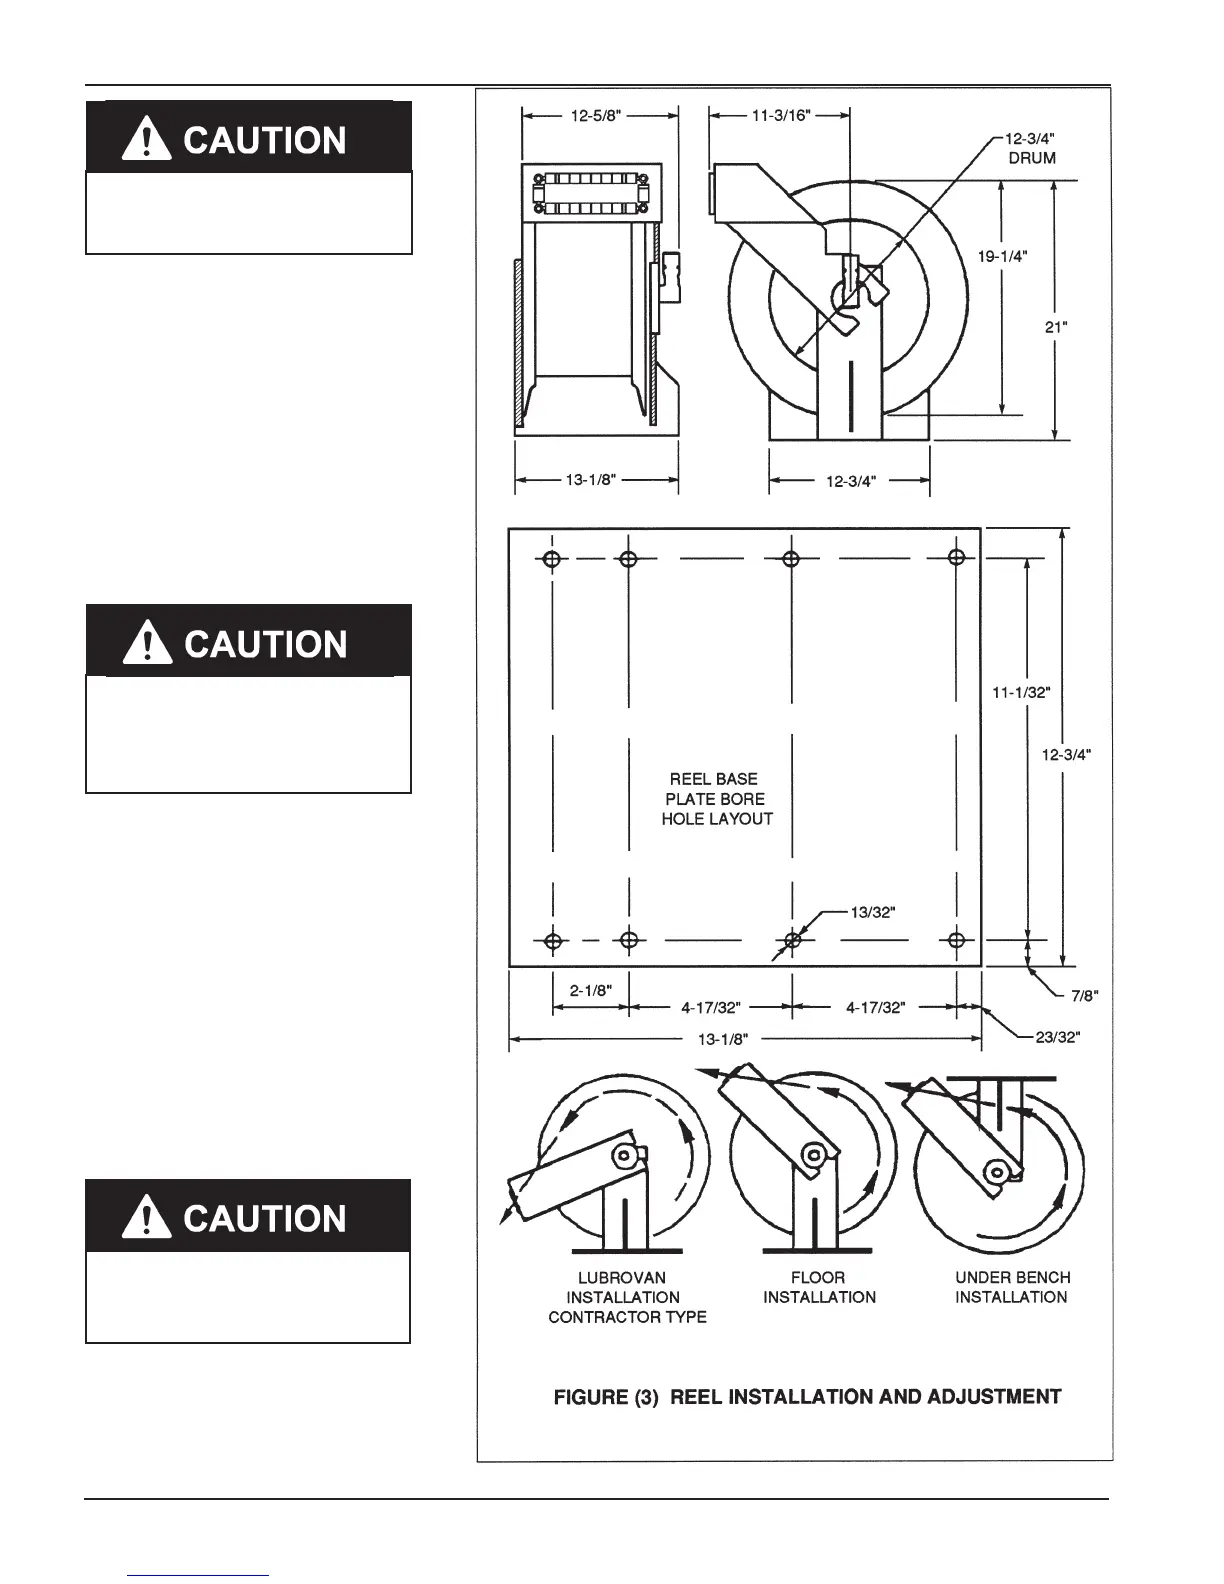
REEL INSTALLATION AND
To order call 1-800-548-1191 or visit www.partdeal.com - info@partdeal.com
 Loading...