Output Modes
The OUTPUT MODE switch found on the Firehawk FX rear panel cleverly
congurestheaudiosignalssentouttheXLRand1/4-inchoutputs.The
big idea hereis that you can independently have afull-delity, stereo
signal for your Bluetooth
®
streamed music library playback, even when
you want to send your guitar signal into the front input of a guitar amp. In
short, the XLR outputs always carry the Bluetooth
®
stream, and you can
choose if you want to also route your guitar signal out the same XLR outs
(LINE Mode) or send your guitar signal to the 1/4" outs (AMP Mode).
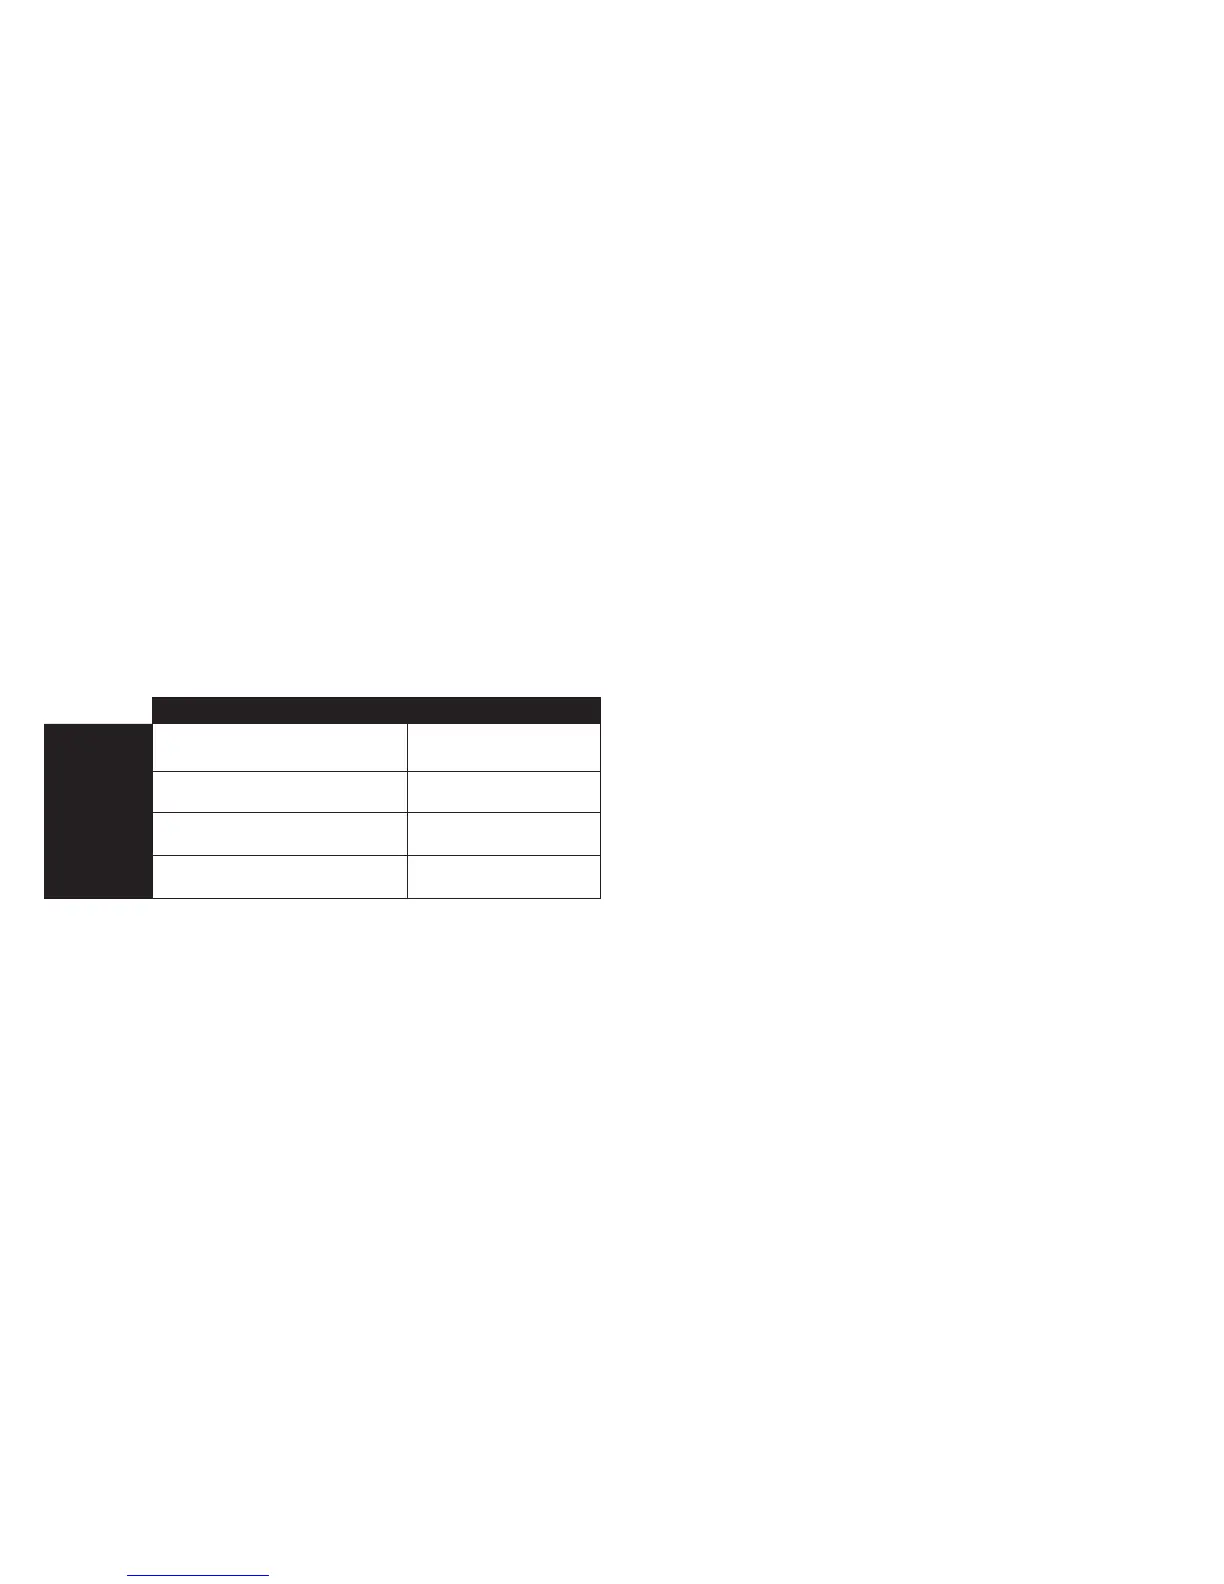
As shown in the following table, the guitar audio signal is optimized for
a full range system versus for a guitar amp, and the level for each signal
also changes with the LINE and AMP Mode settings.
LINE MODE AMP MODE
XLR Output
Audio
Guitar Tone is Studio/Direct optimized
Includes Bluetooth streamed playback
Bluetooth streamed playback
only
XLR Output
Level
8.219 dBu / 6.0 dBv 8.219 dBu / 6.0 dBv
1/4” Output
Audio
Guitar Tone is Studio/Direct optimized
Includes Bluetooth streamed playback
Guitar Tone only - Amplifier
optimized
1/4” Output
Level
Line level Instrument level
LINE vs. AMP Mode - Audio signal type and level sent to outputs
NOTE: In either OUTPUT MODE setting, the PHONES output always
receives the same audio as the XLR outputs.
Factory Reset & Pedal Calibration
Performing a Factory Reset restores the Firehawk FX to factory settings
(without altering your device's saved Presets). After performing a Factory
Reset, it is recommended that you next perform the Pedal Calibration for
proper Pedal operation.
Factory Reset Steps
Simultaneously press and hold the Master Volume Knob and the TAP
footswitch as you power up the unit.
Pedal Calibration Steps
1. Hold down footswitch A while powering on the unit. At startup the
display will show “00” and footswitch D LED will be lit.
2. Press footswitch D to begin. The display will change to “01” and
footswitch DLEDwillturno.
3. Pressthepedalforwardrmlytotogglethepedaltoeswitch.The
display will change to “02” and footswitch D LED will be lit.
4. Move the pedal to the heel position.
5. Press footswitch D. The display will change to “03” and footswitch
D LED will be lit.
6. Move the pedal to the toe position (do not click the toe switch)
7. Press footswitch D. The display will change to “04”.
8. Move the foot pedal and watch the values change on the display.
Values will scroll from a min. of 0 to a max. of 99.
9. Press footswitch D to save the calibration values. The display will
change to “05”.
10. Power cycle the unit and your pedal is calibrated.
 Loading...