1•2
You can also move Presets to dierent Channel locations (in the same or a dierent Set List) within
the application, to manage the contents of your device’s Set Lists/Presets order. Once you are
done with your Tone tweaking, you can “send” one or all of the current Set Lists or Tone Presets
from the application to your device to save all settings within your device’s internal memory. You
can also choose to save Set Lists, Bundles and/or Presets to your computer’s hard drive to build
an unlimited library of Tones, which you can reload into the application, and to your POD HD500X,
at any time.
Computer Connectivity
To put POD HD500X Edit to work, connect your POD HD500X device to your computer’s USB 2.0
port to establish two-way communication. If you are using a Line 6 Variax instrument, connect it to
the Variax Digital Input (VDI) on the rear of POD HD500X. Exit any Line 6 applications that might be
running, and with your POD HD500X device powered on, launch POD HD500X Edit:
• On Mac
®
, go to Applications > Line 6 > POD HD500X Edit
• On Windows
®
, go to the Start button menu > Programs > Line 6 > POD HD500X Edit
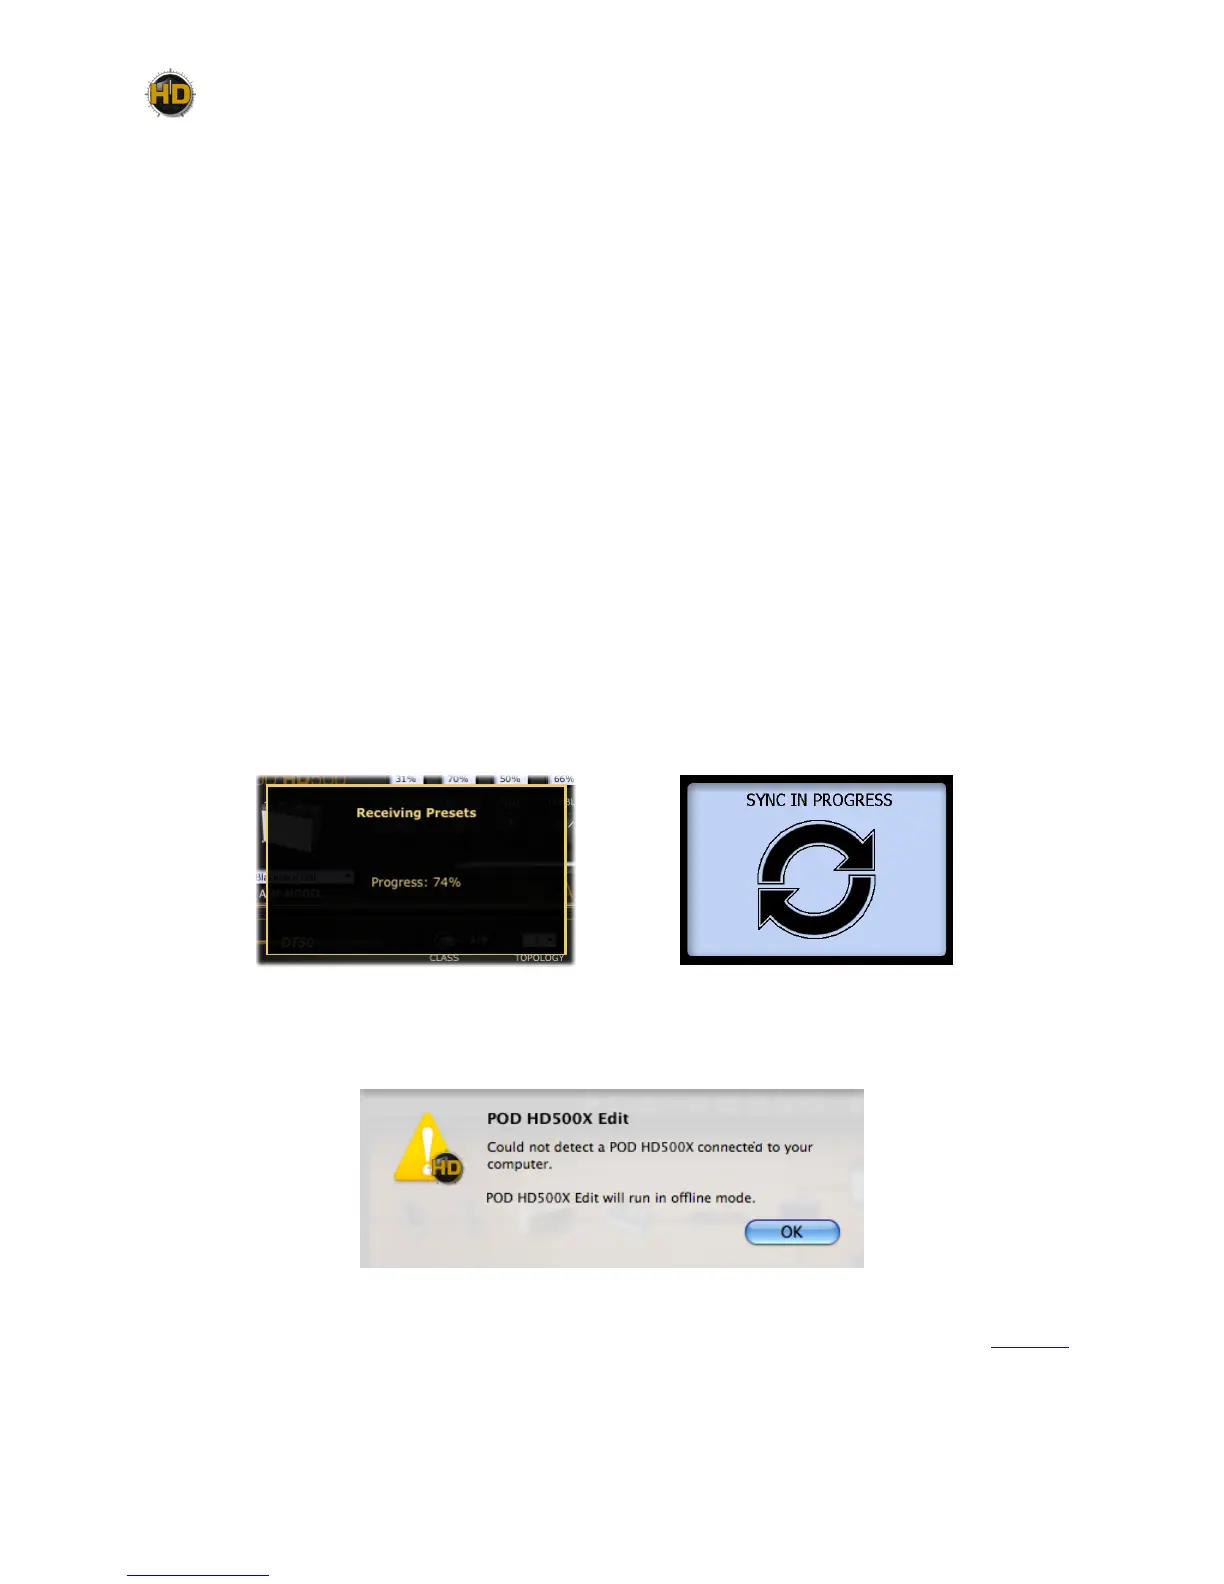
Upon launch, the application will detect your POD HD500X and automatically retrieve and load
its saved Presets. This may take a few moments since the contents of all 8 Set Lists are being
transferred. The application’s progress screen will let you know when the Preset loading process
is complete. Your POD HD500X device’s “Sync In Progress” screen is also displayed during
this process. This screen appears whenever the Editor application has control of POD HD500X
parameters, to let you know that the device’s on-board controls are temporarily “locked-out” from
changing settings to safely allow the sync process to complete.
Edit application - Preset load progress screen POD HD500X - LCD screen
If your POD HD500X device is not USB-connected and powered on, you’ll see the following alert
screen, warning you that no device was detected.
No Device alert
Click OK and you can either continue to run POD HD500X Edit in “Oine Mode” (see page 1•3),
or, connect/power on your device and the application will prompt you to retrieve the connected
device’s Presets.
 Loading...

