25
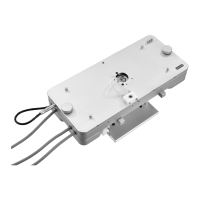
Relax = Sets the mode in which no motion
takes place, only the gap and time need to be
entered.
Once a ‘Mode’ has been set. Left Click in the
‘Gap’ column and enter a value between 0 and
2500mm. (Gap is the distance between shear
windows).
The next column is ‘Strain’. If ‘Step’ or ‘Osc’
Modes have been selected, the user will need to
enter a ‘Strain’ value (Shear and Strain Explana-
tion, page 36). Left click in the column and
type the value required.
The next column is ‘Rate’. If ‘Steady’ or ‘Step’
Modes have been selected, the user will need to
enter a ‘Rate’ value.
The next column is ‘Frequency’. If ‘Osc’ Mode
has been selected the user will need to enter a
Frequency of Oscillation.
The next column is ‘Direction’. Click the arrows
to select CW (clockwise) or ACW (anti-
clockwise).
The next column is ‘Time’. Enter a time
(Seconds or Minutes can be selected in the
CSS450 Setup menu) to set the duration of ramp
until CSS450 proceeds onto next ramp in profile.
For the information entered into a cell to be regis-
tered by the controller, the user must click into
another cell. The information is not stored until
this has been done.
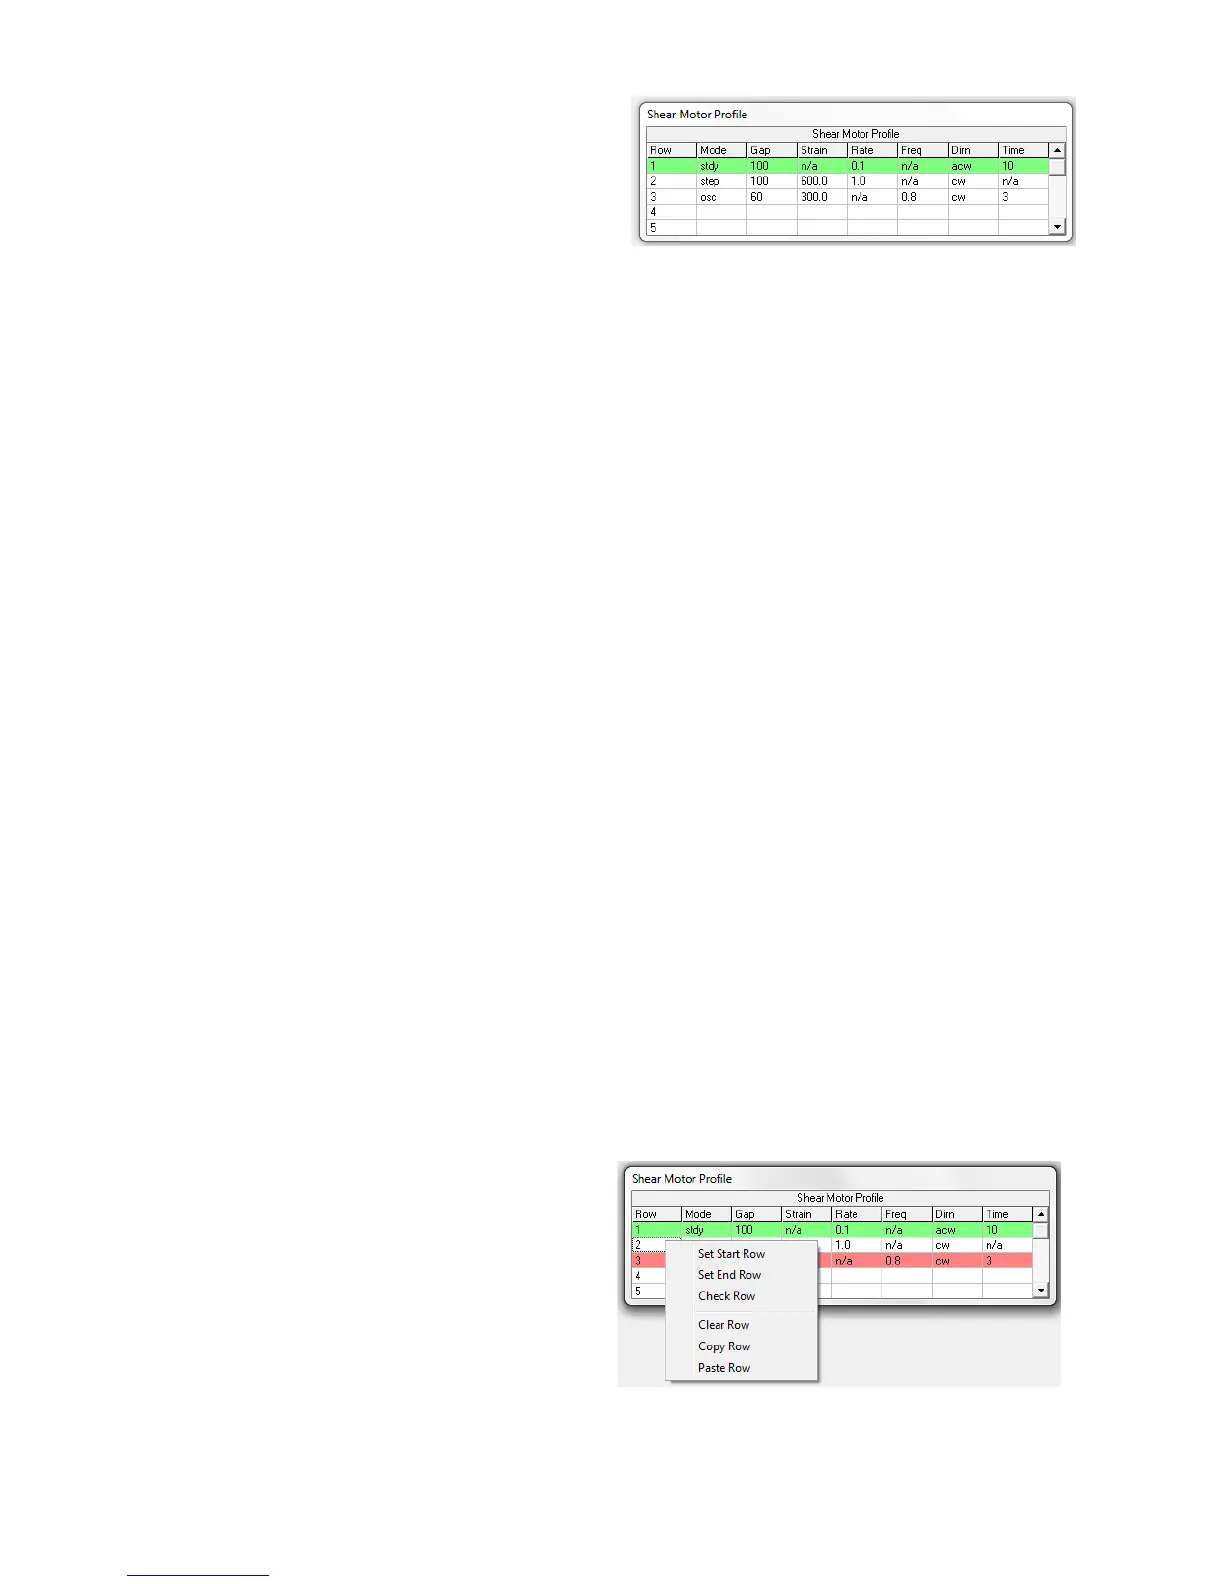
When the ramp information has been entered, the
user can check that it is correct by ‘Left Clicking’
into the Ramp column, then Right clicking and
selecting ‘Check Row’ from the drop down list.
If a cell contains a value that the CSS450 is not
able to execute, then a warning box will appear
with a message detailing the possible parameters
for that particular cell.
A profile may be exist of several ramps (rows). It
may not always necessary to start the profile from
Ramp 1. To select the ‘Start’ and ‘End
Ramp’ (row) Left click into the Ramp column,
then Right Click on the particular Ramp (or Row)
you want the Profile to start with and select ‘Start
Row’ from the drop down list. Do the same for
the End Row. Start Rows are green, End Rows
are red.
The profile can be saved for later use.
Click: File > Save > Shear Motor Profile