Do you have a question about the LO Choice and is the answer not in the manual?
Instructions to read the entire user handbook before use.
Table for industrial use only; not for unsupervised children.
Important safety notices are highlighted throughout the manual.
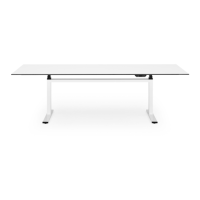
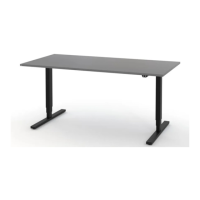
Covers operation, load capacities, and maintenance.
Details assembly steps and product dimensions.
Hold and carry the table only by the sub-frame or legs during transport/assembly.
Initialize drives after power outage to ensure synchronization.
Remove all objects from under the table before initializing.
Follow steps on control panel to complete initialization.
Ensure 25mm clearance around the table for safe height adjustment.
Do not position tables flush to avoid damage or injury.
Ensure height adjustment zone is clear of objects and people.
Keep limbs clear of the zone to prevent crushing injuries.
Ensure space between desktop, frame, and crossbeam is clear.
Check cables are sufficiently long and do not run to other tables.
Press 'Up' button to move the table upwards.
Press 'Down' button to move the table downwards.
Details the display, 'Up/Ab', and memory/position buttons.
Buttons for storing and recalling specific table heights.
Use 'Up/Down' buttons to reach the target height.
Press 'S' to activate save mode, then press position button.
Hold the corresponding position button to move to saved height.
Release the button to stop movement immediately.
Press 'Up/Down' buttons for 5 seconds to enter correction mode.
Adjust the height value shown on the display.
Avoid operating for more than 6 minutes per hour to prevent motor overheating.
Max continuous operation 2 min; max 6 min/hour.
Table lost position; requires re-initialization.
Illegal keys pressed; check control panel.
Too many pulse errors; check cables and sensors.
Verify motor cable connections, replace column if needed.
Column overload or obstruction detected; remove load/obstruction.
Remove load, clear obstruction, and re-initialize if necessary.
Safety limit switch triggered; check for obstructions.
Remove obstruction and re-initialize the system.
Anti-collision may fail during initialization or with soft objects.
Collision with floor at <40kg load may not trigger anti-collision.
Anti-collision does not provide personal protection from crushing.
Requires 50mm clearance for effective collision detection.
Steps to connect cable, PC, and install the app.
Table supports up to 80kg including accessories.
Provides height and width specifications for the table.
Instructions for assembling the horizontal cable conduit.
Illustrates how to route cables through conduits and connect components.
Instructions for installing cable tray with Mediabox for meeting tables.
Instructions for installing cable tray without Mediabox.
Procedure to displace the desktop with specific measurements.
Different options for mounting the CPU holder to the underframe.
Instructions for setting the basic position of the CPU holder.
Install CPU holder flush with the desktop edge.
Install CPU holder protruding from the desktop.
Steps for assembling the side shelf unit.
Instructions for positioning and aligning the side shelf.
Instructions for installing the Axial media box.
Instructions for installing the Turn media box.
Steps to install a cable outlet opening in the desktop.
Instructions for attaching the privacy screen to the desk.
Steps to correctly position and align the privacy screen.
Information on wall organization systems and their load capacity.
Instructions for cleaning adhesive components with water.
Instructions for installing the screen for leg space.
Steps to install the extendable pencil tray.
Instructions for fitting the swiveling pencil tray.
Repairs must be performed by manufacturer or authorized personnel.
Clean controls with a dry/moistened cloth; avoid aggressive agents.
| Brand | LO |
|---|---|
| Model | Choice |
| Category | Indoor Furnishing |
| Language | English |