62
2.1. GAS SUPPLY RUBBER PIPE
The condition of the gas supply pipe should be checked periodically (once a year) and replaced
by the date printed on the outside of the pipe and if there are signs of cracking, cuts, scratches
or burns, or if it is no longer flexible but hard and plastic. The pipe must be suitable for use with
liquid gas and comply with the applicable standards.
2.2. ELECTRICITY SUPPLY CABLE
If the electricity supply cable needs replacing, therefore only authorised LOFRA technicians
may replace it. Use HO5FVV-F cables only. The earth wire (yellow/green)
must be at least 2 cm longer than the other two phase wires (fig. 5 B).
This ensures that the electrics are safe should the wire be pulled
accidentally.
For the cookers with a gas oven and an electric grill, use a 3x1,5 mm²
HO5RR-F cable, for cookers with electric oven and grill, use a 3x1.5 mm²
HO5VV-F cable with a maximum external diameter of 9 mm. In the case
of current exceeding 16A shall have the power section 2.5 mm².
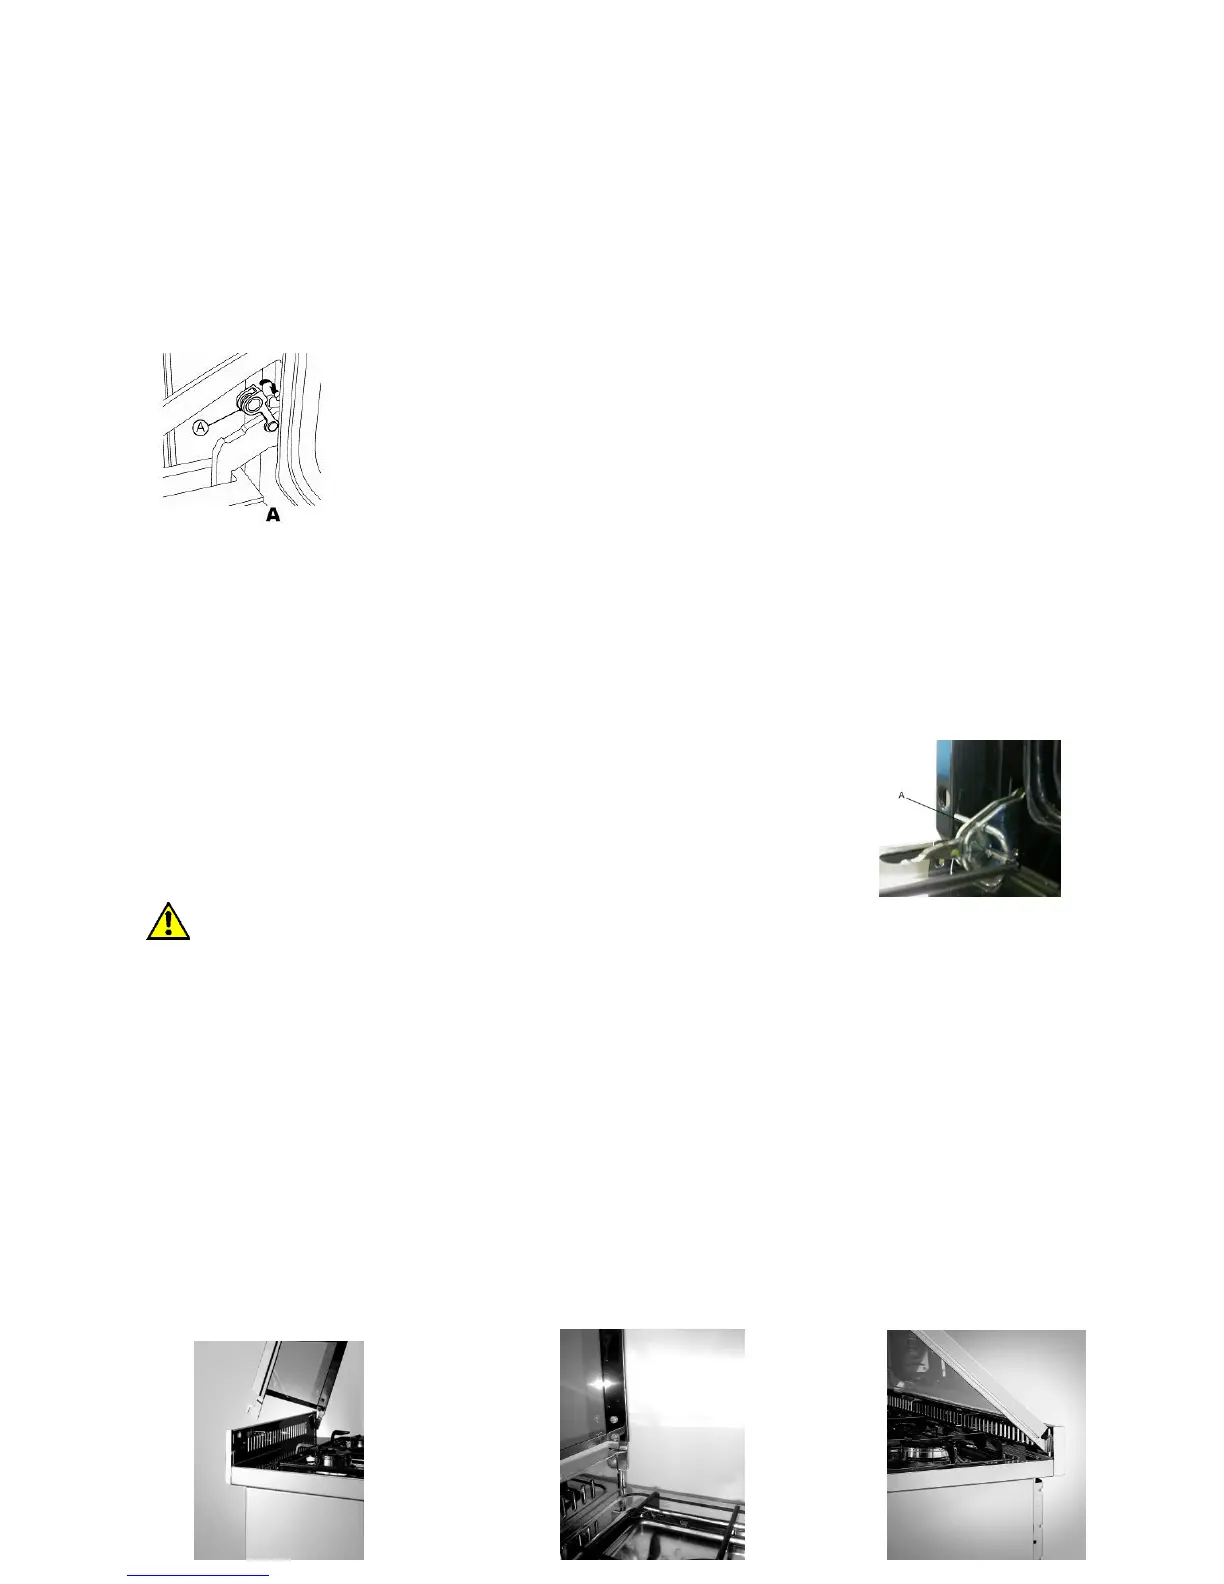
2.3. REMOVING AND FITTING THE OVEN DOOR
Open the oven door completely, insert the anti-rotation device (A) in the hook of the hinge rods.
Hold the oven door by the sides and slowly close it until you can feel a certain resistance;
simultaneausly lift the door and force it towards its closed position in order to slide it out by
freeing the hinge lock from the kitchen’s body. To refit the door repeat the above instructions in
reverse making sure the hinge lock is correctly fitted.
For the CURVA models insert an anti-rotation hinge in the appropriate
holes. Hold the door by the sides and slowly close it until you can feel a
certain resistance; now, while forcing the door closed, lift it in order to
slide it out by freeing the hinge lock from the kitchen. To refit the door
repeat the above instructions in reverse making sure the hinge lock is
correctly fitted.
Avoid using abrasive materials or any kind of sharp metal scraping tool to clean the glass
oven doors to prevent them from getting scratched or cracked.
N.B. Attention, reassembling the windows, the writing "REFGLASS" must be read with
the door open.
2.4. REPLACING THE LIGHT BULB
Turn the cooker off at the mains before replacing the bulb.
Open the oven door, remove the protective glass cover, replace the light bulb (CAUTION: it
must be resistant up to 300°C) and replace the glass protection.
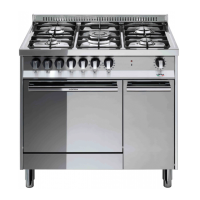
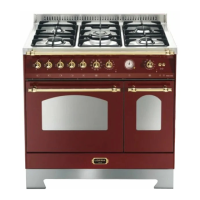
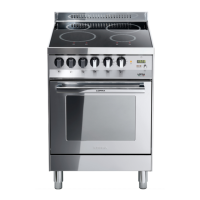
2.5. GLASS COVER
To assemble the cover put the hinges into the special spaces in the wall protection of the
cooker fitting into the existing slits (A), lift the cover up in vertical position (B) and push down
until the hinges go to their place (C).
To disassemble the cover make the contrary of the above-described operation.
A B C