GB
8
Preparation
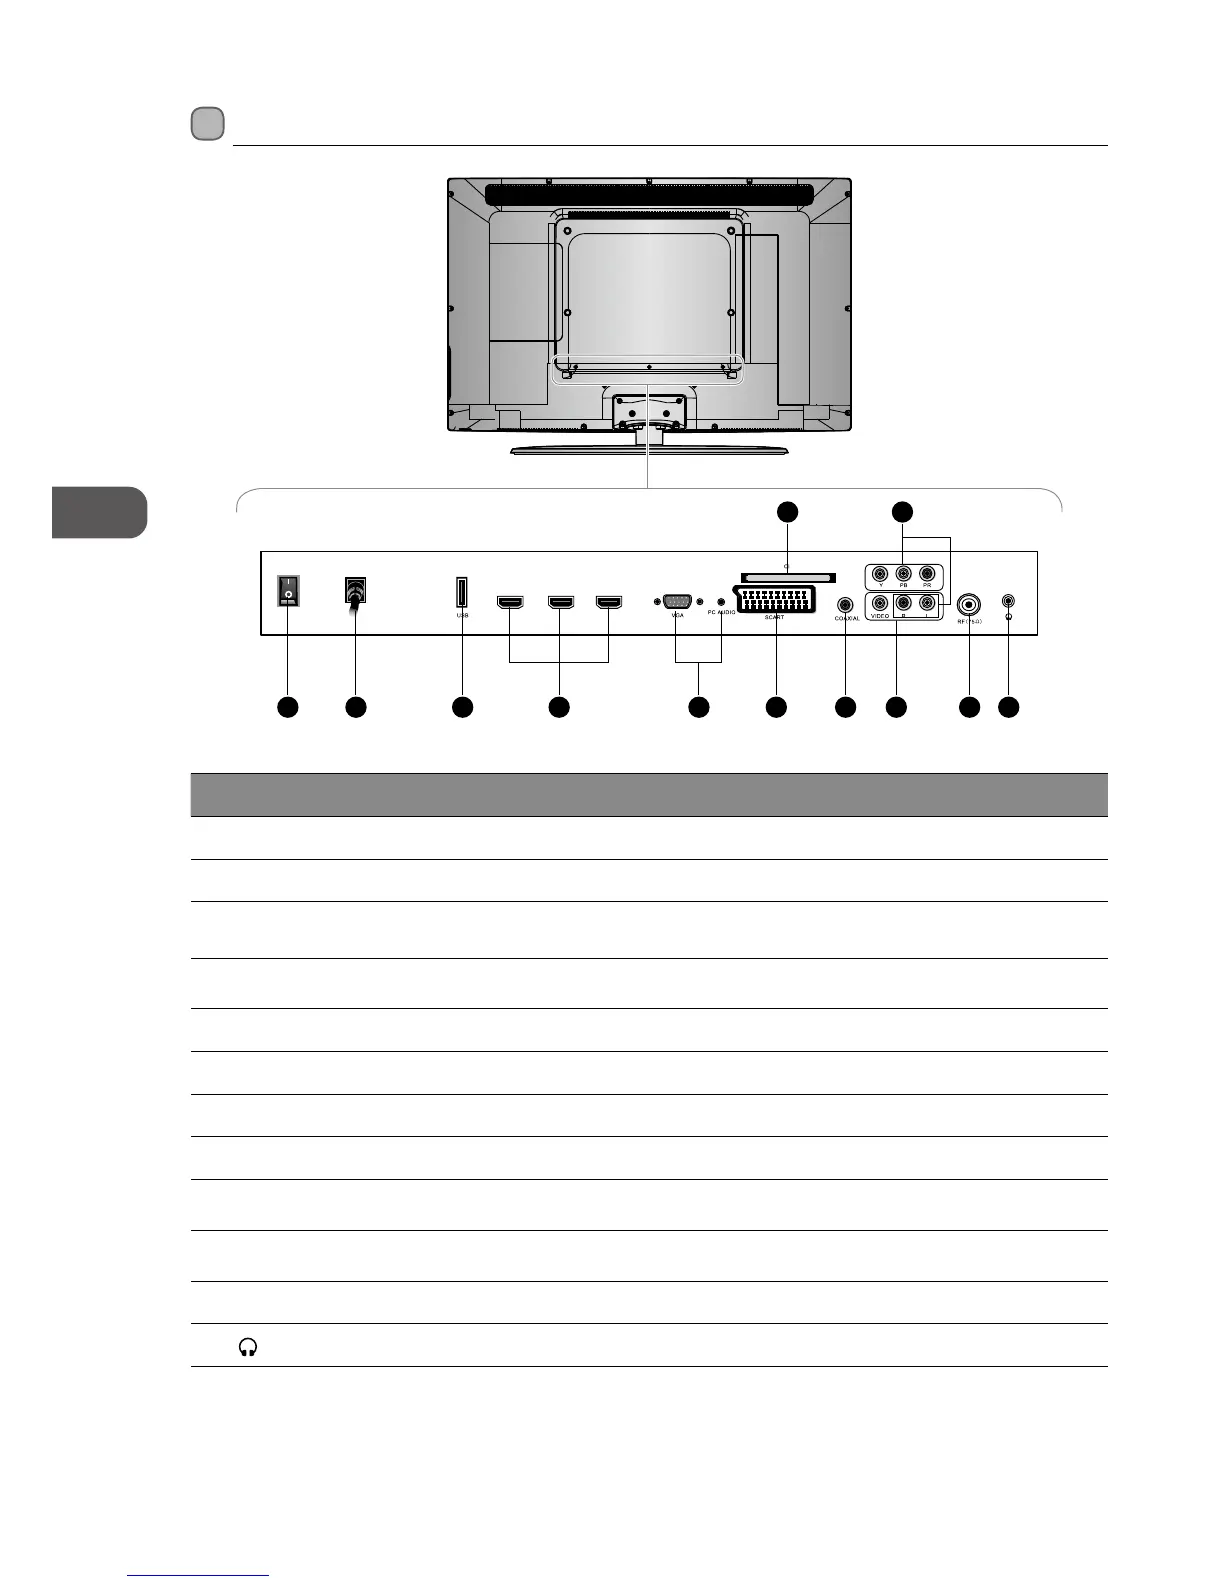
Rear View and Sockets
Socket Description
1 POWER ON/OFF Switch on the POWER ON/OFF switch to turn the TV to standby mode.
2 AC Connects the mains cable to the mains socket.
3 USB
Allows the insertion of a USB storage device to play video, audio, photo and text files
(Media mode) and record DTV programmes on to a USB storage device.
4 HDMI1 / 2 / 3
To connect to a High-Definition (HD) signal output device, such as a set-top box, blu-ray
disc player or AV receiver.
5 VGA / PC AUDIO To connect to a computer or other devices with a VGA interface.
6 CI (Common Interface) Slot Allows the insertion of a Common Access Module. (Refer to page 24 for details)
7 SCART To connect to a VCR, DVD Player, or other AV device with a SCART output socket.
8 COAXIAL To connect to the audio socket on the digital/standard 5.1 audio system.
9 Y, PB, PR / AUDIO (L/R)
To connect to a DVD player, Digital Set-Top-Box, or other AV devices with component
(YPbPr) video and audio output sockets.
10 VIDEO / AUDIO (L/R)
To connect to the Composite VIDEO and AUDIO (L/R) output sockets on external video
devices.
11 RF To connect to the aerial socket on the wall with the RF coaxial cable.
12
To connect to the earphones.
HDMI1
HDMI3
HDMI2
POWER
ON/OFF
AC
4 5 71 2 3 8 11 1210
96