20
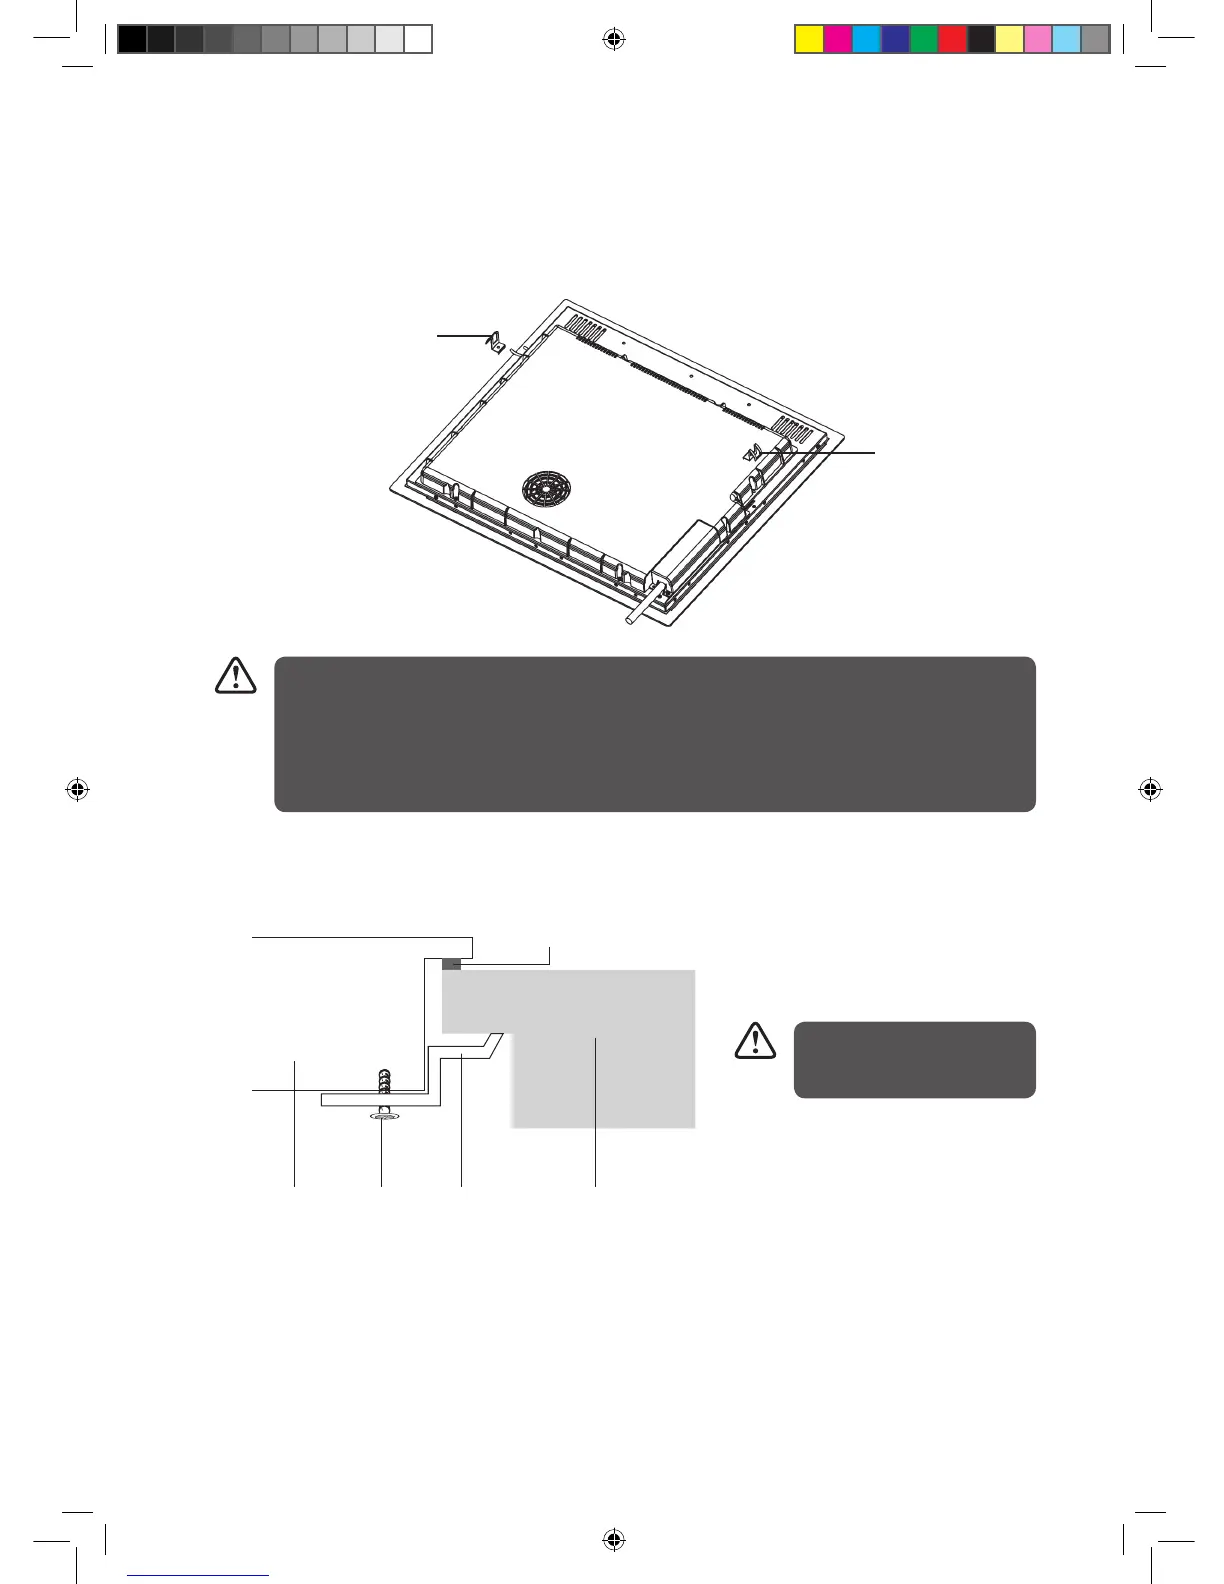
Fastening the Fixing Brackets
The unit should be placed on a stable, smooth surface (use the packaging).
1. Turn the hob upside down, place it on a soft surface and fasten the brackets to the appropriate holes. DO
NOT tighten the screws at this stage.
2. Apply sealing strips around the edge of the hob.
3. Insert the hob into the cut out and position it correctly.
4. Tighten the screws to secure the hob to the worktop.
Worktop
Sealing Strip
BracketScrewHob
bracket
bracket
• The hob must be installed by qualified personnel or technicians.
• The hob should not be mounted above cooling equipment, dishwashers and rotary dryers.
• All surfaces around the hob should be able to withstand the heat generated by the hob.
• Never use a steam cleaner to clean the hob.
• Do not use a silicon sealant to seal the appliance against the aperture. This will make it difficult to
remove the hob from the aperture, particularly if it needs to be serviced.
Do not over tighten the hob
clamps as distortion of the
hob may occur.
LINDHOB10_IB_final110415.indd 20 15/04/2011 2:16 PM
 Loading...