Do you have a question about the LONGER LK4 and is the answer not in the manual?
The LONGER LK1/LK4/LK4Pro/LK5Pro/Cube2 & Cura4.4 User Guides provide comprehensive instructions for operating and maintaining a range of LONGER 3D printers, including the LK1, LK4, LK4 Pro, LK5 Pro, and Cube 2 models. This manual focuses on the essential steps for setting up the Cura 4.4 slicing software and preparing models for 3D printing, ensuring users can effectively utilize their LONGER devices.
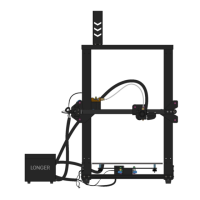
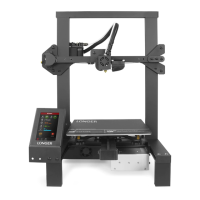
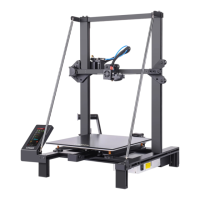
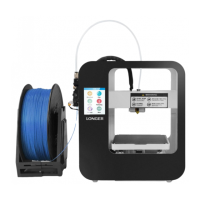
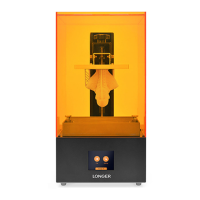
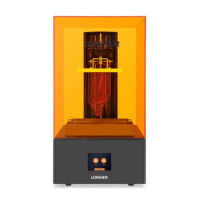
The LONGER 3D printers covered in this guide are designed for additive manufacturing, specifically Fused Deposition Modeling (FDM) technology. These devices are capable of creating three-dimensional objects from digital designs by extruding thermoplastic materials layer by layer. The primary function of these printers is to transform digital models, typically in STL format, into physical prototypes or functional parts. The accompanying Cura 4.4 software serves as the crucial intermediary, translating the 3D model into machine-readable G-code instructions that dictate the printer's movements, extrusion rates, and temperature settings. This integration of hardware and software allows users to bring their digital creations to life with precision and detail.
The LK1, LK4, LK4 Pro, LK5 Pro, and Cube 2 models represent a range of printers, each likely offering varying build volumes, print speeds, and features tailored to different user needs, from hobbyists to more professional applications. While specific features for each model are not detailed in this introductory guide, the common thread is their reliance on the Cura slicing engine for print preparation. The guide emphasizes the ease of use and the structured workflow, guiding users through software installation, printer setup, model preparation, and parameter selection.
The usage of LONGER 3D printers, as outlined in the guide, begins with the installation of the Cura 4.4 slicing software. The process is designed to be user-friendly, starting with an "Open File" icon to load 3D models. Once a model is loaded, the software provides a suite of tools for model manipulation. Users can add models to the virtual build plate, set up the model by adjusting its position, scale (zoom), and orientation (mirroring). This flexibility allows for optimal placement and sizing of objects to fit within the printer's build volume and to achieve desired print outcomes.
A critical aspect of usage is the selection of printing parameters. The guide highlights the importance of choosing appropriate settings such as layer height, infill density, and support structures. Layer height directly impacts the resolution and print time, with finer layers resulting in smoother surfaces but longer print durations. Infill density determines the internal structure of the print, affecting its strength and material consumption. Support structures are essential for printing models with overhangs or complex geometries, preventing collapse during the printing process. The guide also mentions "Adhesion," which refers to settings that improve the first layer's adherence to the build plate, crucial for preventing warping and ensuring print success.
After selecting all necessary parameters, the user initiates the "Slice" function. This process converts the 3D model and its chosen settings into G-code, a series of commands that the 3D printer understands. Once slicing is complete, the G-code file is saved to a Micro SD card, which is then inserted into the printer. The printer reads these instructions and executes the print job autonomously. This workflow underscores the importance of accurate parameter selection in the slicing software, as it directly dictates the quality and success of the physical print. The guide also provides troubleshooting steps for common issues, such as automatic filament unloading and connectivity problems, enhancing the user's ability to manage and resolve operational challenges.
While the provided excerpts do not explicitly detail routine hardware maintenance for the LONGER 3D printers, the guide implicitly supports maintenance through its focus on software and troubleshooting. Proper software configuration, as taught by the Cura 4.4 user guide, is a form of preventative maintenance. Incorrect settings can lead to print failures, which in turn can cause wear and tear on printer components, such as clogged nozzles or damaged build plates. By guiding users to select optimal layer height, infill, and support settings, the manual helps prevent issues that might necessitate physical maintenance.
The "FAQ" section, though brief in the provided snippet, is a key maintenance feature. It addresses common problems that users might encounter, such as "automatic unloading of filament" and "unable to connect to printer." For the filament unloading issue, the guide provides a "Star-G-code Replacement" script. This G-code snippet includes commands like M107 (start with the fan off), G28 X0 Y0 (move X/Y to min endstops), G92 E0 (zero the extruded length), and M117 Printing... (put printing message on LCD screen). These commands are designed to reset or reconfigure the printer's behavior, potentially resolving issues related to filament handling without requiring physical intervention. This suggests that some maintenance can be performed through software adjustments or firmware commands.
For connectivity issues, the guide suggests a "AutoDetectBaudJob.py Replacement" and provides links to Google Drive for the necessary files. This indicates that software or driver updates, or specific scripts, are part of the maintenance toolkit for ensuring proper communication between the computer and the printer. While not direct hardware maintenance, ensuring stable connectivity and correct G-code execution is crucial for the overall health and functionality of the 3D printing system.
In essence, the guide emphasizes a proactive approach to maintenance through correct software usage and provides solutions for common operational glitches, minimizing the need for more complex hardware repairs. Users are empowered to troubleshoot and resolve issues using the provided software and G-code solutions, contributing to the longevity and reliable performance of their LONGER 3D printers.
| Build Volume | 220 x 220 x 250 mm |
|---|---|
| Layer Resolution | 0.1 - 0.4 mm |
| Nozzle Diameter | 0.4 mm |
| Filament Diameter | 1.75 mm |
| Connectivity | USB, SD card |
| Bed Leveling | Manual |
| Print Technology | FDM (Fused Deposition Modeling) |
| Heated Bed | Yes |
| Bed Temperature | Up to 100°C |
| Nozzle Temperature | Up to 250°C |
| Machine Weight | 7.8 kg |
| Printing Speed | 80 mm/s |
| Supported Materials | PLA, ABS, TPU |
| Frame Material | Aluminum |
| Power Supply | 24V, 360W |