Do you have a question about the LONGER LK4 X and is the answer not in the manual?
A table detailing the printer's specifications and technical capabilities.
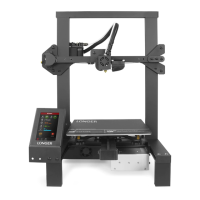
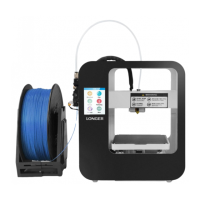
Visual representation of all components included in the printer package.
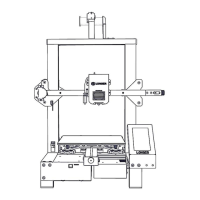
Identifies and labels the main components and parts of the 3D printer.
Instructions on how to carefully remove all components from the packaging.
Guide on connecting the main frame profile to the printer base using screws.
Instructions for attaching the filament sensor and filament holder using specific screws.
Steps to mount the auto-leveling sensor and touch screen.
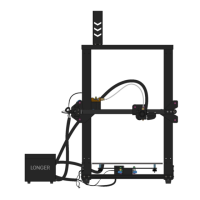
Details on connecting various cables for motors, sensors, and power.
Instructions to check for wobbling and ensure smooth movement of the print head axes.
Explains manual leveling process using paper to set nozzle-to-bed distance.
Details the functions and controls available on the printer's interface.
Displays the main menu with options like Move, File, Tune, and Leveling.
Provides controls for moving the X, Y, and Z axes and filament loading/unloading.
Allows adjustment of nozzle temperature, fan speed, feed rate, and Z offset.
Controls filament type selection, heating, loading, and unloading.
Details the manual and automatic leveling processes via the touch screen.
Shows how to browse and select printable files from the SD card.
Displays real-time print status, progress, and controls like pause/cancel.
Guide on installing the Ultimaker Cura slicing software and necessary files.
Steps to add the specific printer model to the Cura software.
Instructions on importing 3D models (e.g., STL files) into the Cura interface.
Guidance on selecting and customizing slicing parameters for different materials.
Process of generating G-code and saving it to a removable drive.
How to preview the sliced model, including nozzle path and supports.
Steps for connecting the printer to a computer for direct printing via USB.
Instructions for updating the printer's firmware using an SD card.
Steps to clean a clogged nozzle using preheating and a needle.
Guidance on resolving issues with bed leveling, both manual and auto.
Tips for improving first layer adhesion to the heated bed.
Steps to diagnose and fix issues preventing online printing.
| Layer Resolution | 0.1 - 0.4 mm |
|---|---|
| Filament Diameter | 1.75 mm |
| Connectivity | USB, SD Card |
| Print Technology | FDM (Fused Deposition Modeling) |
| Nozzle Diameter | 0.4 mm |
| Supported Materials | PLA, ABS, TPU |
| Display | 4.3-inch Touchscreen |
| Nozzle Temperature | Up to 260°C |
| Power Supply | 24V, 360W |