Always clean your frame with gentle soap
or detergent and water. Use a soft cloth.
Rinse the frame with water and dry it with a
cloth. Do not use a high-pressure cleaner or
abrasive product. To remove tar stains, use a
car body cleaner.
Despite all the care that goes into our
manufacturing, if a defect appears or if a
repair is necessary, always take the frame
or fork and the warranty card to your dealer.
EN
Our frames and our forks are guaranteed
free of manufacturing faults or errors for
a period of five years from the date of
purchase. Paint, decoration, varnish and
all finish items are guaranteed for one year.
To validate the warranty register on our
website: www.lookcycle.com
This warranty remains limited to the
initial purchaser and proof of purchase is
required (original bill).
Frames are guaranteed against all
manufacturing defects and faults.
The warranty applies only if the frame
was assembled in accordance with the
instructions above.
The warranty does not apply to defects
caused by poor maintenance or incorrect
use.
Similarly, the warranty is void if the frame
or fork has been technically modified by
IMPORTANT:
Always inspect your bicycle before using it.
If the tubes of your LOOK frame or fork have
been subjected to any damage, take the
bicycle to your LOOK dealer for inspection.
country, if you ride at night. Reflectors are
not sufficient and do not replace lights.
Highway Code and follow its provisions. Take
precautions against road and traffic hazards.
WARRANTY
MAINTENANCE
AFTER-SALES SERVICE
the user or has been repaired or repainted,
other than by an approved LOOK repair
centre. In particular, do not remove the
safety drop-outs on the fork ends.
The warranty does not cover the following
cases:
* negligence or insufficient
maintenance
* accidents
* incidental or indirect damage
The costs of fitting, dismantling, labour
time, packing and shipping the frame are
not covered.
Do not drill, paint or re-varnish. Do not
leave the frame near a heat source.
In the event of shock or abnormal stress,
your carbon components can be subjected
to degradation which is difficult to see. In
case of doubt, and in all cases after a fall,
it is important to have the components of
your bike carefully serviced. Each of your
carbon components (frame and forks)
is identifiable thanks to a chip hidden in
the carbon. The characteristics of your
components are remembered by LOOK,
who will be able to guarantee their integrity
if necessary.
26 27
INSTALLING THE FRONT AND
REAR DERAILLEURS
Check that the rear derailleur thread is
clean.
This frame is designed to take a front
“brazed” type derailleur.
Follow the manufacturer’s fitting,
adjustment and maintenance instructions.
FITTING THE WHEELS
Follow the manufacturer’s fitting
instructions.
The ends of our forks are designed with
safety drop-outs.
tightly locked in place by the quick-lock
mechanism.
Warning: it is strictly forbidden to file down
the wheel security sprockets. As well as
the risks, this operation would make the
bike contrary to UCI rules.
EN
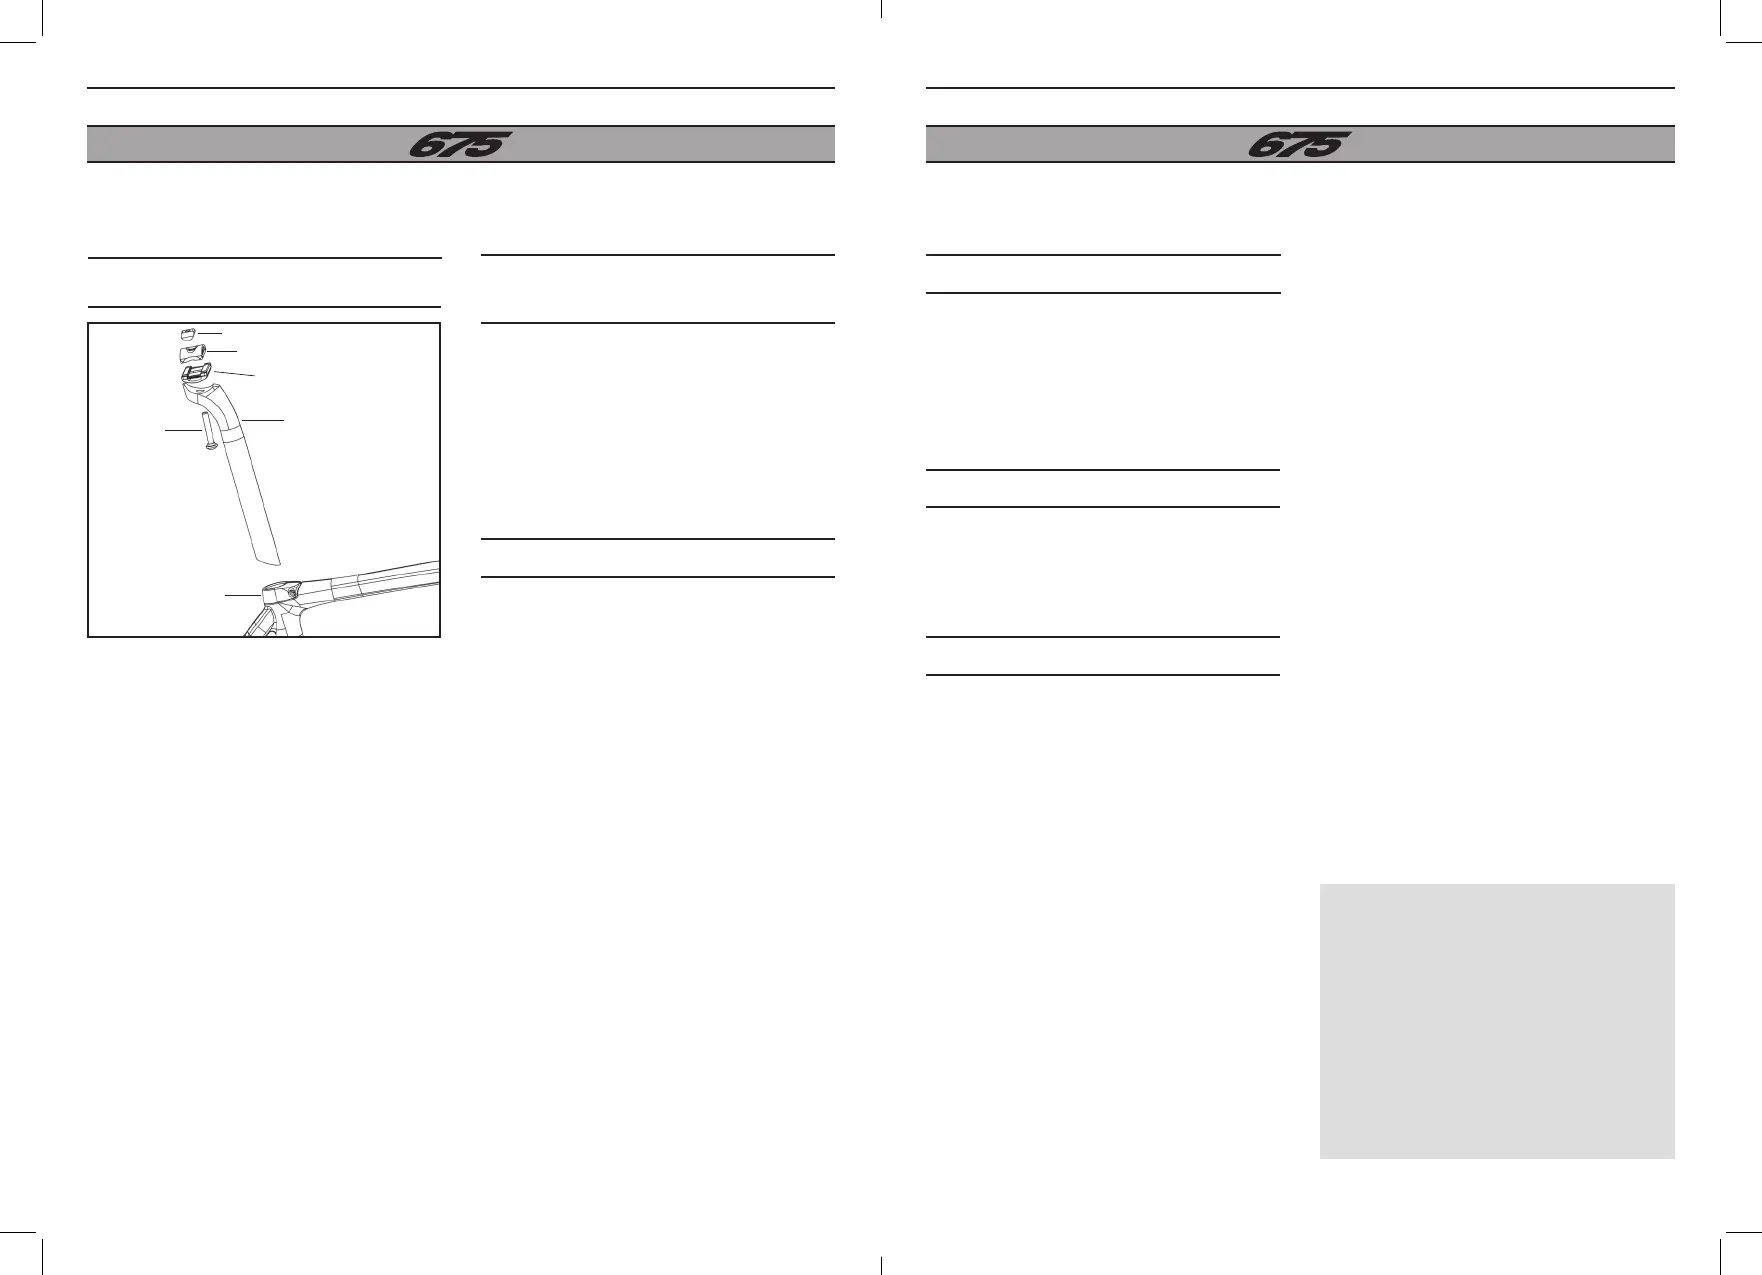
1. Fit the lower clamp (3) on the seat post
(4).
2. Place the upper clamp (2) on the lower
clamp (3) and insert the screw (5).
3. Tighten the nut slightly (1).
4. Fit the saddle rails on the lower clamp
(3), then turn the upper clamp (2) until
the grooves are parallel.
5. Adjust the saddle horizontally using a
level then fine-tune according to your
preferences.
6. Tighten the nut using a 6 mm hexagon
socket key to the recommended
tightening torque of 15 Nm maximum.
7. Position the saddle collar on the frame.
8. Insert the seat post into the saddle
tube.
9. Tighten the screw of the saddle collar
to the recommended torque of 8 Nm
maximum.
ASSEMBLY OF THE SEAT POST
1
2
3
4
5
6
 Loading...