LH100 ECO Series QSG - English - R1
SET-UP LOCAL VIEWING ON YOUR PC
STEP 3
CONTINUED
SET-UP INTERNET REMOTE SECURITY
MONITORING
STEP 4
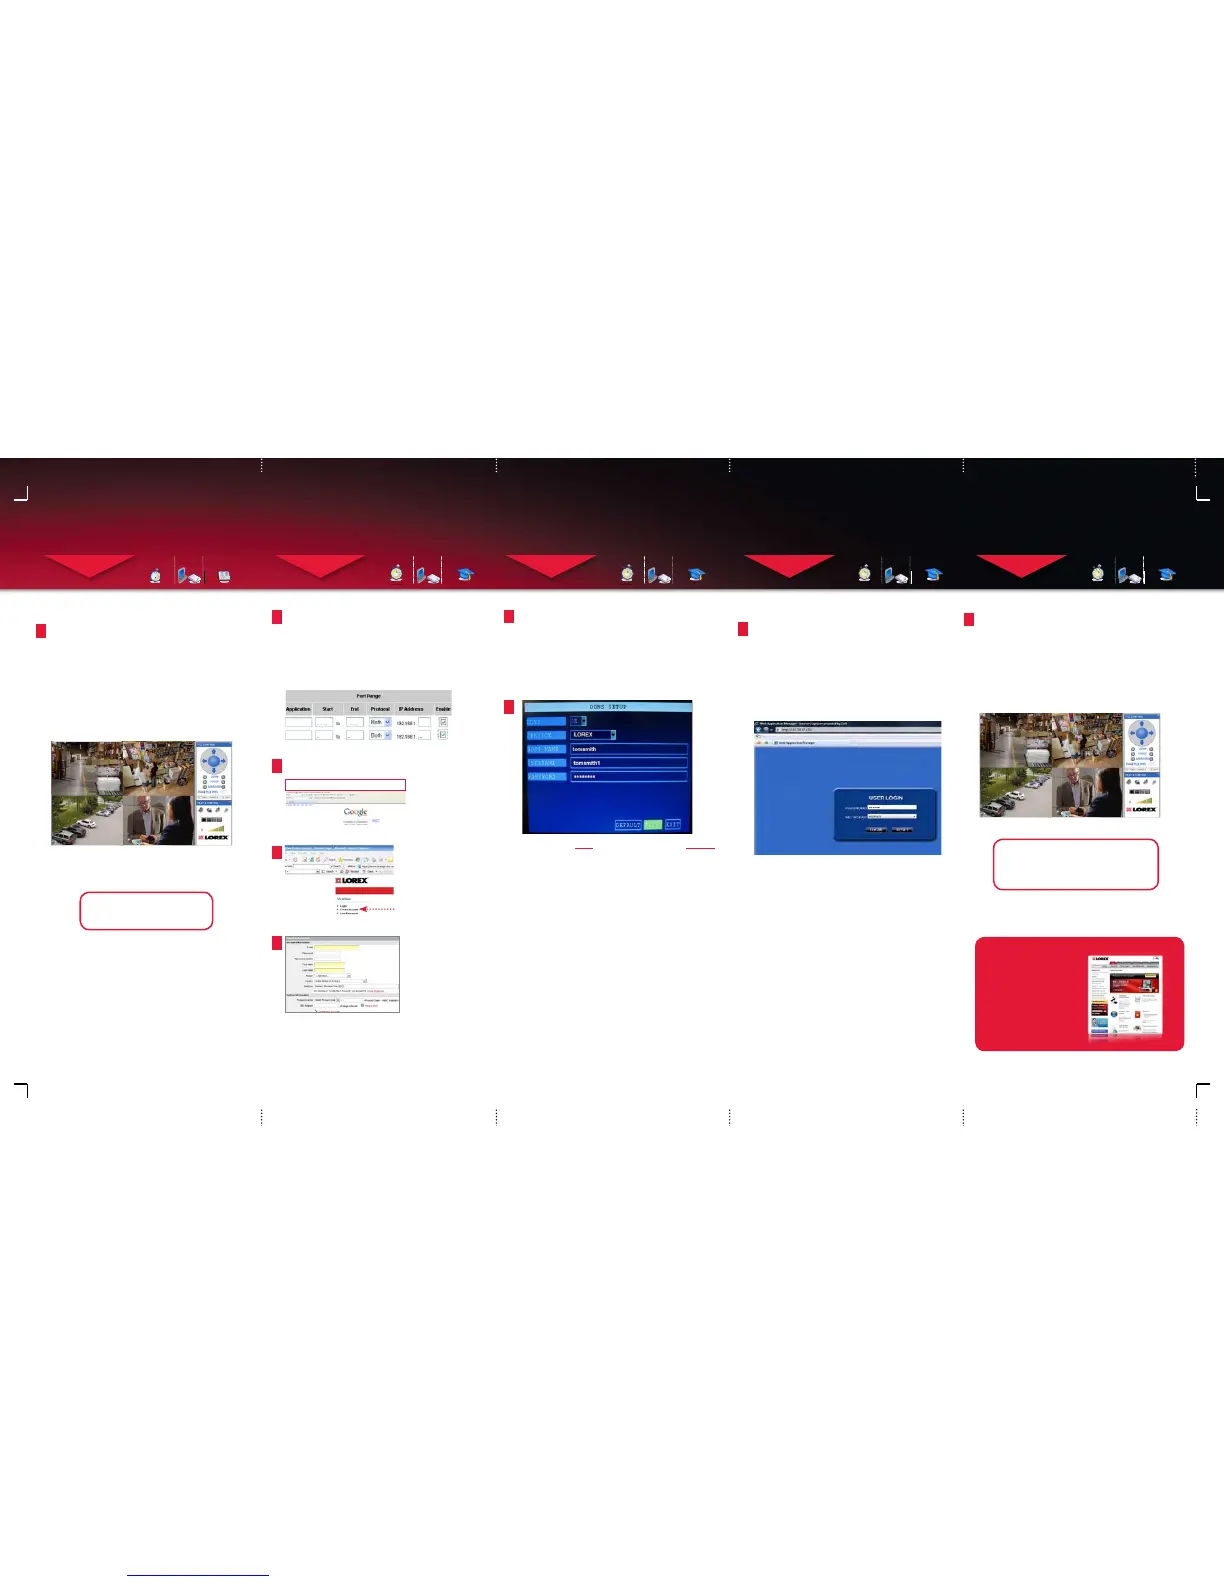
Port Forward your Router:
1
Port forward your router first before proceeding with the set-up.
You must forward Port: 9000, Web Port: 80. All routers are
different. To port forward your router, please refer to your
router’s user manual.
A router configuration guide featuring the most commonly used
routers in the market is available on www.lorexcctv.com/support
in the Consumer’s Guide Section. An example of a port forwarding
screen is shown for illustration purposes.
System
System
9000 9000
80 80
12
12
EXAMPLE
2
Open your web browser (Internet Explorer by default) and enter
http://www.lorexddns.net in the address bar.
DDNS (Dynamic Domain Name System) Set-up:
http://www.lorexddns.net
Create Account
3
Create Account:
1. FOR PRODUCT LICENSE select the LH100 Series option
from the drop down menu.
2. FOR PRODUCT CODE enter the MAC address
(recorded in step 3, section 1).
3. FOR URL REQUEST enter a unique URL name (e.g.
tomsmith). Note: URL name should be as short as possible, no more
than 15 characters.
Complete New Account Information:
1
2
3
4
An automated REGISTRATION CONFIRMATION EMAIL will be
sent to your email. Print and Save this confirmation. You will
need this information to access your System remotely.
Registration Email:
Service Provider: dns1.lorexddns.net
Domain Name: tomsmith.lorexddns.net
User ID: tomsmith
Password: (your password)
5
SET-UP INTERNET REMOTE SECURITY
MONITORING
STEP 4
CONTINUED
Enter DDNS Set-up in your DVR:
6
1. From the MAIN menu, click the ADVANCE menu to enter the
NETWORK Setup menu. Click DDNS SETTINGS.
2. Under DDNS, select ON.
3. Under SERVICE, select LOREX.
4. Under DOMAIN NAME, enter only the first portion of your
DDNS domain from the confirmation email. For example, if
your domain name is “tomsmith.lorexddns.net”, you only need
to enter “tomsmith” in the text field.
5. Enter your Lorex DDNS user name and password in the
respective fields.
NOTE: Obtain this information from the confirmation email after
registering for the Lorex DDNS service.
6. Click APPLY. Once the DDNS status shows successful
registration, click CLOSE in the confirmation window.
7. Click EXIT. You will be prompted to restart the system.
Click CLOSE.
SET-UP INTERNET REMOTE SECURITY
MONITORING
STEP 4
CONTINUED
SET-UP INTERNET REMOTE SECURITY
MONITORING
STEP 4
CONTINUED
Congratulations! You have completed Step
4 successfully. You can now view, playback
video and Remotely control the system on
your Remote computer over the Internet
WAN (Wide Area Network).
LO CA L VI E W IN G IN S TAL LAT IO N GU I DE
Time: 30 Minutes
Skills - IntermediateHardware
PC/Router
Skill Level
Intermediate
easy
advanced
Time
under 30 minutesunder 15 minutes under 60 minutes
Hand Tools Hardware
Router
Hi Speed
over 60 minutes
Skill Level
Intermediate
easy
advanced
Time
under 30 minutesunder 15 minutes under 60 minutes
Hand Tools Hardware
Router
Hi Speed
over 60 minutes
Skill Level
Intermediate
easy
advanced
Time
under 30 minutesunder 15 minutes under 60 minutes
Hand Tools Hardware
Router
Hi Speed
over 60 minutes
Skill Level
Intermediate
easy
advanced
Time
under 30 minutesunder 15 minutes under 60 minutes
Hand Tools Hardware
Router
Hi Speed
over 60 minutes
REMOTE V IEWIN G INS TALLATION GUID E
Time: 60 Minutes
Skills - AdvancedHardware
PC/Router
Skill Level
Intermediate
easy
advanced
Time
under 30 minutesunder 15 minutes under 60 minutes
Hand Tools Hardware
Router
Hi Speed
over 60 minutes
Skill Level
Intermediate
easy
advanced
Time
under 30 minutesunder 15 minutes under 60 minutes
Hand Tools Hardware
Router
Hi Speed
over 60 minutes
Skill Level
Intermediate
easy
advanced
Time
under 30 minutesunder 15 minutes under 60 minutes
Hand Tools Hardware
Router
Hi Speed
over 60 minutes
REMOTE V IEWIN G INS TALLATION GUID E
Time: 60 Minutes
Skills - AdvancedHardware
PC/Router
Skill Level
Intermediate
easy
advanced
Time
under 30 minutesunder 15 minutes under 60 minutes
Hand Tools Hardware
Router
Hi Speed
over 60 minutes
Local Live Viewing using DVR Web Application
Manager (on your local computer):
By default, DVR Web Application Manager launches in Live
Viewing mode.
3
To use Live Viewing:
1. Click LIVE at the top of the main screen.
2. Click the display mode icons to view the main screen in
single-channel, quad, or split-screen configurations. You
can also double-click a channel at any time to view it in
single-channel.
LOCAL LIVE SITE
7
It’s all on the Web
www.lorexcctv.com
For detailed setup
information, please
refer to your included
User’s Manual. For
additional information,
please visit our website
www.lorexcctv.com
NOTE: Once you have saved your DDNS settings, you must restart your
system in order for the changes to take effect. Disconnect and reconnect
the power cable from the rear panel. Please allow 10-15 minutes for the
DDNS servers to update with your new URL.
ATTENTION: You MUST enter your DDNS information LOCALLY
before attempting remote access.
NOTE:
For added security, we highly recommend changing
HTTP port 80 on the system to any desired port -- the port
must not be blocked by your Internet service provider.
For more details on changing ports, please see Appendix
C: Changing Ports on Your System in the LH100 Series
Instruction Manual.
1. Launch Internet Explorer.
2. In the address bar, enter the DDNS DOMAIN NAME
from the Registration Email sent to you.
(e.g. http://tomsmith.lorexddns.net)
3. Password - by default there is no password, leave it
blank. Remote password can be enabled on the remote
software only. Check the user manual for more
information.
4. In the NETWORK drop down menu select INTERNET.
5. Click LOGIN
Logging into DVR Web Application Manager
(on your remote computer):
Remote Live Viewing using DVR Web Application
Manager (on your remote computer):
By default, DVR Web Application Manager launches in Live
Viewing mode.
8
To use Live Viewing:
1. Click LIVE at the top of the main screen.
2. Click the display mode icons to view the main screen in
single-channel, quad, or split-screen configurations. You
can also double-click a channel at any time to view it in
single-channel.
REMOTE LIVE SITE
Log in using your ADMIN system password. If you
have not enabled passwords on the system, leave
the password field blank.
Congratulations! You have completed Step
3 successfully. You can now view, playback
video on your Local Computer via LAN
(local area network).

 Loading...