Congratulations!Youcannowview&playbackvideoonyourviayourLAN.
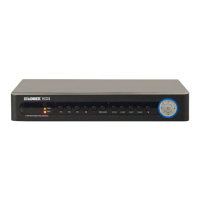
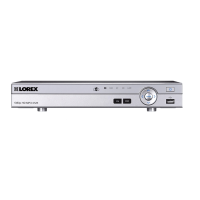
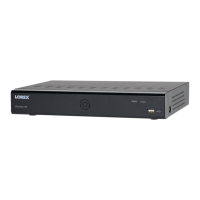
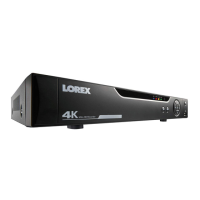
1xDigitalVideoRecorderwithpre-installedHDD*
1xUSBmouse
1xPoweradapter
1xRemotecontrol
1xEthernetcable
1xHDMIcable(in8and16channelmodelsonly)*
1xAudioharnesscable(in16channelmodelsonly)*
1xInstructionmanual
1xQuickstartguide
1xCD
PACKAGE CONTENTS:
2
Connecting the USB Mouse
ConnecttheUSBmouseto
oneoftheUSBportsonthe
backpaneloftheDVR.
4
Connecting the Ethernet Cable
Connectoneendofthe
Ethernetcabletoanavailable
LANportofyourrouter(not
included)andtheotherendto
theDVR’sLANport.
3b
ConnectaVGAcable(not
included)fromyourmonitor
orTVtotheVGAportonthe
rearpaneloftheDVR.
3c
FromoneoftheVIDEO
OUTPUTportsconnectaBNC
terminatedcable(notincluded)
toaTVorCCTVmonitor.
OR
OR
2
Using a Mouse (Recommended)
1:Left-button:Clicktoselectamenu
option;duringliveviewinginsplit-
screen,double-clickonachannel
toviewtheselectedchannelin
full-screen;double-clickthechannel
againtoreturntosplit-screenview.
2:Right-button:Clicktoopenthe
MenuBarortoexitfromamenu.
3:Scroll-wheel:Nofunction.
1 2
3
YouhavecompletedSTEPS1&2successfully.YourDVR
isnowreadytouse.Refertotheowner’smanualtolearn
howtorecord,playback,searchandforallotherfeatures
availablewiththisDVR.
Managing Passwords
Bydefault,passwordsaredisabledonthesystem.
Youdonotneedtoenterapasswordwhenaccessingthe
MenuBarorMainMenu.However,youmaybeaskedfor
apasswordtoaccesscertainfunctions.
7
NOTE: For security purposes, it is highly recommended to
enable passwords on the system using the Password Menu.
Please refer to the instruction manual for more information.
NOTE: By default, the
username is admin and
password is 000000.
Connecting Cameras
(not included)
1
ConnectBNCcamerastothe
BNCports(VIDEO INPUT)
ontherearpanel.
NOTE:Testthecameraspriorto
selectingapermanentmounting
locationbytemporarily
connectingthecamerasand
cablestoyourDVR.
NOTE:thefourchannel
modelisshown
2
1.LaunchInternet Explorer.
NOTE: IfusingInternetExplorer9,besureyoudonotselect64bit.
2.Intheaddressbar,entertheIP address of your DVR (recorded
inthepreviousstep)
NOTE: Enterhttp://followedbytheIPaddressofyourDVR(recorded
instep3-1),thenacolonfollowedbytheWebPortnumber
i.e. http://192.168.X.XXX:80
Logging into Lorex Web Client (LOCALLY)
4.YoumustinstalltheActiveX
®
plug-inforDVRNetviewertofunction.
ClicktheattentionbarandselectInstall ActiveX Control.Lorex
WebClientwillreset.
5.LoginwithyourLANusernameandpassword.Fromthesecurity
window,clickInstall.
3.Enteryouruser name and
password,thenclickLOGIN.
Yourdefaultlogin:
Username is “admin”
Password is left blank
TheDVRcanalsobecontrolledusingthefrontpanel
buttonsandtheincludedremotecontrol.
Pleaserefertotheinstructionmanualformoreinformation
onthesemethods.
Other Control Options
3
FrontPanelButtons
BASICSETUPBASICSETUP NAVIGATIONANDCONTROLS SET-UPLOCALVIEWINGONYOURPC
Continued
STEP1
STEP2
STEP3
STEP1
RemoteControl
*remotecontrolmaynotbeexactlyasshown
3a
ConnectanHDMIcablefrom
yourTVormonitortothe
HDMIportontherearpanel
oftheDVR.
Connecting a Monitor
TheECO2featuresmultipleoptionsforconnectingtoamonitor.
Fortheabsolutebestpicturequality,itisrecommendedthatyou
connecttoamonitorwithanHDMIinput.
Powering ON the DVR
5
ConnectthepowercabletotheDC12V
portontherearpanelandthepower
cordintoanelectricaloutlet.Topower
ontheDVR,turntheON/OFFswitchto
theONposition.Atstartup,thesystem
performs a basic system check and
runsaninitialloadingsequence.After
afewmoments,thesystemloadsalive
displayview.
NOTE:Makesureallcamerasandcables
areproperlyconnectedpriortopowering
onthesystem.
Using the Main Menu
Right-clickanywhereon-screentoopentheSub-Menuandselect
MAIN MENU(mouseonly),orpresstheSEL buttonontheremote
controlorthePTZbuttononthesystemfrontpaneloftheDVR.
1
5
6
7
8
1
2
3
4
1.Display
2.Search
3.Alarm
4.System
5.Record
6.Network
7.Device
8.Advanced
Itisimportanttosetthecorrecttimetoassureaccuratetime
stampsonvideorecordings.
Setting the Date & Time
1.Movethemousecursortothebottomofthescreento
openthemenubarandselectMAIN MENU.
2.ClickSYSTEM.
3.ConfigurethedateandpressAPPLYtosaveyour
settings.ClickAPPLY.Tofinish,pressOK.
6
NOTE:
A pop-up key
pad will open.
When you
have selected
the desired
date, press the
button to
confirm.
Recordtheinformationinthesectionbelow:
IPADDRESS: _______._______ ._______._______
MACADDRESS: _____:_____:_____:_____:_____:____
HTTPPORT: _________
(RequiredforDDNSregistration)
Retrieve the DVR Information
1
Thisstepwillteachyouhowtolocally
viewyoursystemovertheLAN(local
areanetwork)usingyourPC.
NOTE:Thismethodonlyworks
ifyourcomputerisonthesame
networkastheDVR.
TorecordyourIPAddress,MacAddress
andHTTPPort,simplypressthe
buttononthefrontoftheDVR.
3
Live Viewing Using the Web Client (LOCALLY)
Uponlogin,theWebClientmainscreenappearsinyourbrowser.
CHECK OUR WEBSITE FOR LATEST DVR SOFTWARE
FIRMWARE UPGRADES, VIDEOS & DOCUMENTATION.
www.lorextechnology.com
* Contentmayvarybymodel,includingnumberofchannels/portconfigurationand
HDD(harddiskdrive)capacity.Checkyourpackageforspecificcontentinformation.
LH130ECO2SeriesQuickSetupGuide-English-R3