16
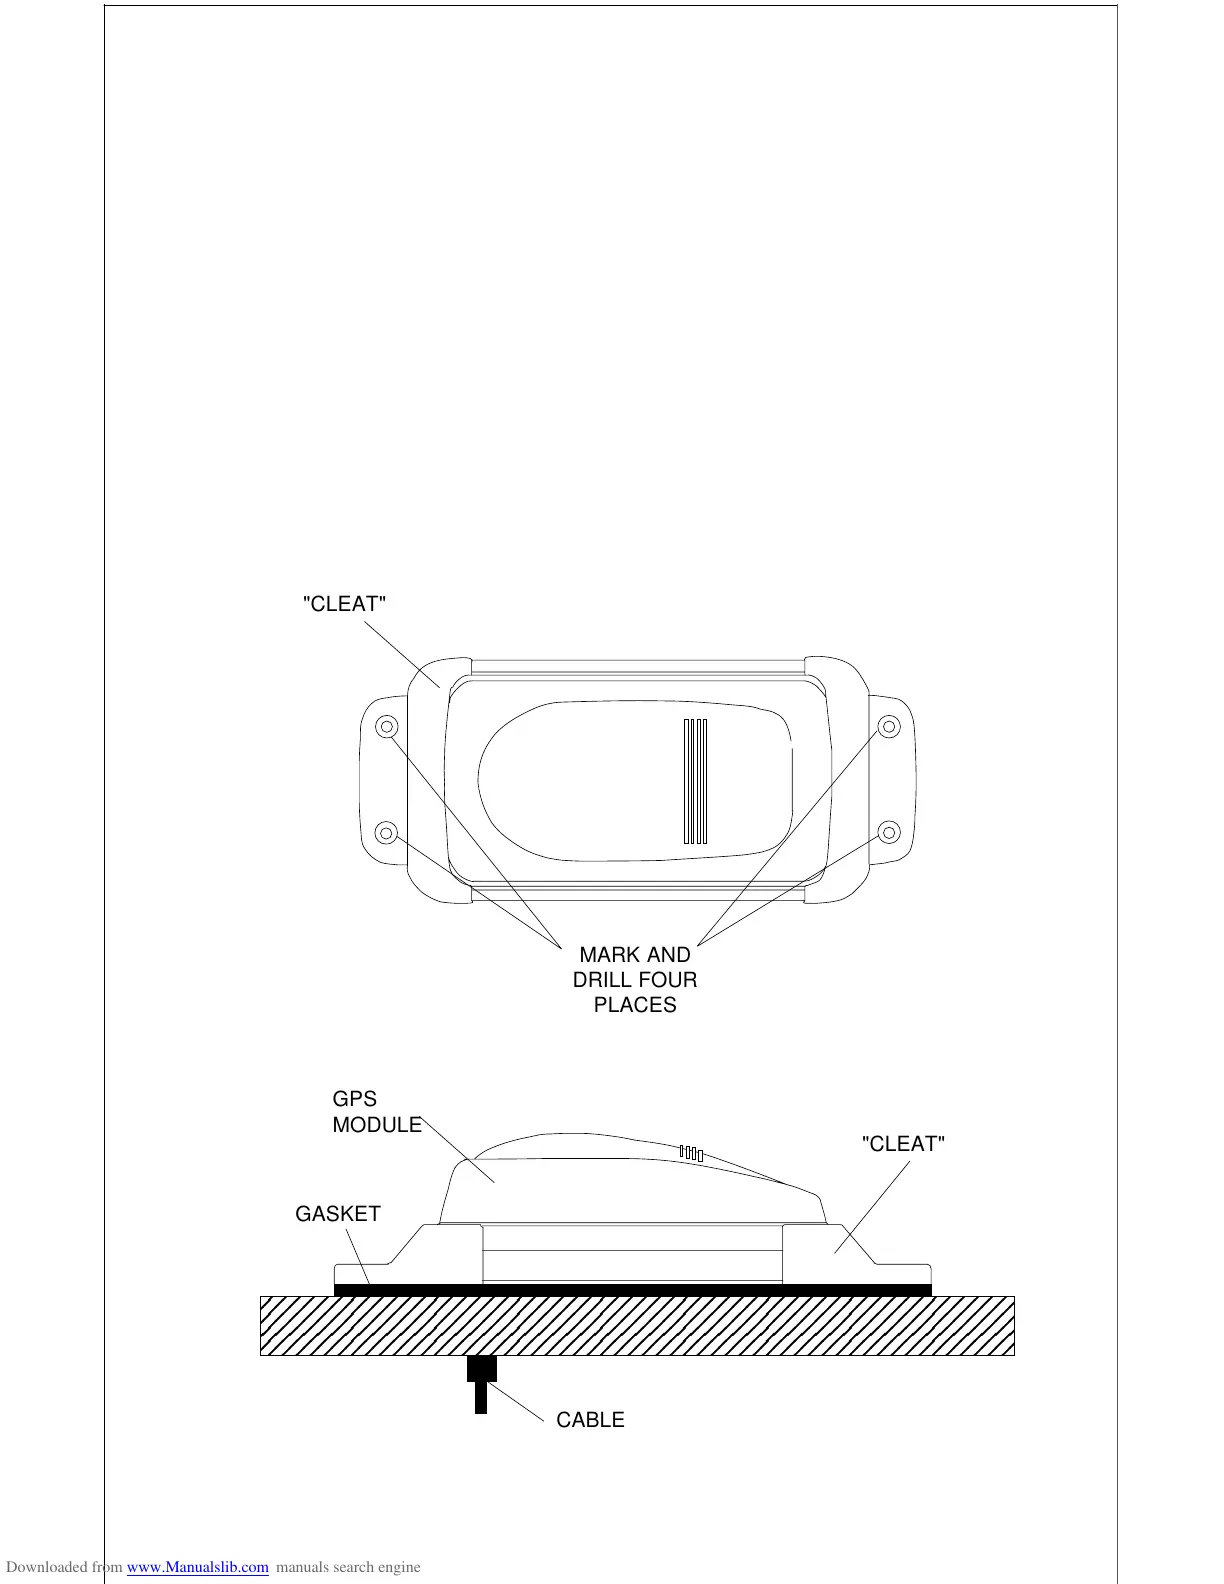
Surface Mounting - Without Access
If you don’t have access to the back side of the mounting surface, use the
“cleats” supplied with the GlobalMap 2000. (Note: This is assuming you
can “snake” the module’s cable to a location that is accessible. A hole will
still need to be drilled in the mounting surface for the cable.) Using the
gasket as a template, mark and drill the 17 mm (11/16") hole for the cable.
Attach the cable to the module and drop the other end of the cable through
the gasket and down the hole. Place the module on the gasket. Slide the
“cleats” onto each end of the module and (using the cleats as templates)
mark four holes for 5 mm (#10) mounting screws. Drill the holes, then
replace the cleats on the module and fasten them to the mounting surface
with 5 mm (#10) screws. Route the cable to the GlobalMap 2000.