USING YOUR CEILING FAN
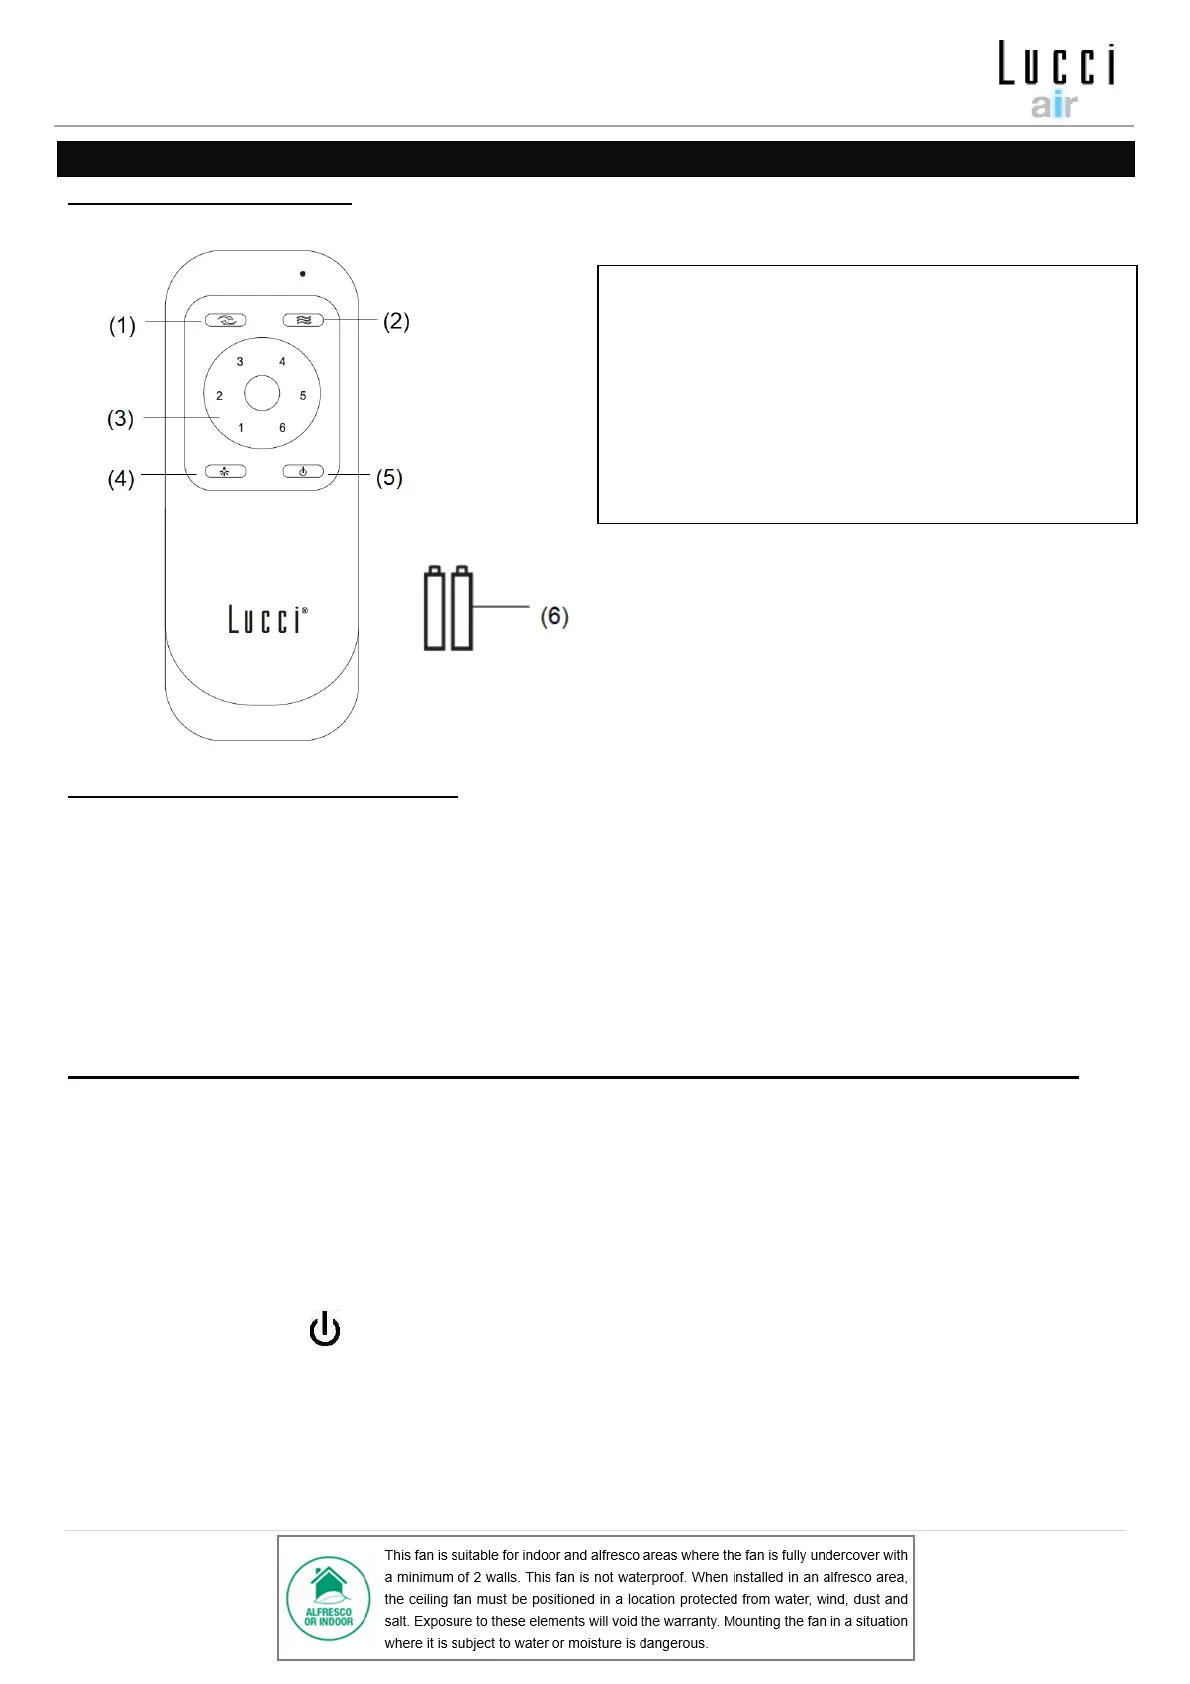
REMOTE CONTROL (Fig. 11)
LIGHT FUNCTION CONTROL (Fig. 11)
The GX53 LED lamp has a built-in 3 step dimming circuit.
- Initially turn ON the LED lamp with 100% brightness – press Light button (4) once on the remote.
- Press the Light button to switch OFF and then ON again, within 3 seconds for dimming to 50% brightness.
- Press the Light button to switch OFF and then ON again, within 3 seconds for dimming to 20% brightness.
(If the ON/OFF toggle switching is not completed within 3 seconds, the lamp will reset to 100% brightness)
PAIRING REMOTE AND RECEIVER – WHEN 1 DC CEILING FAN IS INSTALLED IN ONE LOCATION
NOTE: Ensure that you have installed a single pole disconnection switch in the fixed wiring for the fan.
NOTE: Ensure power to the receiver is ON prior to pairing the remote with the receiver.
• Turn OFF the mains supply to the fan by on/off wall switch.
• Install the batteries into the remote. Please make sure the polarity of the battery is correct.
• Turn ON the power to the receiver.
• Press and hold the “ ” button on the remote for 10 seconds within 30 seconds of switching the power
ON to the receiver of the ceiling fan.
• There will be a notification ‘beep’ sound from the receiver to indicate that the paring process is successful.
• Turn ON and change the speed of the ceiling fan via the remote to check the operation and successful
paring.