5
OPERATION
Using the PowerView
®
Remote
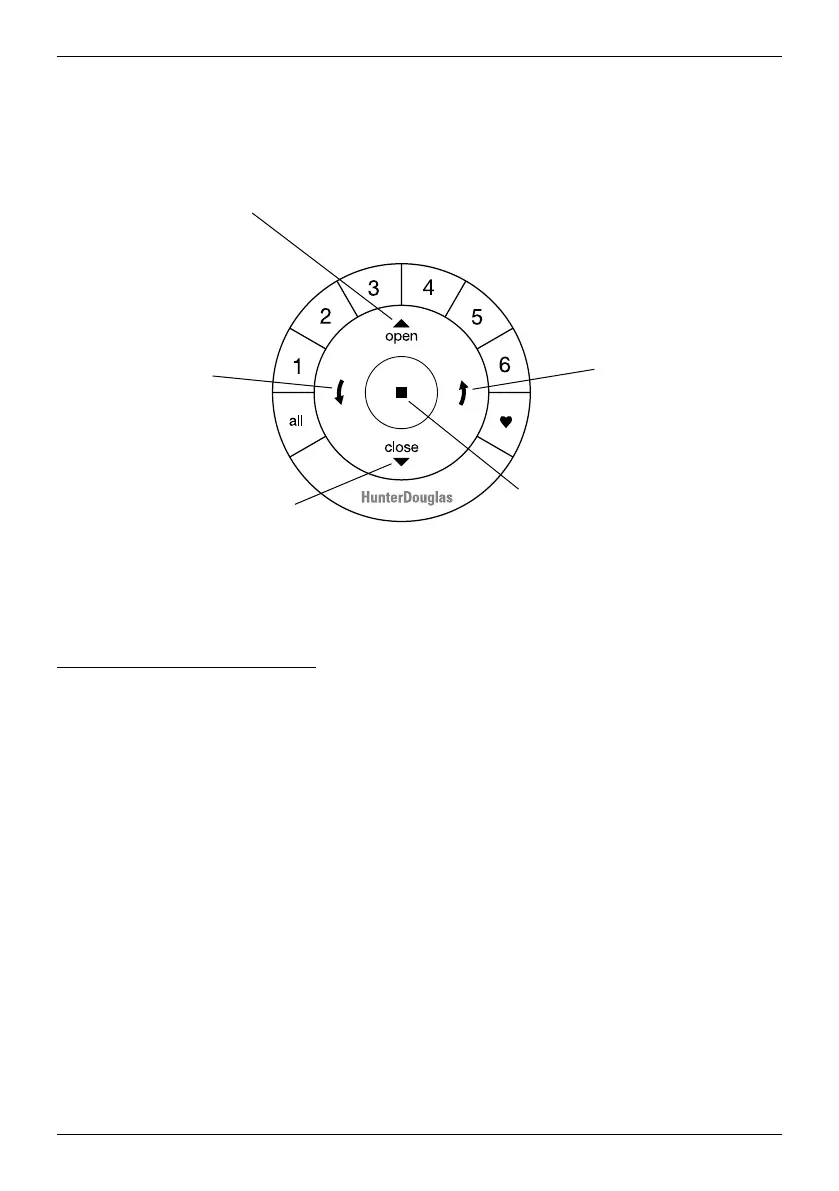
Refer to the illustration below to familiarise yourself with the controls on the remote. Activate the remote by
pulling both plastic tabs from the back battery compartment.
IMPORTANT: If you have more than one remote, see “Adding Additional Remote(s) to the PowerView
®
Shade Network” in the PowerView Motorisation Remote Control Guide.
Joining a Louvre Section to a Group
IMPORTANT: The louvre section will not operate using the remote until it has been joined to
a group.
NOTE: If multiple louvre sections must be joined to a group, it is recommended that they be in different
groups for individual operation, as well as in the same group for simultaneous operation. (Note that any
louvre section can belong to more than one group.) Louvre sections will also operate simultaneously if their
individual group buttons are selected, or the “all” button is selected.
1. Press and hold ■ STOP on the remote until the indicator lights blink (approximately 6 seconds). The
remote is now in program mode.
2. Press the desired group number (1 – 6) on the remote. The backlit group number will flash to show it is
selected.
3. While pressing the programming button on the rail with the corresponding louvre section, press ▲ OPEN
on the remote. The green light flashes once and the louvres will move slightly to indicate the louvre
section has joined the group. Release the programming button.
4. Press and hold ■ STOP on the remote until the indicator lights stop blinking (approximately 6 seconds).
Group 1
Group 2
OPEN
Tilt louvres
to the open,
horizontal
position
CLOSE
Tilt louvres to
the closed position
Group 3 Group 4
Group 5
Group 6
FAVOURITE
(Default set at 45 degrees open)
LEFT ARROW
Tilt louvres down
RIGHT ARROW
Tilt louvres up
STOP
(Press and hold for
programming mode)

 Loading...