Do you have a question about the LuxaFlex PowerView Motorisation and is the answer not in the manual?
Learn how smart shades enhance daily living.
Verify shades are installed and connected to their power source.
Locate all included components: Remotes, repeaters, and the optional Hub.
Designate a Source remote and begin pairing by following instructions.
Ensure all remaining "Target" remotes are successfully paired.
Perform sequence: Target reset, source STOP press, target STOP press, source STOP release.
Release target STOP button; if flashing persists, press and hold STOP again.
Understand remote group limits and find the shade's specific button.
Follow steps to associate a shade with group 1 on the remote.
Follow the sequence of STOP, GROUP 1, shade button, OPEN, and release actions.
Connect the USB cable to the power supply and Hub, then plug into an outlet.
Use the PowerView app for Wi-Fi or Ethernet connection to your home router.
Connect Repeater to outlet; AMBER LED indicates power but not network connection.
Avoid direct sunlight and limit to six repeaters per home unless advised.
Follow app instructions to pair the Repeater with the PowerView network.
Use STOP on remote near Repeater; check for BLUE blinking confirmation.
Pair Hub to existing network via app; transfer data if upgrading or replacing.
Use GROUP, OPEN, STOP, and CLOSE buttons to operate shades as needed.
Utilize STOP and FAVOURITE buttons on the remote to set a favorite position for shades.
Find the specific shade button on the window covering for adjustments.
Move shade, press STOP for 6s, hold shade button, press FAVOURITE, release shade button.
Press GROUP 1 then FAVOURITE to move shades to their pre-set favorite position.
Learn shade removal from group doesn't affect network, and which buttons to use.
Follow sequence of STOP, GROUP 1, shade button, and CLOSE to remove shade from its group.
Launch app, open menu, select Accessories, and follow instructions to install.
| Power Source | Battery |
|---|---|
| Frequency | 433.92 MHz |
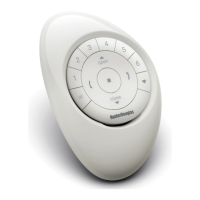
| Type | Remote Control |
| Technology | Radio Frequency (RF) |
| Operating Temperature | 0°C to 40°C |
| Control Range | Up to 30 meters (open space) |