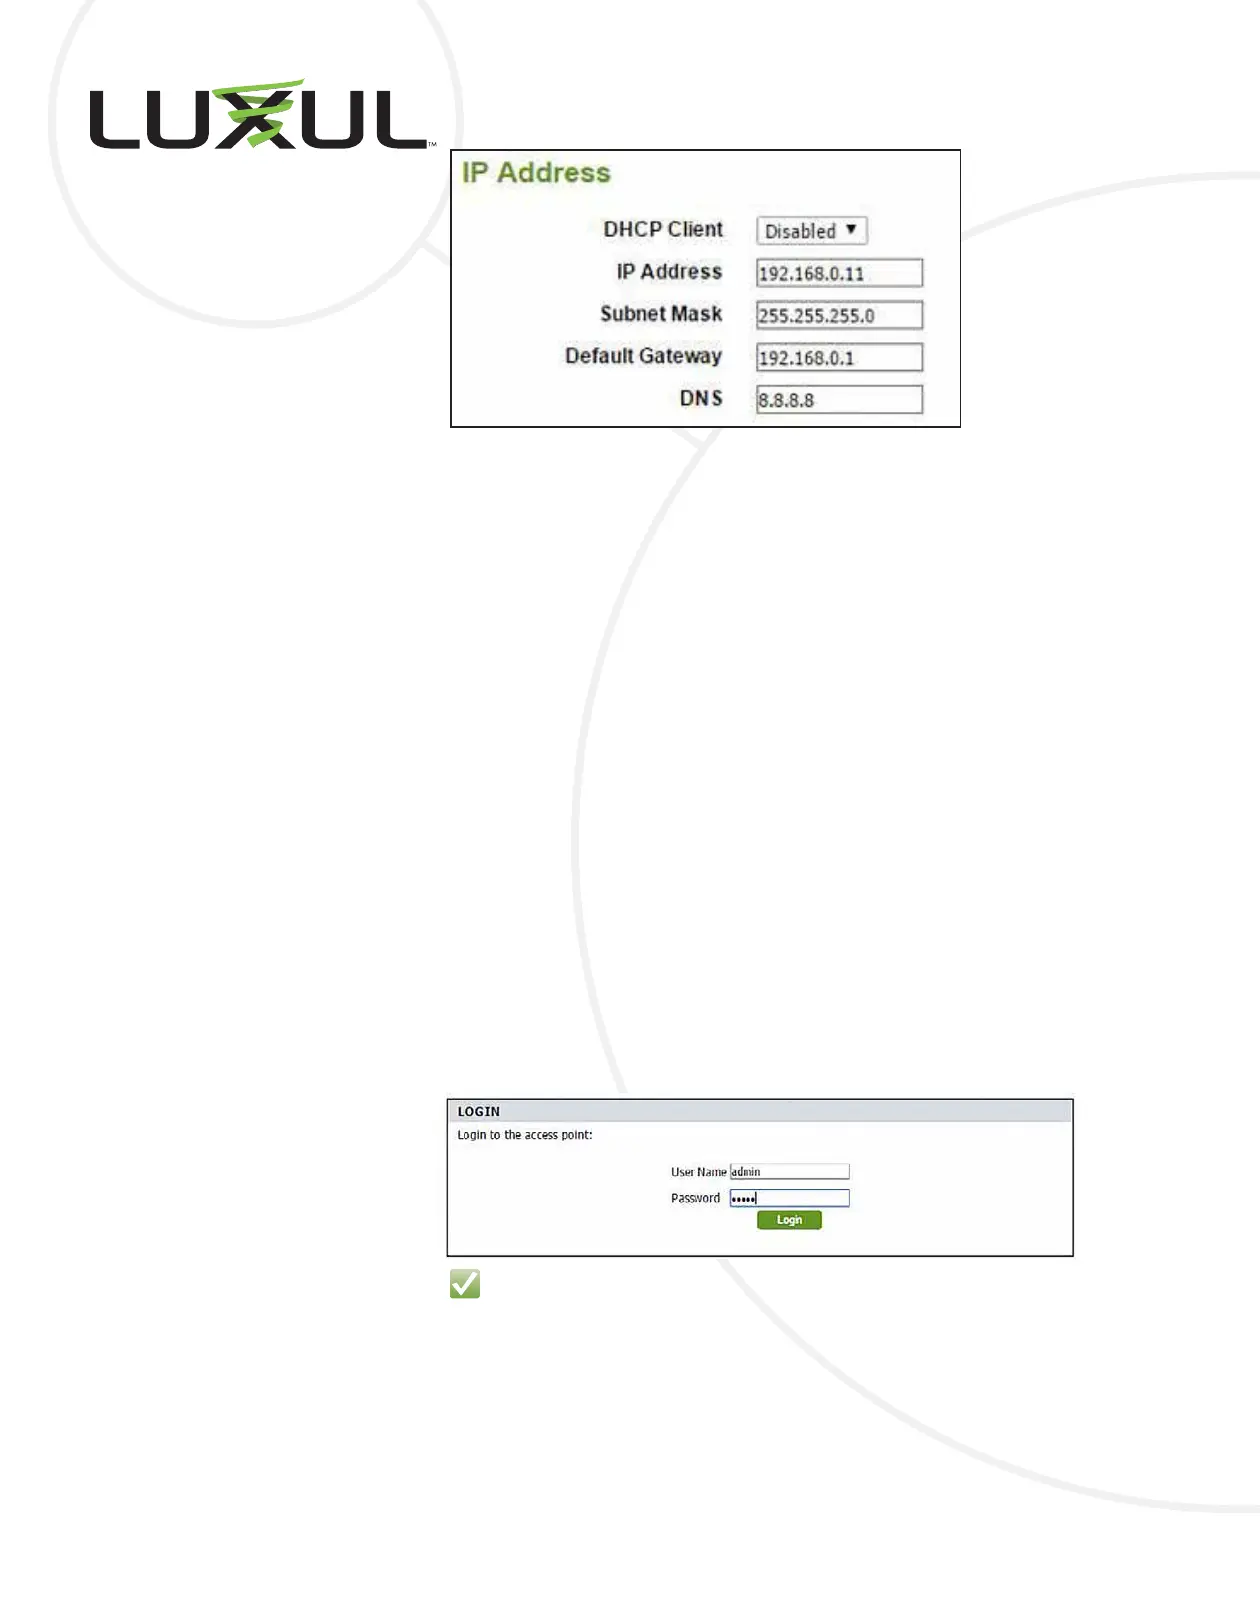
ASSIGN THE IP ADDRESS
The last conguration change to make on the REMOTE access point is the IP
address. Even if you are using the 192.168.0.X network scheme, you should still
change the IP address because any additional XWO-BAP1’s will use the same
default IP address. Choose an IP address unoccupied on the network so you can
manage it later.
Select the Quick Setup page and make the following changes:
1. Enter an unused IP Address on your network/management VLAN.
2. Conrm that the Subnet Mask is correct.
3. Enter the Default Gateway for the subnet the access point will occupy.
4. Enter the DNS Server the access point should use.
Alternately, you can change the DHCP Client from Disabled to Enabled to allow
the access point to use your DHCP server to acquire an IP address.
STEP 3: FINAL ROOT ACCESS POINT CONFIGURATION
With the REMOTE AP congured, you need to make one nal change to the
ROOT AP. Log back in to the ROOT access point and update the Remote AP
MAC Address to match the MAC address created by the REMOTE AP’s SSID.
Log in to the AP using the default “admin” for both User Name admin and Pass-
word, or your User Name and Password selections if you changed them.
SECURITY NOTE: You will be required to change the default administrator password.
Select Basic Settings and Wireless.
Change the Wireless Bandwidth to the Frequency that your wireless bridge will use.
In the WDS section, you should see the fake Remote AP MAC Address you
entered earlier. Highlight the entry and delete it.
In Site Survey, select the Scan button to scan for the MAC Address of the REMOTE AP.
 Loading...