EasyManuals Logo

Lynx Aurora User Manual

Lynx Aurora
30 pages
To Next Page IconTo Next Page
To Previous Page IconTo Previous Page
Page #18 background imageLoading...
Page #18 background image
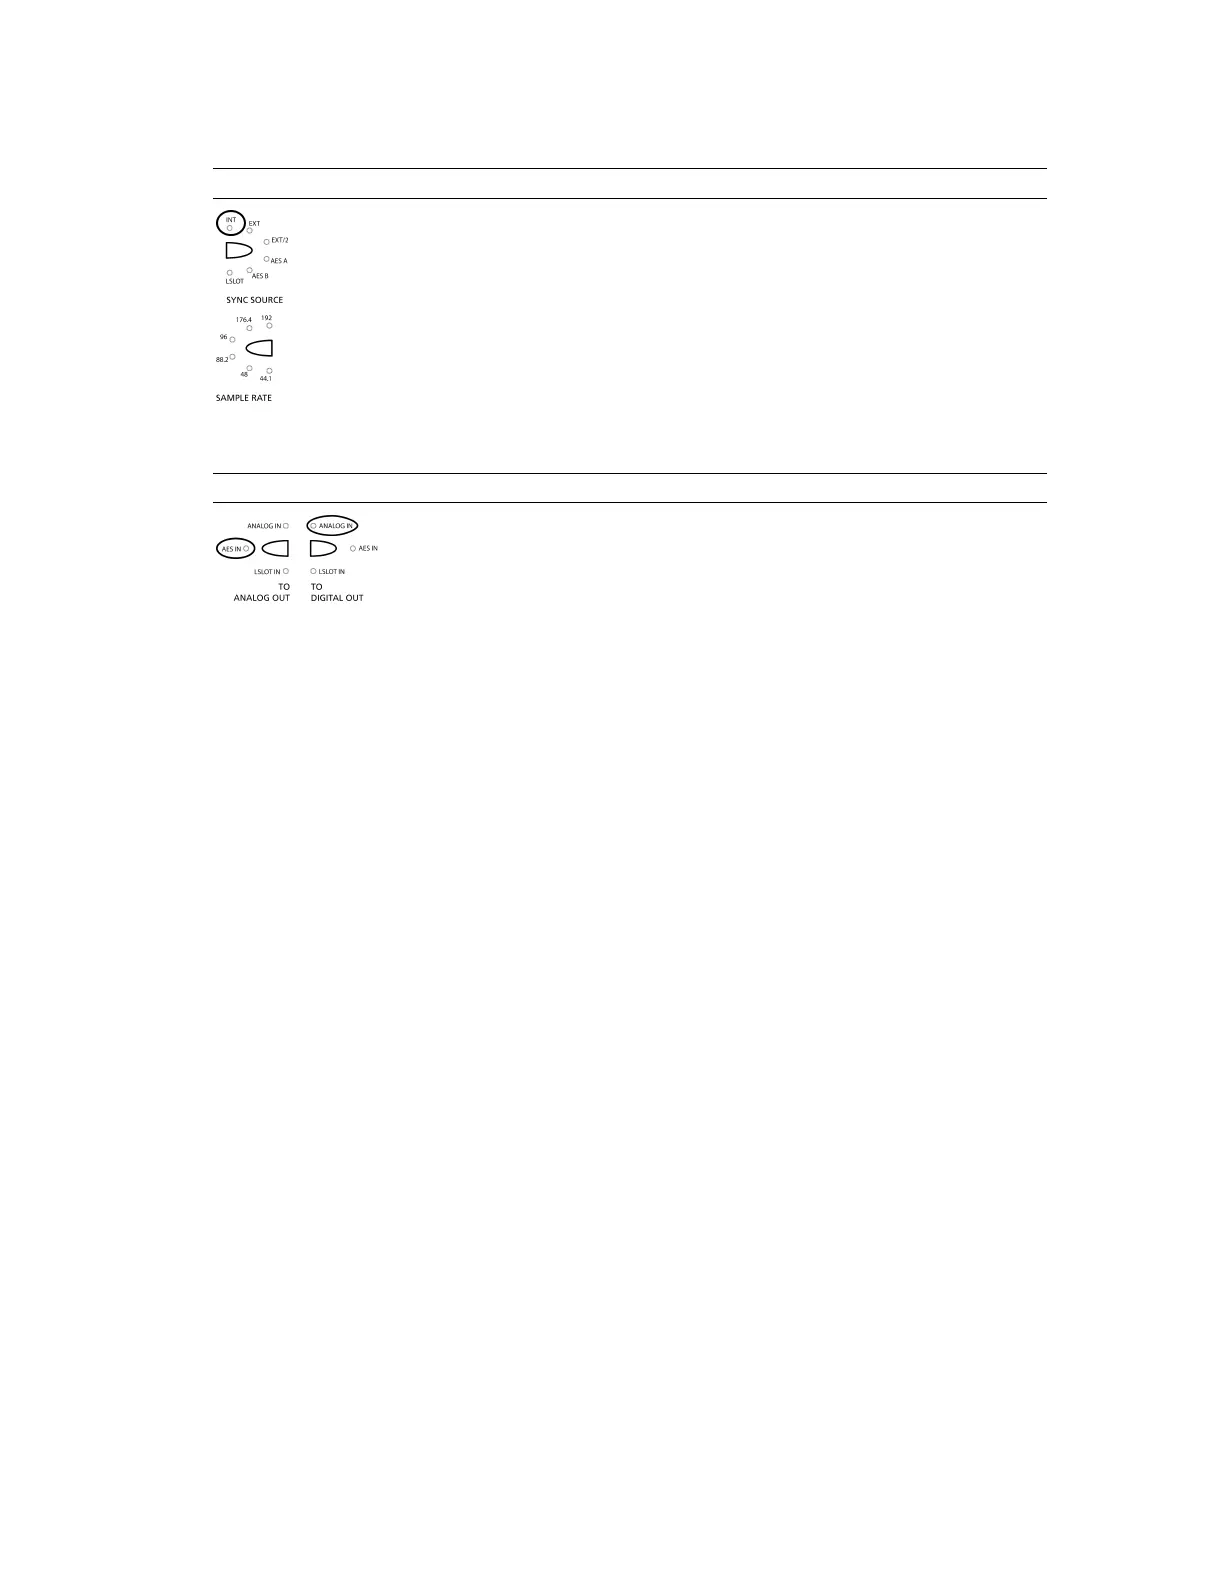
3.1.1 Clock settings
To use the Aurora as the clock master, select “INT” as the SYNC SOURCE from the Aurora
front panel.
Also, select the appropriate sample rate for your project. Make sure and only choose
sample rates supported by your mixer.
Change the clock source setting of the digital mixer to slave to one of its digital inputs.
3.1.2 Routing
In this instance, signals from the analog inputs should be routed to the digital
outputs for delivery to mixer channels. Similarly, the digital inputs providing
signals from the mixer should be routed to the Aurora’s analog outputs, which will
be connected to monitoring equipment.
Page 15

Questions and Answers:

Question and Answer IconNeed help?

Do you have a question about the Lynx Aurora and is the answer not in the manual?

Lynx Aurora Specifications

General IconGeneral
A/D Resolution24-bit
D/A Resolution24-bit
Channels8, 16, or 32
Sample Rates44.1kHz, 48kHz, 88.2kHz, 96kHz, 176.4kHz, 192kHz
Digital I/OAES/EBU, ADAT, S/PDIF
Clock I/OWord Clock
Power SupplyInternal
Dimensions1U rackmount
ConnectivityUSB

Related product manuals