P a g e | 14
Once the wireless wall switch has been successfully programmed, repeat the process with the touch screen remote
control. Once again, press the LEARN button on the receiver. Release the LEARN button. You will now hear a single beep.
Now push the lower, center MODE SET button on the transmitter until the word ‘ON’ is displayed in the upper left hand
corner. Once the code is accepted, you will hear four beeps in rapid succession. You should also hear the pilot sparking
rapidly. This confirms that the signal has been received, and your programming was successful. Press the mode button
until ‘OFF’ is displayed at the top right side of the screen. Re-confirm proper functioning by turning the transmitter back
to ‘ON’ and listening for rapid sparking of the pilot. Once confirmed, press the mode set button until ‘OFF’ appears, to
shut the system off.
Replace the plastic cap over the LEARN BUTTON access hole. Replace the louvered end plate over the open end of the
heater and tighten the two screws.
Refer to the section ‘TOUCH SCREEN REMOTE CONTROL OPERATION’ to learn more about the remote operations that
are possible with your Lynx Heater.
BASIC OPERATION OF YOUR HEATER
Your new Lynx Eave Mount Patio Heater has been designed with cutting edge technology and easily operates with either
the manual ON-OFF-HI-LOW wall switch or with the use of a touch screen remote control. Please study the section of
this manual entitled ‘Remote Control Operation’ to allow a full understanding of the heater’s capabilities.
Manual Operation
1. TURN THE GAS ON. If this is a Natural Gas (NG) installation, turn the manual shut-off valve lever ¼ turn so that
the lever is parallel and in-line with the gas line. If this is a Liquid Propane (LP) installation, open the gas cylinder
valve by a minimum of one full turn, and if connected to the Lynx LQD-EM, turn the in-line valve lever by ¼ turn
so that the lever is parallel and in-line with the gas line.
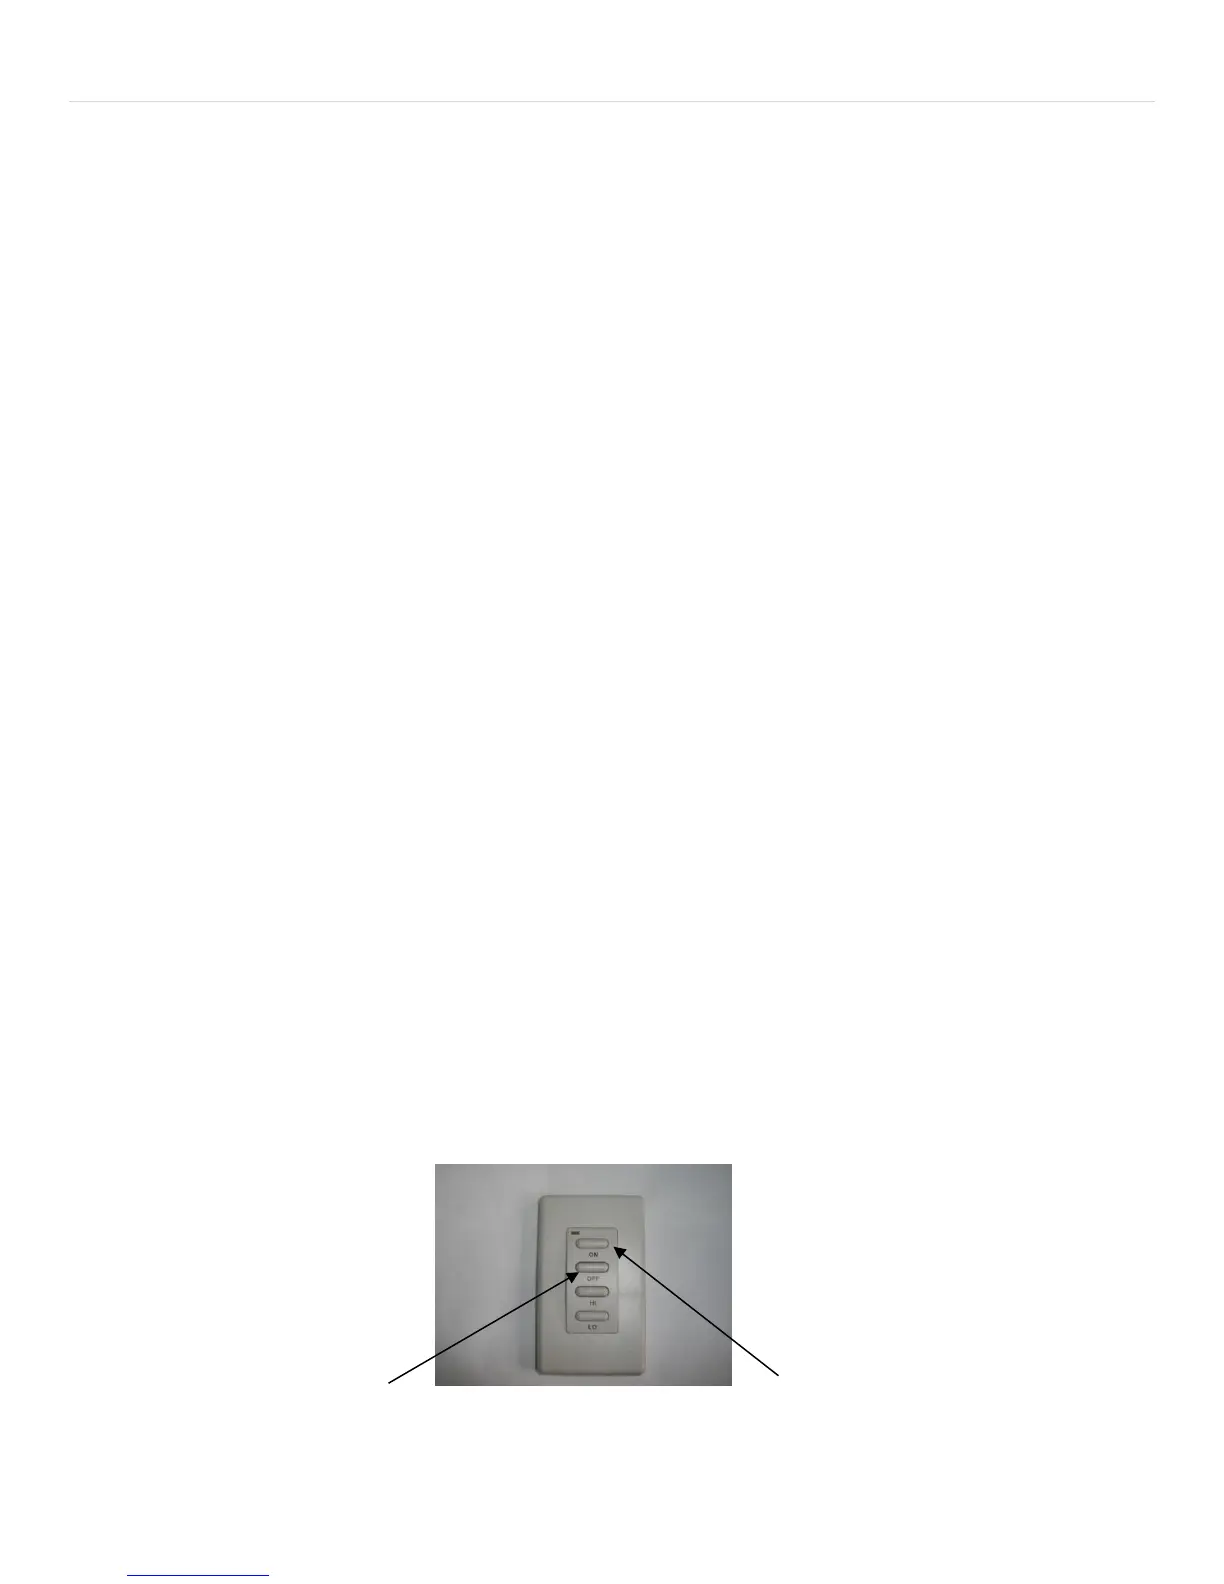
2. At the wall switch, push the ‘ON’ button, and listen for the pilot to spark rapidly. After the pilot sparks, you will
hear the small pilot flame ignite. Shortly after that, you will hear the main burner of the heater ignite. When
using the wall switch, the heater will light on ‘HIGH’ regardless of the previous setting when it was turned off.
Allow the heater to warm up for a few seconds, and then press the ‘LO’ button to adjust the heat downward.
Each press of the button will lower (or raise) the heat level by one increment. If you hold the ‘HI’ button
continuously, the heat level will advance more rapidly. Likewise, when you press the ‘LO’ button , the heat will
become lower by one increment, and by pressing the ‘LO’ button continuously, the heat level will decrease more
rapidly. Push the “OFF’ button when finished using the heater.
‘OFF’ Button ‘ON’ Button
3. IMPORTANT NOTE: When the heater is being lit for the first time after installation, or after hooking up a gas line for
the first time, the gas lines will need to purge themselves of the air to fill with gas. Depending on the length of gas
lines, this may take a few minutes or possibly more. The spark ignition system is designed to spark for 1 minute, and
 Loading...