P a g e | 3
A minimum pipe size of ½” is required for inlet piping. The supplied exit coupling of this heater is ½”NPT (female). A ½”
leaver-handled, manual gas shut-off valve should be installed within 6 feet of the appliance to allow emergency gas
shut-off and provide isolation for servicing.
All gas pipe connections to the heater must be sealed with gas pipe compound or Teflon sealing tape. Prior to use, the
gas supply line should be checked for leaks by applying a mild solution of soap and water. Never use an open flame to
check for leaks. See section titled ‘Checking for Gas Leaks’ on page 10.
Keep all gas supply lines as short as possible because gas lines lose pressure over distance. Additionally, each ‘T’ or
elbow that is added to the line can also reduce pressure. This drop in pressure can affect overall heater performance.
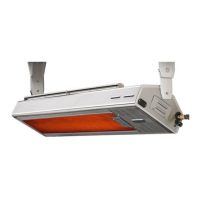
IMPORTANT NOTE: There is a pressure tap built into the valve system used on the Lynx Eave Mount Patio Heater. To
access this tap, remove the 2 screws which hold the louvered plate on the END CAP of the heater. Remove this plate
and look for the 2 smaller, slotted, brass screws. The uppermost screw is the OUTLET pressure (as seen when the
heater is pointed downward). The lower screw is the INLET pressure. To access either inlet for taking measurements,
turn the screw until it becomes loose. It will not fall out, as, it is captivated in the valve. Be sure to re-tighten screw
after pressure measurements have been taken.
A typical gas supply line might consist of ½” piping beginning at the gas supply source. This line will be routed, within the
shortest possible distance, up to the vicinity of the heater location (30 Ft. MAX). This line, as previously mentioned, will
have a ½” lever- handled gas shut-off valve installed in-line, and within 6-feet of the termination point. After final heater
positioning and mounting angle is created, the pipe line is then routed directly to the ½” NPT (female) coupling at the
end of the heater. As an alternate to this installation, after the gas line has been routed to the vicinity of the heater, and
after final positioning and pivot angle has been determined, a short gas flex line can be installed from the end of the
hard pipe to the ½” NPT (female) coupling on the heater. This flex line should be 1/2” I.D. (5/8” O.D.), Stainless Steel,
with ½”MIP fittings at both ends. A ½” FIP coupling will then be used to connect the flex line to the hard pipe. The use of
this flex line allows for additional angle (pivot) adjustment of the heater after installation has been complete.
All gas connections must be made by a qualified technician, specifically trained in the installation of this type of gas
appliance. Some states or provinces require this trained personnel be licensed. Installations must be performed in
accordance with local codes, or in the absence of local codes, the regulations governed by that state or province.
ELECTRICAL SUPPLY SPECIFICATIONS AND CONNECTIONS
Touch Screen Remote Control- 6.0 V (four 1.5 V AAA batteries) supplied
Radio Frequency (Remote Control and Receiver) – 303.8 MHz
Heater Battery Supply- 6.0 V (four 1.5V AA batteries) supplied
Receiver Module – powered by battery supply and/or AC Adaptor
Valve and Pilot- rated @ 3 V DC
AC/DC Adaptor (Transformer)-Input AC 100-240V-0.3A, 60/50Hz Output 7.5V ---1000mA 10W Max, cord length -24 in
NOTE: If the AC/DC Transformer (Lynx P/N 33937) is NOT being used, then there is no preliminary electrical preparation
required. If the transformer IS going to be used, then there must be electrical considerations. A GFI protected, 110 V
grounded electrical power outlet must be placed within 24 inches of the end, DC jack receptacle on the heater.
 Loading...