8
9. App Volume and Device Preferences (Windows 10), and Sound and Volume mixer (Windows 11), next to the game
that you are running, select the Output dropdown and select Game (M-Audio M-Game Solo). Once this has been
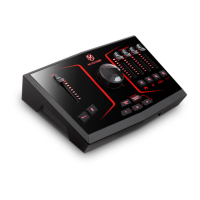
selected, your game's audio level will be controlled by the Game fader on your M-Game.
10. Select these additional routing options from the Output dropdown in the App Volume and Device Preferences:
a. Chat app (Discord, etc.): Select CHAT (M-Audio M-Game Solo) to route Chat’s audio to the Chat fader.
Important: If you're using a Chat application like Discord, set the Audio Input to Chat and Output to Chat. This will
ensure that your Chat audio is sent to the M-Game Solo's Chat fader, and that your Mic is only sent to the Chat.
b. Music: Select SYSTEM (M-Audio M-Game Solo) to route music program audio to the System/Aux fader.
Note: You can route additional computer audio sources to the SYSTEM channel if you would like to control
additional streams of software audio.
11. Open your streaming/broadcast software, such as OBS used in the example below.
12. OBS, in the File > Settings menu, select the Audio tab.
a. Under Global Audio Devices set Desktop Audio to Disabled, set Desktop Audio 2 to Disabled.
b. Set Mic/Auxiliary Audio to STREAM L/R (M-Audio M-Game Solo Stream). Make sure that Mic/Auxiliary 2, 3, and 4
are all set to Disabled.
c. In Advanced, set Monitoring Device to Default. Click Apply and OK.
13. Check OBS or other software you're using to record to make sure that your individual signals (Mic, Game, Chat,
Sampler, and System) signals aren't clipping (going into the red) and are balanced. An easy way to check this is by
pressing all of the Mute buttons on the M-Game hardware and turning up the fader levels one at a time, first checking
the mic level, as that's what you want your viewers to hear loudest, then proceed with the other M-Game faders.
Note: The optimal level in OBS is in the yellow area (between -15 dB and -10 dB).
14. Start your stream and have fun!

 Loading...