8
ASSEMBLY
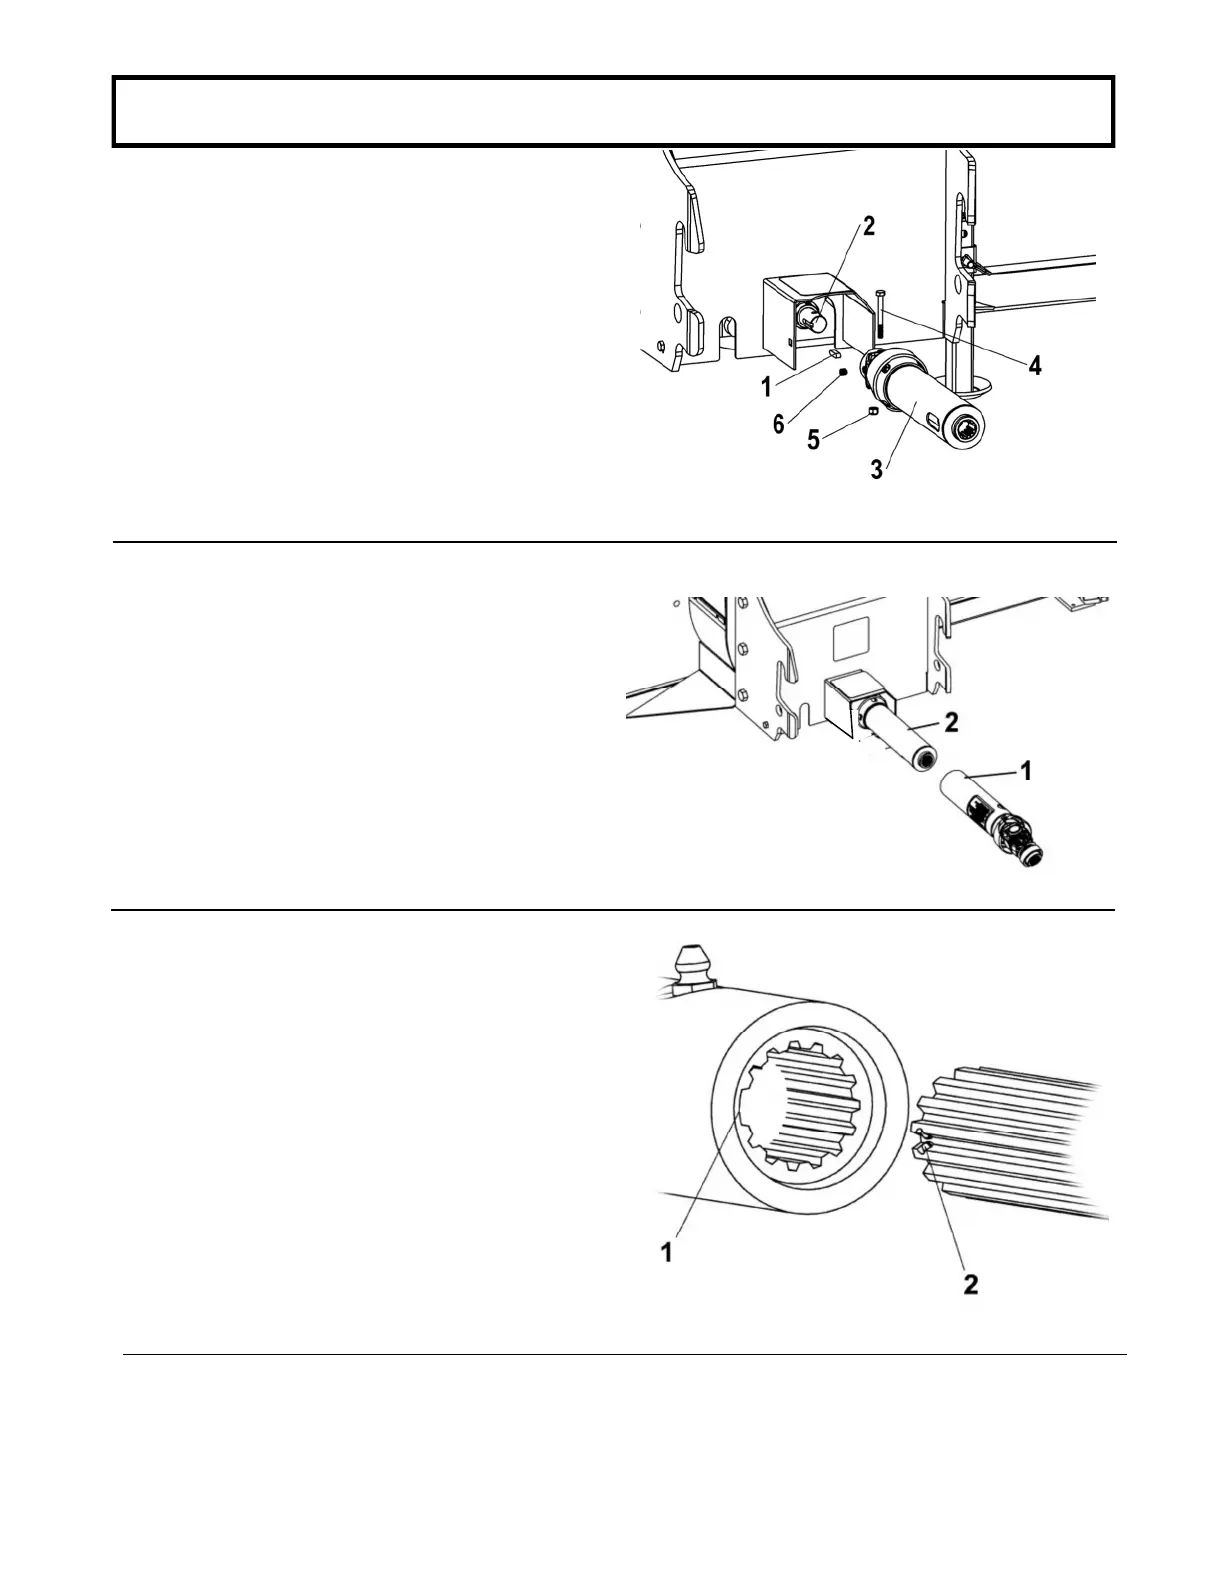
NOTE: To facilitateinstallation, turnthe snowblower
facedown.
Insertthe1/4’’key(item1)ontheinputshaft(item2).
Slidethehalfdriveline(item3)ontheinputshaftuntil
theholeinthedrivelinelinesupwiththeholeinthe
inputshaft.Secureinplacewiththe1/4’’x21/2’’hex
bolt(item4)andnyloninsertlocknut(item5).Tighten
firmly.
Securethekeyinplacewiththe3/8’’setscrew(item
6) and torque at 317 lbf
-
in using thread locking
sealant.
Installdriveline
Assemblethehalfdrivelines(item1&2)makingsure
thegroovesarewellaligned.
Assemblethehalfdrivelines
Install the male section of the driveline into the
snowblower’s driveline by aligning the stamped mark
(item2) (located betweenthesplinesattheendofthe
shaft)withthelargegroove(item1)inthehollowtubeof
thesnowblower’sshaft.
NOTE: Only one position allows the shafts to be
insertedoneintotheother.
IMPORTANT: Incorrect assembly of the drivelines will
causevibrationswhichwilldiminishtheeffectivenessof
theaccessoryanddamagethecomponents.
Followtheinstructionsinthesubframeowner’smanualfortractorpreparation,subframepreparationandsubframe
installation. The installation instructions for the accessories and the drive mechanism are included in subframe
Owner’smanual..
 Loading...