8
ASSEMBLING THE MOWER & HITCHING TO TRACTOR
Handle all the heavy parts with a hoist whose capacity is greater than the load to be hoisted. Make sure all the
units and parts are supported by suitable harnesses and hooks. Make sure there is no one near the load to be
hoisted. Handle all the parts with care. Never put your hands or fingers between the parts. Always wear
approved accident prevention gear. Make sure the tools supplied with the machine are in good working order.
Never use tools with upset or deformed heads. After the machine has had a part dismounted and then
remounted, it must be tested to check the new part has been mounted correctly.
The mower may be supplied in a variety of ways:
1) mower with rear discharge;
2) mower with side discharge;
3) mower with rear discharge and side discharge transformation kit;
4) mower with side discharge and rear discharge transformation kit;
5) mower-machine base and transformation kit for both side and rear
discharge versions.
Important: The user is responsible for the following:
• the assembly of the separate pieces;
• transforming the machine from rear to side discharge versions or vice versa.
The operator responsible must have the necessary skills and background to carry out the operations required
correctly and safe
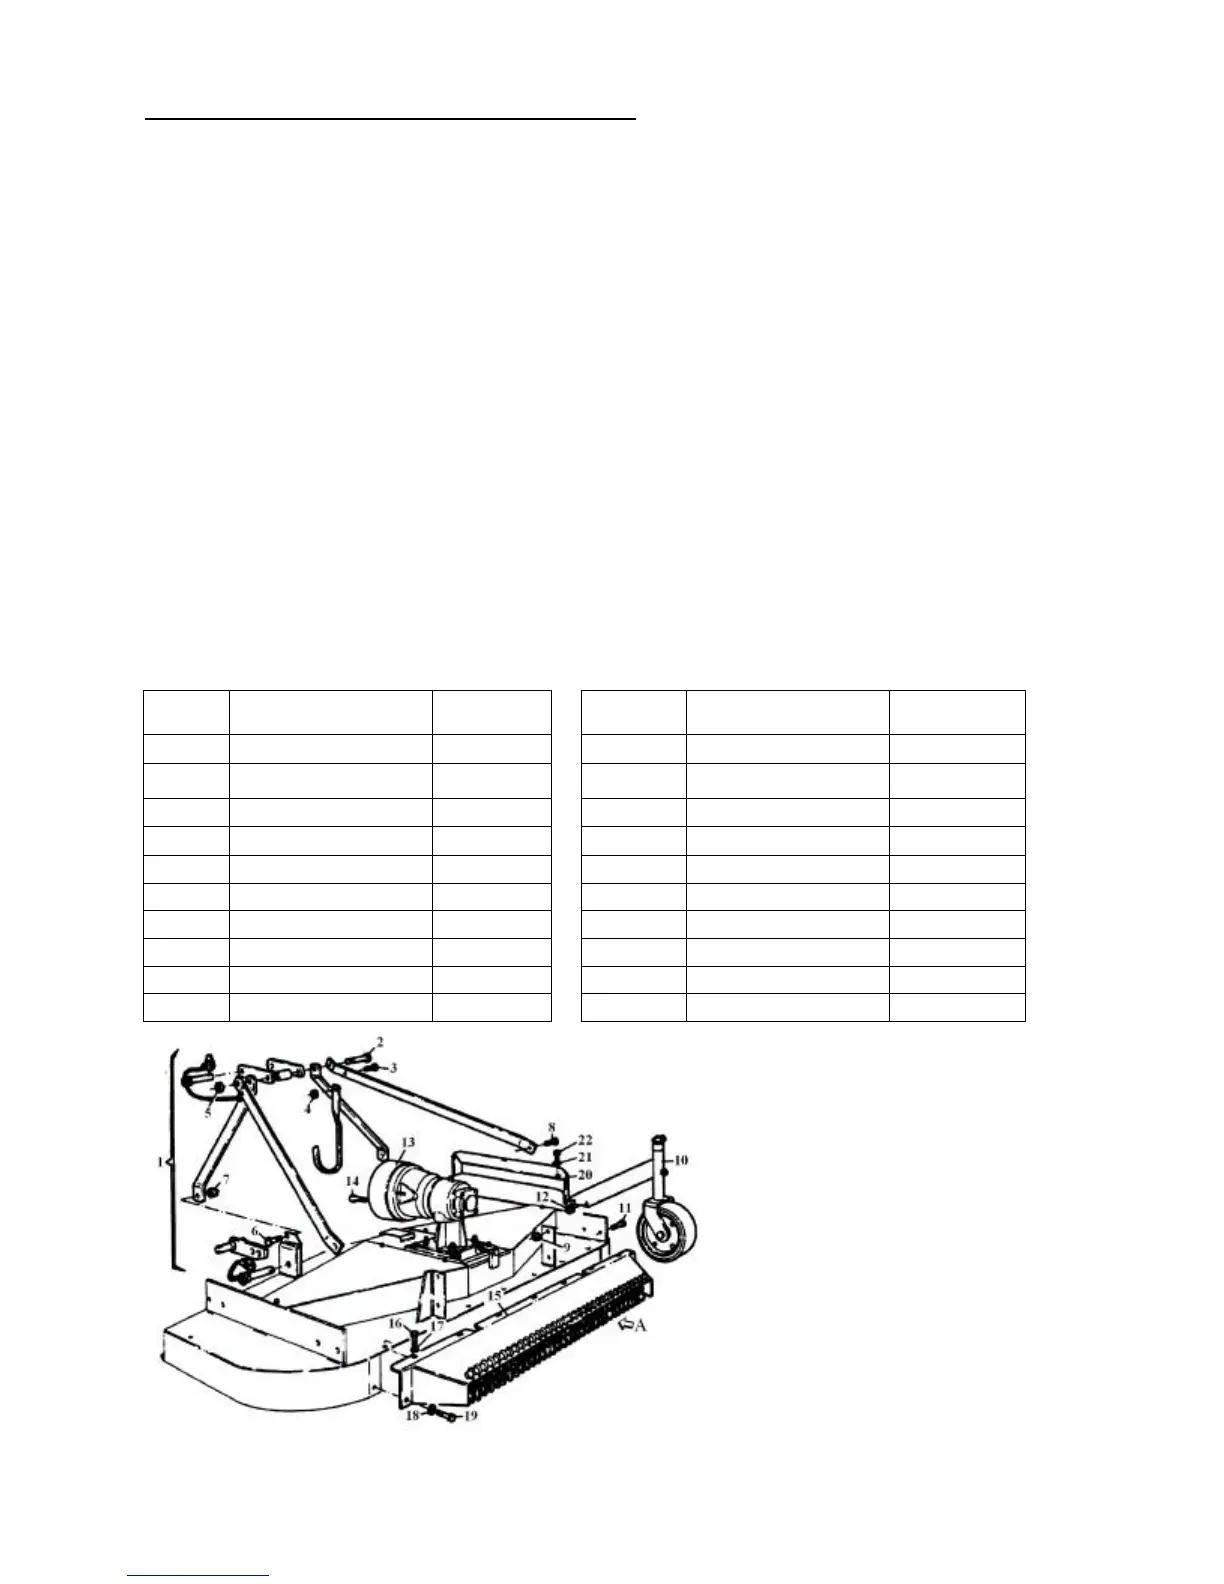
Assembling the Mower – With Rear Discharge Unit
Ref No Description Ref No Description
1
Three point
attachment 12 M12 Nut - Auto Lock
2 M12 x 20 Screw (UNI 5737) 13 Guard
3 M10 x 30 Screw (UNI 5739) 14 M8 x 20 Screw (UNI 5739)
4 M10 Nut 15 Conveyor
5 M12 Nut - Auto Lock 16 M10 x 20 Screw (UNI 5739)
6 M12 x 35 Screw (UNI 5739) 17 Washer M10
7 M12 Nut - Auto Lock 18 Washer M10
8 M12 x 35 Screw (UNI 5739) 19 M10 x 20 Screw (UNI 5739)
9 M12 Nut - Auto Lock 20 Guard
10 Wheel with support 21 Washer M10
11 M12 x 40 Screw (UNI 5739) 22 M10 x 20 Screw (UNI 5739)
Mount the three-point attachment "1"
on the machine base using the
relative screws, nuts and pins
• Mount the guard 13 using the screws
"14".
• Mount the four wheels "10" using the
screws "11 " and the nuts "12".
• Mount the conveyor "15" using the
screws "16" and "19" and the
washers "17"and "18". Fig. 5.1
WARNING: Make sure all the guard chains
"A " are mounted in the correct position.
Mount the guard "20" using the screws "22"
and the washers "21"