17 ENGLISH
WIRELESS ACTIVATION
FUNCTION
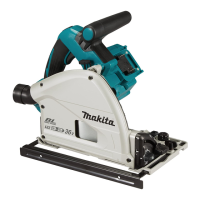
For DSP601 only
What you can do with the wireless
activation function
Thewirelessactivationfunctionenablescleanandcom-
fortableoperation.Byconnectingasupportedvacuum
cleaner to the tool, you can run the vacuum cleaner
automaticallyalongwiththeswitchoperationofthetool.
►Fig.33
Tousethewirelessactivationfunction,preparefollow-
ing items:
• Awirelessunit(optionalaccessory)
• Avacuumcleanerwhichsupportsthewireless
activationfunction
Theoverviewofthewirelessactivationfunction
settingisasfollows.Refertoeachsectionfordetail
procedures.
1. Installing the wireless unit
2. Toolregistrationforthevacuumcleaner
3. Startingthewirelessactivationfunction
Installing the wireless unit
Optional accessory
CAUTION: Place the tool on a at and stable
surface when installing the wireless unit.
NOTICE: Clean the dust and dirt on the tool
before installing the wireless unit. Dust or dirt
maycausemalfunctionifitcomesintotheslotofthe
wireless unit.
NOTICE: To prevent the malfunction caused by
static, touch a static discharging material, such
as a metal part of the tool, before picking up the
wireless unit.
NOTICE: When installing the wireless unit,
always be sure that the wireless unit is inserted
in the correct direction and the lid is completely
closed.
1. Openthelidonthetoolasshowninthegure.
►Fig.34: 1. Lid
2. Insert the wireless unit to the slot and then close
the lid.
Wheninsertingthewirelessunit,aligntheprojections
with the recessed portions on the slot.
►Fig.35: 1. Wireless unit 2.Projection3. Lid
4. Recessed portion
When removing the wireless unit, open the lid slowly.
Thehooksonthebackofthelidwillliftthewirelessunit
as you pull up the lid.
►Fig.36: 1. Wireless unit 2. Hook 3. Lid
Afterremovingthewirelessunit,keepitinthesupplied
caseorastatic-freecontainer.
NOTICE: Always use the hooks on the back of
the lid when removing the wireless unit.Ifthe
hooks do not catch the wireless unit, close the lid
completely and open it slowly again.
Tool registration for the vacuum
cleaner
NOTE:AMakitavacuumcleanersupportingthe
wirelessactivationfunctionisrequiredforthetool
registration.
NOTE: Finish installing the wireless unit to the tool
beforestartingthetoolregistration.
NOTE: During the tool registration, do not pull the
switch trigger or turn on the power switch on the
vacuum cleaner.
NOTE:Refertotheinstructionmanualofthevacuum
cleaner, too.
Ifyouwishtoactivatethevacuumcleaneralongwith
theswitchoperationofthetool,nishthetoolregistra-
tionbeforehand.
1. Install the batteries to the vacuum cleaner and the
tool.
2. Set the stand-by switch on the vacuum cleaner to
"AUTO".
►Fig.37: 1. Stand-by switch
3. Press the wireless activation button on the vac-
uumcleanerfor3secondsuntilthewirelessactivation
lampblinksingreen.Andthenpressthewirelessacti-
vation button on the tool in the same way.
►Fig.38: 1. Wireless activation button 2. Wireless
activation lamp
Ifthevacuumcleanerandthetoolarelinkedsuccess-
fully,thewirelessactivationlampswilllightupingreen
for2secondsandstartblinkinginblue.
NOTE:Thewirelessactivationlampsnishblinking
ingreenafter20secondselapsed.Pressthewireless
activation button on the tool while the wireless acti-
vationlamponthecleanerisblinking.Ifthewireless
activation lamp does not blink in green, push the wire-
lessactivationbuttonbrieyandholditdownagain.
NOTE:Whenperformingtwoormoretoolregistra-
tionsforonevacuumcleaner,nishthetoolregistra-
tion one by one.
Starting the wireless activation
function
NOTE:Finishthetoolregistrationforthevacuum
cleaner prior to the wireless activation.
NOTE:Refertotheinstructionmanualofthevacuum
cleaner, too.
Afterregisteringatooltothevacuumcleaner,the
vacuum cleaner will automatically runs along with the
switchoperationofthetool.
1. Install the wireless unit to the tool.
2. Connectthehoseofthevacuumcleanerwiththe
tool.
►Fig.39
 Loading...