Do you have a question about the Makita DTD146 and is the answer not in the manual?
Details tool models DTD134/DTD146, capacities, speed, weight, and voltage.
Defines the tool's primary purpose for screw driving in wood, metal, and plastic.
Provides A-weighted noise levels (sound pressure and power) for DTD134 and DTD146.
Lists vibration emission values (an) for DTD134 and DTD146 during impact fastening.
Covers keeping the area clean, avoiding hazardous atmospheres, and managing distractions.
Details precautions related to power sources, plugs, grounding, and wet conditions.
Emphasizes alertness, use of PPE, preventing unintentional starts, and maintaining balance.
Specific instructions for handling battery packs, including charging and storage safety.
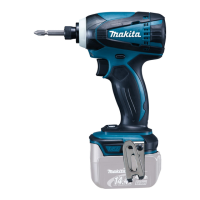
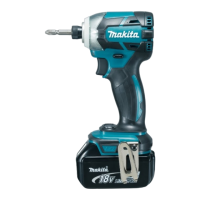
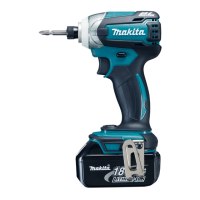
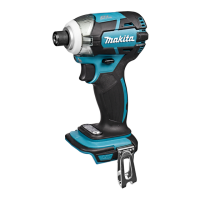
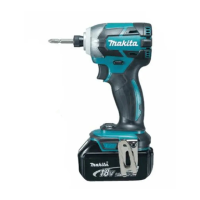
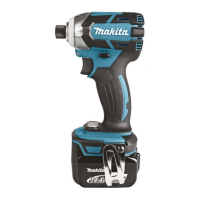
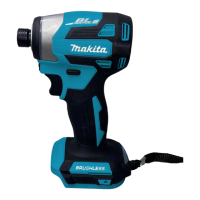
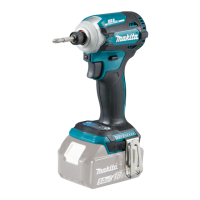
This document outlines the operation, features, and maintenance of the Makita Cordless Impact Driver models DTD134 and DTD146.
The Makita Cordless Impact Driver is a power tool designed for screw driving in wood, metal, and plastic. It operates on a battery cartridge and features an impact mechanism for efficient fastening. The tool includes a switch trigger for controlling speed, a reversing switch for changing rotation direction, and a front lamp for illuminating the work area. It is equipped with a battery protection system to ensure long service life for compatible battery cartridges.
Battery Cartridge Installation/Removal: To install the battery cartridge, align the tongue on the cartridge with the groove in the tool's housing and slide it in until it locks with a click. A red indicator will not be visible when properly locked. To remove, slide the button on the front of the cartridge and pull it out. Always ensure the tool is switched off before installing or removing the battery.
Switch Action: The tool is activated by pulling the switch trigger. The speed of the tool increases with greater pressure on the trigger. Releasing the trigger stops the tool. Always ensure the switch trigger actuates properly and returns to the "OFF" position when released, before installing the battery cartridge.
Front Lamp: Pulling the switch trigger activates the front lamp, which remains lit while the trigger is pulled. It automatically turns off 10-15 seconds after the trigger is released. Avoid looking directly into the light source.
Reversing Switch Action: The tool features a reversing switch to change the direction of rotation. Depress the lever from the 'A' side for clockwise rotation or from the 'B' side for counterclockwise rotation. The switch trigger cannot be pulled when the lever is in the neutral position. Always check the direction of rotation before operation and ensure the tool comes to a complete stop before changing direction to prevent damage. When not in use, set the lever to the neutral position.
Empty Signal for Remaining Battery Capacity: To check the remaining battery capacity, stop the tool and press the button on the switch panel. LED indicators will display the approximate remaining charge:
Battery Protection System: For battery cartridges with a star mark, a protection system automatically cuts off power if the tool or battery overheats, if battery cells get hot, or if the remaining battery capacity is low. If this occurs, release the switch trigger, remove the battery, address the cause (e.g., cool down, charge), and then restart.
Driver Bit/Socket Bit Installation/Removal: For tools with a deep bit hole, pull the sleeve and insert the bit (and bit-piece if necessary, pointed end facing in) as far as it will go, then release the sleeve to secure. For tools with a shallow bit hole, a bit-piece is not necessary; simply insert the bit. Ensure the bit is firmly secured after installation. To remove, pull the sleeve and pull the bit out.
Hook: A hook is provided for temporarily hanging the tool. It can be installed on either side of the tool by inserting it into a groove and securing it with a screw.
Fastening Operation: Hold the tool firmly and place the driver bit in the screw head. Apply forward pressure to prevent the bit from slipping and then turn the tool on. Use the proper bit for the screw/bolt head. For smaller screws (M8 or less), carefully adjust trigger pressure to avoid damage. Hold the tool straight at the screw. Prolonged tightening beyond the recommended time can overstress or damage the screw or bit. Always perform a test operation to determine the proper fastening time for your specific screw. If using a spare battery, allow the tool to rest for at least 15 minutes. The fastening torque is influenced by battery charge, driver bit size, and bolt characteristics (diameter, torque coefficient, class, and length). Always verify torque with a torque wrench after fastening.
General Maintenance: Always ensure the tool is switched off and the battery cartridge is removed before performing any inspection or maintenance. Do not use gasoline, benzine, thinner, alcohol, or similar substances, as they can cause discoloration, deformation, or cracks.
Replacing Carbon Brushes: Carbon brushes should be replaced when they wear down to the limit mark. Both brushes should be replaced simultaneously with identical replacements.
Battery Cartridge Maintenance Tips:
| Voltage | 18V |
|---|---|
| Max Torque | 160 Nm |
| No Load Speed | 0 - 2, 300 RPM |
| Impacts per Minute | 0 - 3, 200 IPM |
| Battery Type | Lithium-Ion |
| Weight | 1.5 kg |
| Drive Shank | 1/4" Hex |
| Tool Length | 138 mm |
| LED Light | Yes |