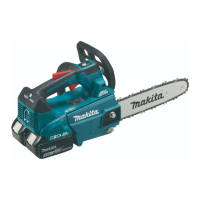
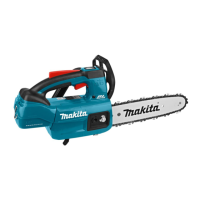
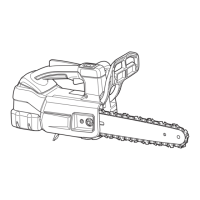
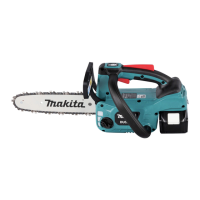
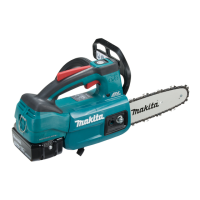
This document provides an instruction manual for the Makita Cordless Chain Saw models DUC256, DUC306, DUC356, DUC406, and DUC256C. It covers functional descriptions, usage features, and maintenance instructions to ensure safe and effective operation of the tool.
Functional Description
The Makita Cordless Chain Saw is designed for cutting branches and pruning trees, and is also suitable for tree service. It is equipped with several electronic functions for easy operation, including constant speed control, which provides a consistent rotation speed regardless of load conditions.
The tool features a battery indicator that allows users to check the remaining battery capacity by pressing a check button. The indicator lamps light up for a few seconds, showing the battery status in increments (75-100%, 50-75%, 25-50%, 0-25%, and charge the battery). If the battery has malfunctioned, a specific indication will appear.
A main power switch controls the tool's operation. To turn it on, the main power switch is pressed until the main power lamp lights up in green. To turn it off, the switch is pressed again. The tool also incorporates an auto power-off function to prevent unintentional start-up; if the switch trigger is not pulled for a certain period after the main power switch is turned on, it will automatically shut down.
The chain saw is equipped with a lock-off lever to prevent unintended starting. To start the tool, the lock-off lever must be depressed before pulling the switch trigger. The tool's speed increases with increased pressure on the switch trigger, and releasing the trigger stops the tool.
For demanding tasks, the tool offers a Torque Boost mode, which can be used for cutting thick or hard branches for up to 60 seconds. This mode is activated by pressing the main power switch for a few seconds until the mode indicator lights up in green when the tool is off. However, this mode may not be available immediately after cutting operations or if used multiple times in a row, to protect the battery.
The tool incorporates a comprehensive tool/battery protection system that automatically cuts off power to the motor under certain conditions to extend tool and battery life. This includes overload protection, which stops the tool if it draws abnormally high current, with the main power lamp blinking green. Overheat protection stops the tool if it or the battery overheats, indicated by the main power lamp lighting up in red. Overdischarge protection stops the tool if the battery capacity is insufficient, also indicated by the main power lamp blinking red.
The chain lubrication system automatically lubricates the saw chain during operation. The oil pump feed rate can be adjusted in three steps using an adjusting screw and a universal wrench, accessible by opening a cap. The oil tank has an inspection window to check the remaining oil level.
For user safety, the tool includes a chain brake and a run-down brake. The chain brake is activated by pushing the front hand guard forward, bringing the saw chain to an immediate standstill. The run-down brake ensures the saw chain stops within two seconds after the switch trigger is released.
A carabiner (rope attachment point) is provided for hanging the tool, allowing it to be secured with a rope. The tool is also equipped with a spike bumper as standard, which can be engaged with a tree trunk to act as a lever during cutting operations.
Usage Features
Before using the chain saw, it is crucial to ensure all safety warnings and instructions are understood and followed. This includes wearing appropriate personal protective equipment such as safety glasses, ear protection, a helmet, goggles, foot-leg protection, and hand-arm protection. The chain saw should always be operated with both hands, maintaining a firm grip with thumbs and fingers encircling the handles.
When installing or removing the battery cartridge, the tool must be switched off, and the battery cartridge should be held firmly to prevent accidental drops or injury. The battery cartridge is installed by aligning its tongue with the groove in the housing and pushing it in until it locks with a click, ensuring the red indicator on the button's upper side is no longer visible.
Before starting any cutting operation, the chain brake must be released by pulling the front hand guard back. The saw chain tension needs to be checked and adjusted regularly. For 90PX and 91PX chain blades, the saw chain should be tightened until the lower side fits in the guide bar rail. For 25AP chain blades, the gap between the center of the lower side of the guide bar and the saw chain should be approximately 1 mm to 2 mm. Over-tightening can cause breakage and wear, while a loose chain can jump off the bar, leading to injury.
When pruning trees, the chain saw body should be brought into contact with the branch before switching on to prevent wobbling and injury. For thick branches, a shallow undercut should be made first, followed by the finish cut from the top, to prevent pinching or splintering. If a single stroke is not sufficient, light pressure should be applied to the handle, and the chain saw should be drawn back slightly while continuing to saw.
When carrying the tool, the chain brake must be applied, and the battery cartridges removed. The guide bar cover and battery cover should be attached to protect the components and prevent accidental contact with the moving saw chain.
Maintenance Features
Regular maintenance is essential for ensuring the long life, safety, and proper functioning of the chain saw. All maintenance work not described in the instruction manual should be carried out by an authorized service center.
Chain Saw and Guide Bar:
The saw chain and guide bar should be removed and cleaned regularly to remove chips and sawdust, especially from the sprocket cover and guide bar groove. This prevents clogging and ensures proper oil flow. The oil discharge hole should also be cleaned using a slotted screwdriver to prevent insufficient lubrication. After cleaning, the battery cartridge can be inserted, and the switch trigger pulled to discharge chain oil and clear any remaining dust or particles from the oil discharge hole.
Saw Chain Sharpening:
The saw chain needs sharpening when mealy sawdust is produced, the chain penetrates wood with difficulty, the cutting edge is damaged, or the saw pulls to one side. Sharpening should be done frequently with two or three strokes of a file. A special round file (optional accessory) of the correct diameter (4.5 mm for 90PX, 4.0 mm for 91PX and 25AP) should be used. The file should only engage the cutter on the forward stroke, lifted off on the return stroke. The sharpening angle should be 30°, and the depth gauge height should be checked with a chain gauge tool (optional accessory) after sharpening. The shortest cutter should be sharpened first, setting the standard for all other cutters. The chain should be replaced if the cutter length reaches 3 mm or shorter.
Sprocket:
The sprocket should be checked for wear before fitting a new saw chain. A worn sprocket can damage a new chain and must be replaced. A new locking ring should always be fitted when replacing the sprocket.
Lubrication:
The oil tank level should be checked periodically through the inspection window. When refilling, only Makita chain saw oil or equivalent botanical oil (for pruning trees) should be used, avoiding oils with dust, particles, or volatile components. The oil tank cap must be securely tightened after refilling.
Storage:
Before storing the tool, it should be thoroughly cleaned, removing all chips and sawdust. After cleaning, run the tool under no load to lubricate the saw chain and guide bar. The guide bar should be covered with the guide bar cover, and the oil tank emptied. If the tool is not used for a long period (more than six months), the battery must be removed.
Battery Cartridge:
Battery cartridges should be charged before they are completely discharged, and charging should stop when the tool power decreases. Overcharging shortens battery service life. Batteries should be charged at room temperature (10°C - 40°C) and allowed to cool down if hot before charging. If not used for a long period, the battery cartridge should be charged every six months. Only genuine Makita batteries and chargers should be used to avoid risks of fire, injury, or damage, and to maintain warranty validity.