6 ENGLISH
NOTE: Use a dry cloth to wipe the dirt off the lens of
the lamp. Be careful not to scratch the lens of lamp, or
it may lower the illumination.
NOTE:Whenthetoolisoverheated,thelightashes
foroneminute,andthentheLEDdisplaygoesoff.In
this case, cool down the tool before operating again.
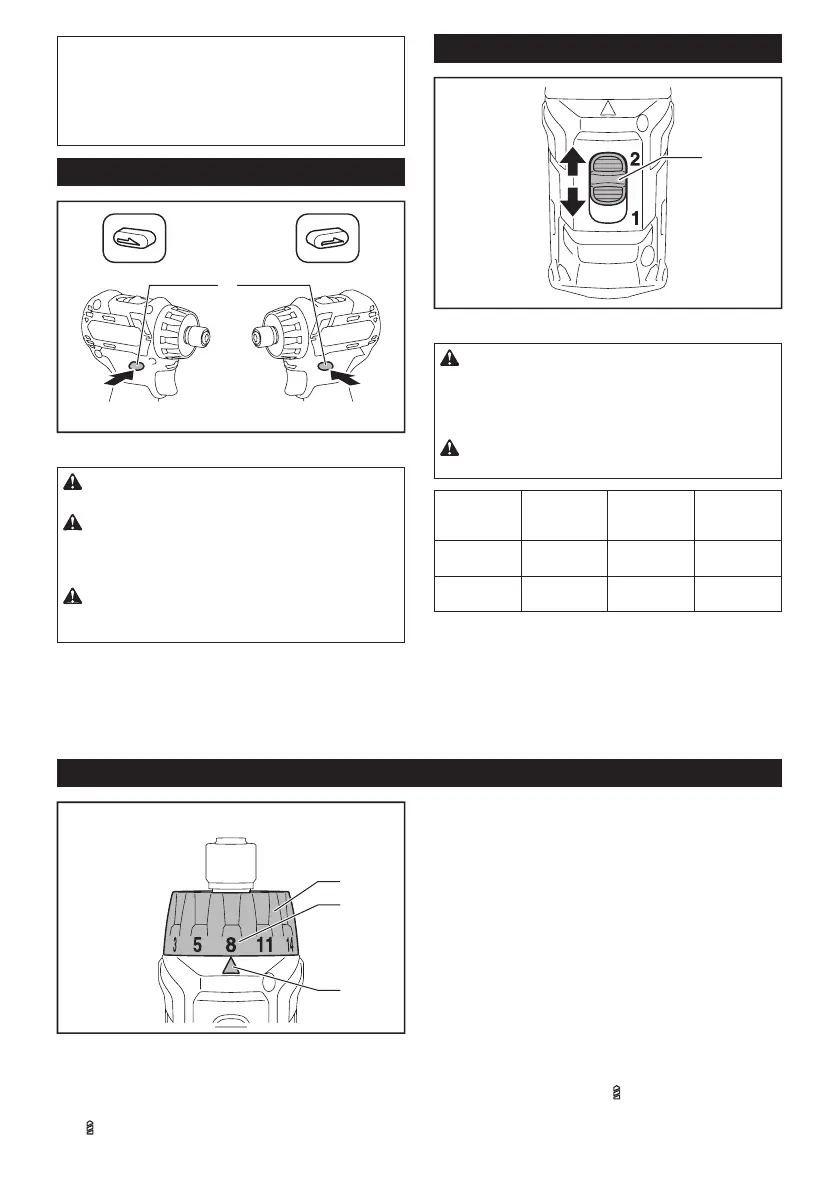
Reversing switch action
1
►1. Reversing switch lever
CAUTION: Always check the direction of
rotation before operation.
CAUTION: Use the reversing switch only after
the tool comes to a complete stop. Changing the
direction of rotation before the tool stops may dam-
age the tool.
CAUTION: When not operating the tool,
always set the reversing switch lever to the neu-
tral position.
Thistoolhasareversingswitchtochangethedirection
of rotation. Depress the reversing switch lever from the
AsideforclockwiserotationorfromtheBsideforcoun-
terclockwise rotation.
When the reversing switch lever is in the neutral posi-
tion, the switch trigger cannot be pulled.
Speed change
1
►1. Speed change lever
CAUTION: Always set the speed change lever
fully to the correct position. If you operate the
tool with the speed change lever positioned halfway
between the "1" side and "2" side, the tool may be
damaged.
CAUTION: Do not use the speed change lever
while the tool is running.Thetoolmaybedamaged.
Position of
speed
change lever
Speed Torque Applicable
operation
1 Low High Heavy load-
ing operation
2 High Low Light loading
operation
Tochangethespeed,switchoffthetoolrst.Select
the "2" side for high speed or "1" for low speed but high
torque. Be sure that the speed change lever is set to the
correct position before operation.
If the tool speed is coming down extremely during the
operation with "2", slide the lever to the "1" and restart
the operation.
Adjusting the fastening torque
1
2
3
►1.Adjustingring2. Graduation 3.Arrow
Thefasteningtorquecanbeadjustedin21stepsbyturningtheadjustingring.Alignthegraduationswiththearrow
on the tool body. You can get the minimum fastening torque at 1 and maximum torque at
marking.
Theclutchwillslipatvarioustorquelevelswhensetatthenumber1to20.Theclutchdoesnotworkat
the marking.

 Loading...