Do you have a question about the Makita HM1205C and is the answer not in the manual?
Keep work area clean and well lit. Cluttered or dark areas invite accidents.
Power tool plugs must match the outlet. Never modify the plug in any way. Do not use any adapter plugs with earthed (grounded) power tools.
Stay alert, watch what you are doing and use common sense when operating a power tool. Do not use a power tool while you are tired or under the influence of drugs, alcohol or medication.
Have your power tool serviced by a qualified repair person using only identical replacement parts.
Describes how to operate the power tool's switch lever for ON/OFF and locking.
Explains how to adjust the blows per minute using the adjusting dial.
Details the function of the power-ON and service indicator lamps.
Instructions on how to hold and operate the tool for demolition tasks.
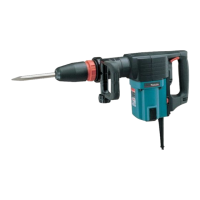
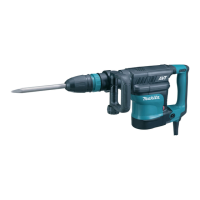
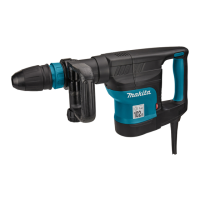
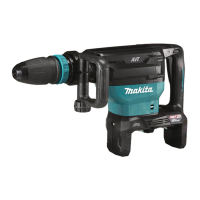
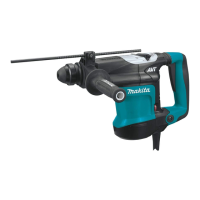
This document is an instruction manual for the Makita HM1205C Demolition Hammer, providing essential information for its safe and effective operation, maintenance, and assembly. It emphasizes safety warnings, functional descriptions, and details on optional accessories.
The Makita HM1205C Demolition Hammer is designed for chiseling work in concrete, brick, stone, and asphalt, as well as for driving and compacting with appropriate accessories. It is a double-insulated tool, meaning it can be operated from sockets without an earth wire. The tool's power supply should match the voltage indicated on its nameplate and must be a single-phase AC supply.
A key functional feature is the speed adjustment, controlled by an adjusting dial marked from 1 (lowest speed) to 5 (full speed). This allows users to adjust the blows per minute even while the tool is running, optimizing performance for different tasks. The speed adjusting dial should not be forced past its limits (5 or 1) to avoid damaging the speed adjustment function.
The tool includes an indicator lamp system for operational feedback. A green Power-ON indicator lamp illuminates when the tool is plugged in, signaling that the mains cord and controller are functioning correctly. If this lamp does not light up, it may indicate a malfunction in the mains cord or controller. A red service indicator lamp flickers when the carbon brushes are nearly worn out, indicating that servicing is required. After approximately 8 hours of use following this indication, the motor will automatically shut off to prevent damage.
Before any adjustments or operation, users must ensure the tool is switched off and unplugged. The switch lever controls the tool's operation, with "ON (I)" on the left side to start and "OFF (O)" on the right side to stop. For extended use and operator comfort, the switch can be locked in the "ON" position, though caution and a firm grasp are advised in this mode.
The HM1205C features a side handle (auxiliary handle) that can be swung 360° vertically and secured at eight different horizontal positions. To adjust the side handle, the clamp nut is loosened, the handle is positioned as desired, and then the clamp nut is securely tightened. The side handle can also be mounted in the rear groove by widening its base. This flexibility allows users to find the most comfortable and secure grip for various working conditions.
Installing and removing bits involves a specific procedure. The bit shank should be cleaned and bit grease applied before insertion. The bit is then inserted into the tool, turned, and pushed in until it engages. If the bit does not engage easily, the releasing cover should be pulled down a couple of times before re-inserting. After installation, it's crucial to verify the bit is securely held by attempting to pull it out. To remove a bit, the releasing cover is pulled down completely, and the bit is pulled out.
The tool also allows for bit angle adjustment. The bit can be secured at 12 different angles. To change the angle, the change ring is slid forward, rotated to the desired angle, and then slid back to its original position to secure the bit.
During chipping, scaling, or demolition operations, it is essential to use the side grip and firmly hold the tool with both hands (side grip and switch handle). The tool should be turned on, and slight pressure applied to prevent it from bouncing uncontrollably. Applying excessive pressure will not increase efficiency.
For cold weather or after prolonged disuse, it is recommended to operate the tool under no load for a while to warm up the lubrication. This helps ensure proper hammering operation.
Regular maintenance is crucial for the safety and reliability of the Makita HM1205C. Before performing any inspection or maintenance, the tool must always be switched off and unplugged.
The tool features a grease-packed lubrication system, which means it does not require hourly or daily lubrication by the user. However, it needs to be relubricated regularly by authorized service centers. For this service, the complete tool should be sent to a Makita Authorized or Factory Service Center.
For all repairs, maintenance, or adjustments, it is imperative that these are performed by Makita Authorized Service Centers using only genuine Makita replacement parts. This ensures the product's safety and reliability are maintained.
Users are advised not to use gasoline, benzine, thinner, alcohol, or similar substances for cleaning, as these can cause discoloration, deformation, or cracks in the tool. Handles should be kept dry, clean, and free from oil and grease to ensure a secure grip.
The red service indicator lamp serves as a maintenance alert, signaling when the carbon brushes are nearing the end of their lifespan and the tool requires servicing. This proactive warning helps prevent unexpected breakdowns and ensures the tool remains in optimal working condition.
| Impact Energy | 25.5 J |
|---|---|
| Blows per Minute | 2900 bpm |
| Power Source | Corded Electric |
| Voltage | 230 V |
| Bit Shank Size | SDS-MAX |
| Vibration Control | Yes |
| Anti-Vibration Technology | Yes |
| Bit Type | SDS-MAX |
| Type | Demolition Hammer |