(2) If Fluoride ring 28 is worn, O ring 23 (orange) appears. In this case,
replace all the rings (X ring 21, Fluoride ring 28 and O ring 23) with new ones.
X ring 21
O ring 23
Fluoride ring 28
Impact bolt
Fig. 8
P 6/ 17
Repair
[3] ASSEMBLY/ DISASSEMBLY
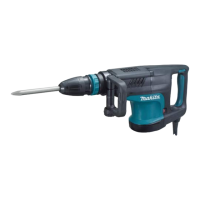
[3] -2. Impact bolt, Cylinder, Striker
DISASSEMBLING
(1) Impact bolt can be disassembled as drawn in Fig. 7.
Fig. 7
1. Remove four M8x35 Hex socket head bolts with 1R231
and M5x25 Hex socket head bolt with 1R229.
Housing cover and Barrel section can be separated from
Crank housing without disassembling Chuck mechanism.
Barrel section
Crank housing
Shoulder
sleeve
Impact bolt
Tool holder cap
Rubber
ring 24
Housing cover
M8x35 Hex
socket head
bolt (4pcs.)
M5x25 Hex
socket head
bolt
Screwdriver
2. Insert a screwdriver and tap Impact bolt
with the screwdriver to remove Impact bolt,
two Shoulder sleeves and Rubber ring 24.
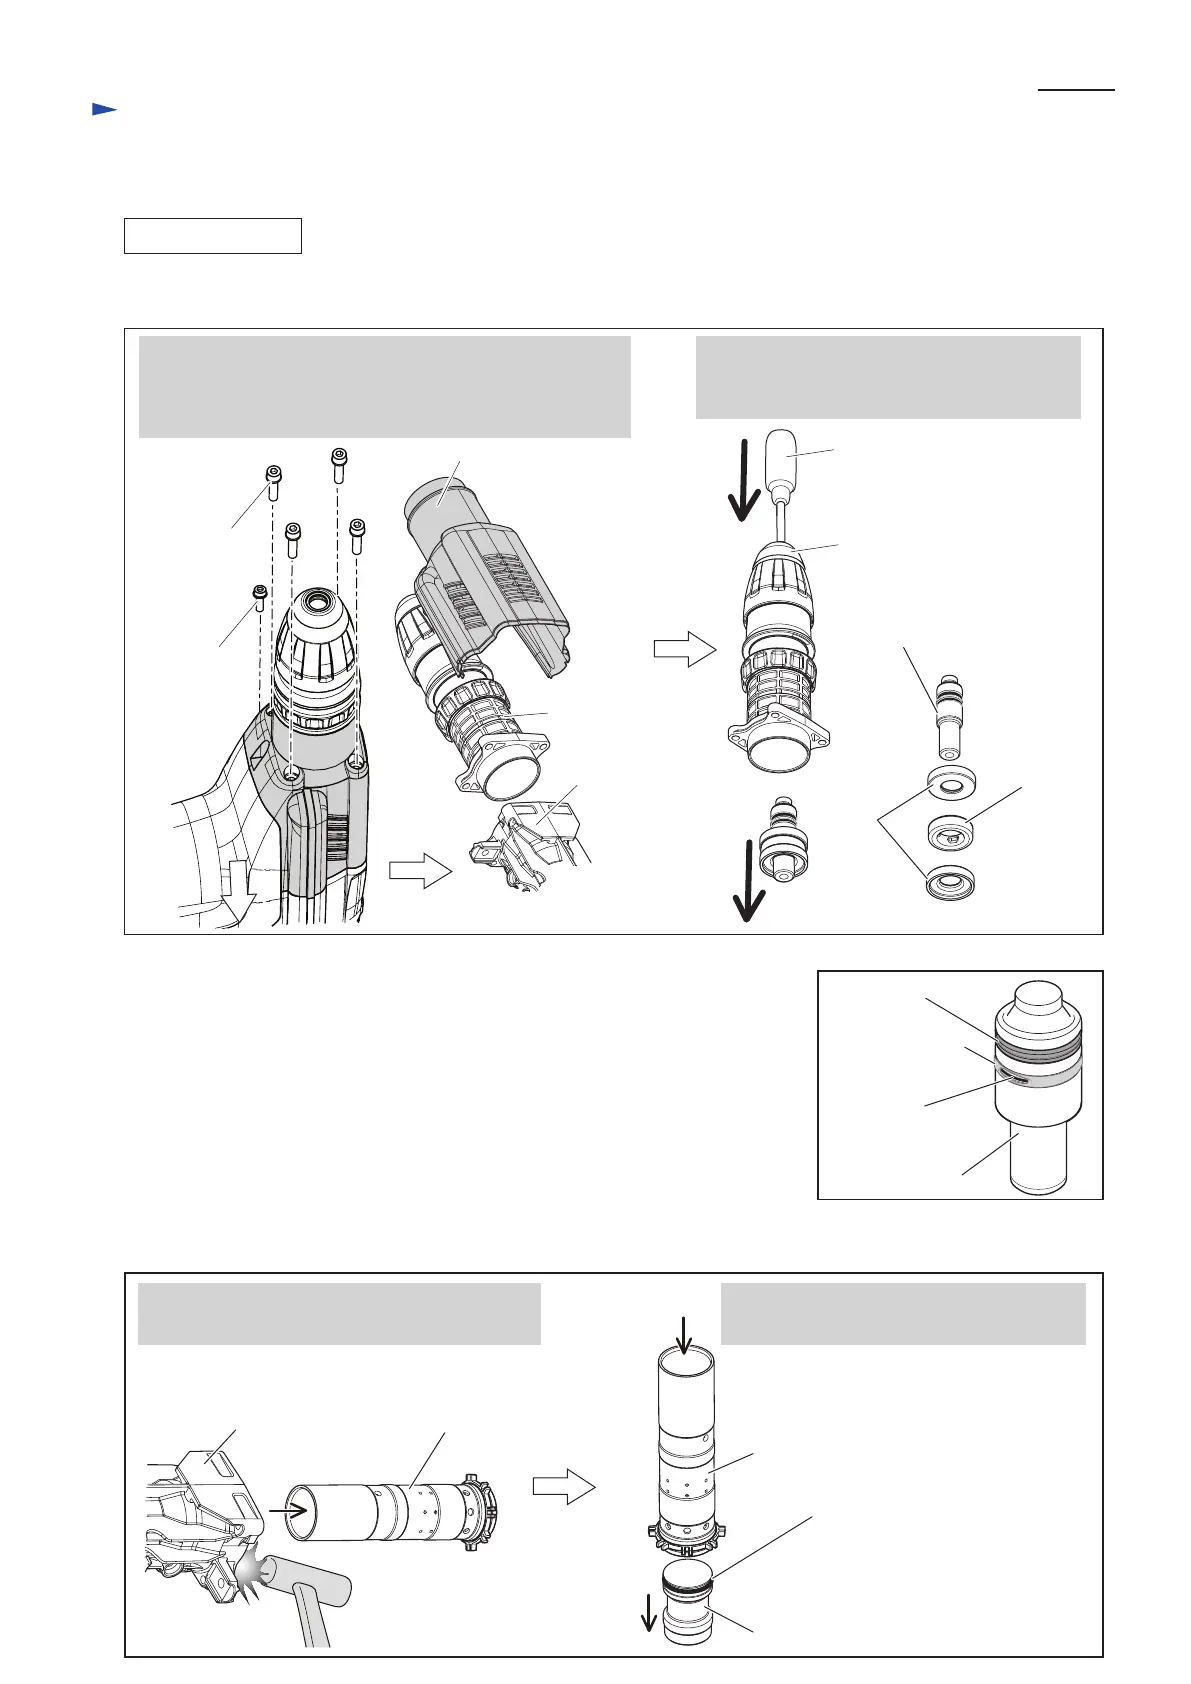
1. Tap Crank housing as shown below to remove
Cylinder 40 from Crank housing.
2. Remove Striker from Cylinder 40. Then,
O ring 31.5 can be removed from Striker.
Fig. 9
(3) Disassemble Cylinder 40 from Crank housing, and take out Striker from Cylinder 40 as drawn in Fig. 9.
O ring 31.5
Cylinder 40
Cylinder 40
Crank housing
Striker
 Loading...