Bit grease
Coat the bit shank head beforehand with
a
small amount (about
0.5-
1
g;
0.02-0.04'0z.)
of
bit grease. This chuck lubrication assures smooth action and longer service life.
Installing or removing drill bit
CAUTION
:
Always be sure that the tool
is
switched off and unplugged before installing
or
removing
the bit.
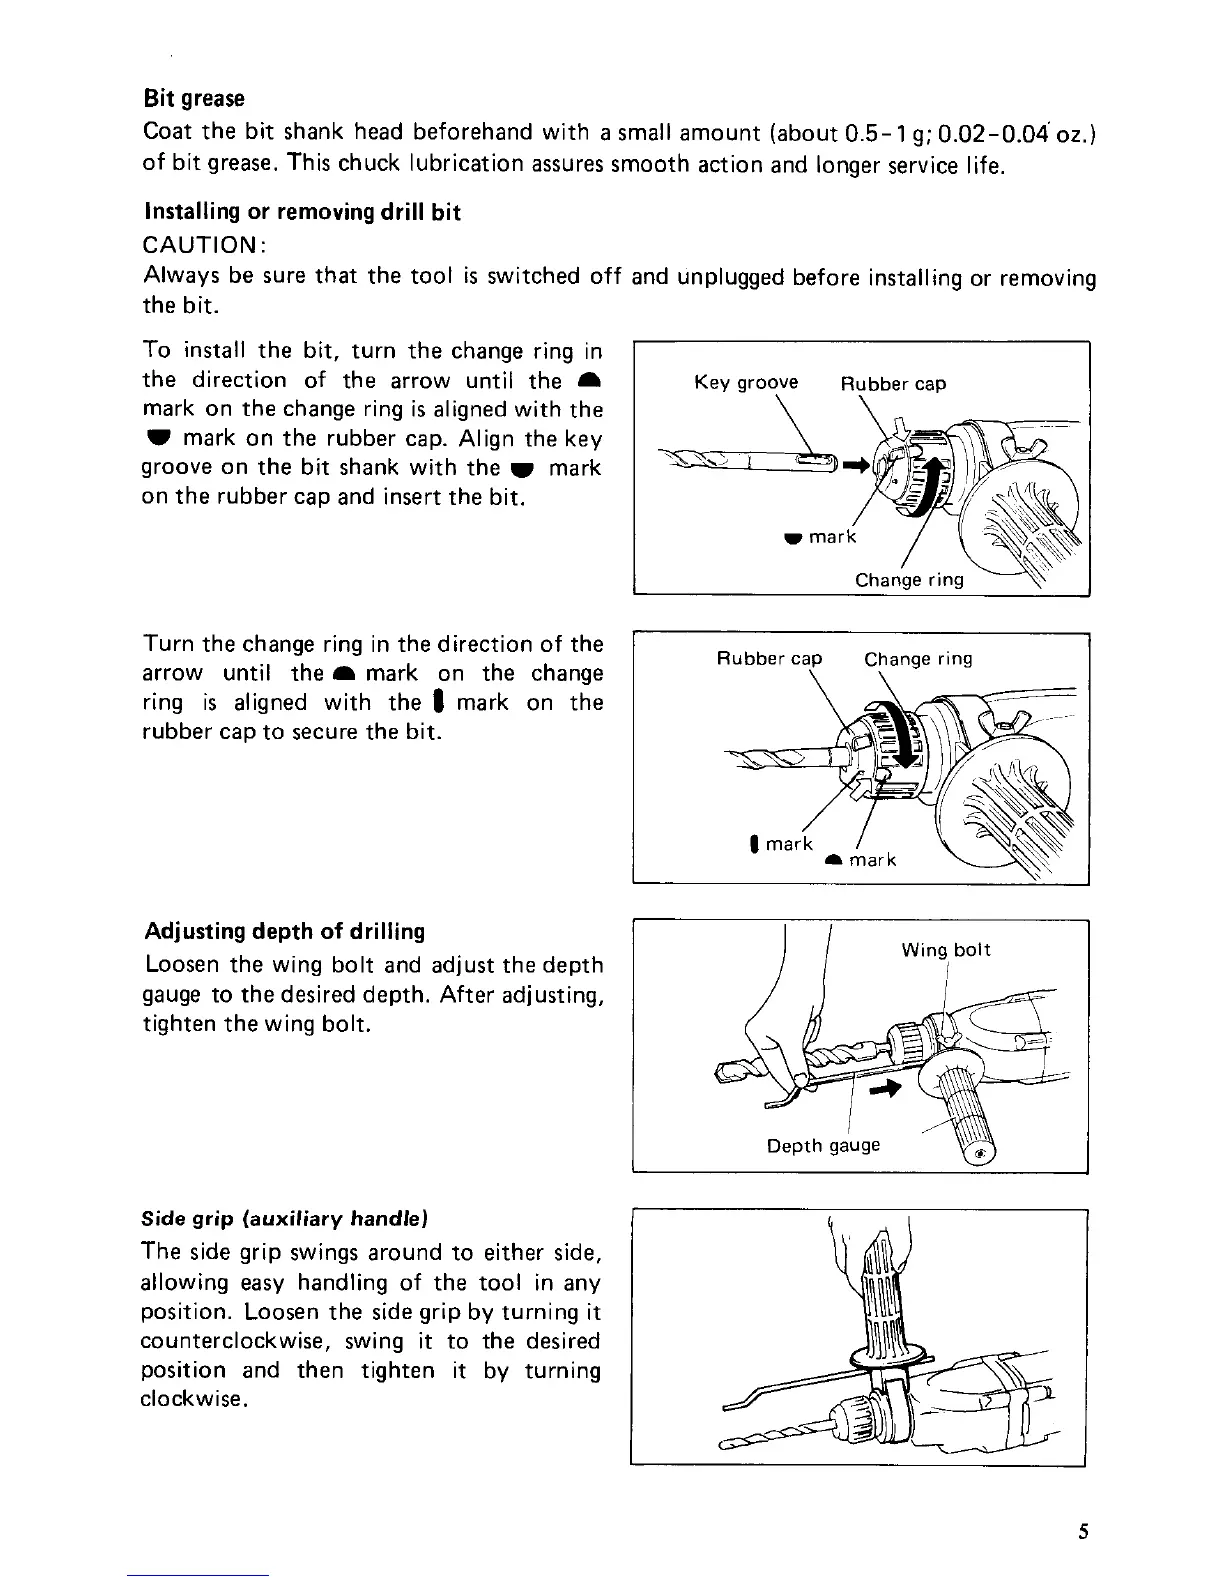
To
install the bit, turn the change ring in
the direction of the arrow until the
a
mark on the change ring
is
aligned with the
I
mark on the rubber cap. Align the key
groove on the bit shank with the mark
on the rubber cap and insert the bit.
Turn the change ring in the direction
of
the
arrow until the
a
mark on the change
ring
is
aligned with the
8
mark on the
rubber cap to secure the bit.
Adjusting depth
of
drilling
Loosen the wing bolt and adjust the depth
gauge to the desired depth. After adjusting,
tighten the wing bolt.
Side
grip
(auxiliary
handle)
The side grip swings around to either side,
allowing easy handling of the tool in any
position. Loosen the side grip by turning
it
counterclockwise, swing
it
to the desired
position and then tighten it by turning
clockwise.
Key
groove
Rubber
cap
Rubber
cap
Change
ring
Wing
bolt
I
5
 Loading...