Do you have a question about the Makita HR2470 and is the answer not in the manual?
Covers safe practices for the work environment and electrical connections.
Guidelines for operator awareness, protective gear, and preventing accidental starts.
Special safety warnings and advice for operating the rotary hammer.
Instructions for changing between SDS-plus and drill chucks.
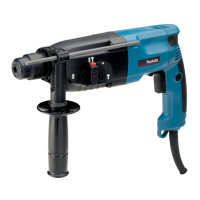
Guides on choosing between rotation, hammering, or combined modes.
Step-by-step instructions for bit insertion and removal.
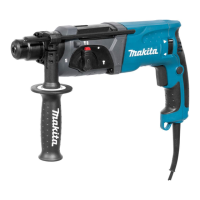
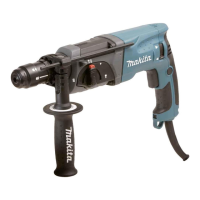
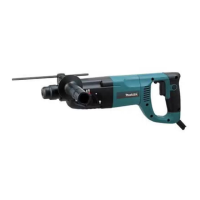
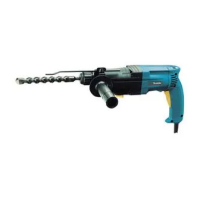
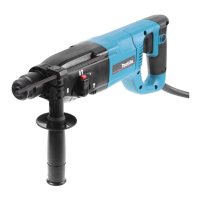
This document serves as an instruction manual for the Makita Rotary Hammer models HR2470, HR2470F, HR2470FT, and HR2470T. It provides essential information for safe and effective operation, maintenance, and assembly of the tool.
The Makita Rotary Hammer is a versatile power tool designed for various drilling and chiseling tasks. Its primary functions include hammer drilling in brick, concrete, and stone, as well as chiseling work. Additionally, it can be used for drilling without impact in wood, metal, ceramic, and plastic materials. The tool features a reversing switch to change the direction of rotation, allowing for both clockwise and counterclockwise operation. It also incorporates a torque limiter that actuates when a certain torque level is reached, disengaging the motor from the output shaft to prevent premature wear.
Switch Action: To start the tool, pull the switch trigger. The speed increases with greater pressure on the trigger. Releasing the trigger stops the tool. For continuous operation, pull the trigger and then push in the lock button. To stop from the locked position, pull the trigger fully and release it. Always ensure the switch trigger actuates properly and returns to the "OFF" position before plugging in the tool.
Lighting up the lamps (For Models HR2470F, 2470FT): These models are equipped with a lamp that illuminates the work area. To turn on the lamp, pull the trigger. Release the trigger to turn it off. It is important not to look directly at the light source.
Reversing Switch Action: The tool has a reversing switch to change the direction of rotation. Move the reversing switch lever to the "A" side for clockwise rotation or the "B" side for counterclockwise rotation. Always ensure the tool has come to a complete stop before changing the direction of rotation to prevent damage. If the switch trigger cannot be depressed, check that the reversing switch is fully set to either position.
Changing the Quick Change Chuck for SDS-plus (For Models HR2470T/HR2470FT): The quick change chuck for SDS-plus can be easily exchanged for a quick change drill chuck. To remove the SDS-plus chuck, first remove the bit. Grasp the change cover and turn it in the direction of the arrow until the change cover line moves from the "hammer" symbol to the "drill" symbol. Then pull forcefully in the direction of the arrow. To attach the quick change drill chuck, ensure the line on the chuck shows the "drill" symbol. Grasp the change cover, set the line to the "hammer" symbol, and place the chuck on the spindle. Turn the change cover line to the "drill" symbol until a click is heard.
Selecting the Action Mode:
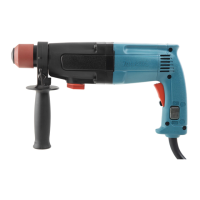
Side Grip (Auxiliary Handle): Always use the side grip for operating safety. Install the side grip so its teeth fit between the protrusions on the tool barrel. Tighten the grip by turning clockwise. It can be swung 360° and secured at any position.
Bit Grease: Coat the bit shank head with a small amount of bit grease (0.5 - 1 g) before installation. This lubrication ensures smooth action and longer service life.
Installing or Removing the Bit: Clean the bit shank and apply bit grease. Insert the bit into the tool, turn it, and push it in until it engages. After installation, always pull on the bit to ensure it is securely held. To remove, pull the chuck cover down all the way and pull the bit out.
Bit Angle (when chipping, scaling or demolishing): The bit can be secured at a desired angle. To change the angle, depress the lock button and rotate the action mode changing knob to the "rotation only" symbol. Turn the bit to the desired angle. Then depress the lock button and rotate the knob to the "hammer" symbol, ensuring the bit is securely held.
Depth Gauge: The depth gauge is useful for drilling holes of uniform depth. Loosen the side grip, insert the depth gauge into its hole, adjust to the desired depth, and tighten the side grip. Note that the depth gauge cannot be used if it strikes against the gear housing.
Dust Cup: Use the dust cup to prevent dust from falling over the tool and on yourself during overhead drilling. Attach the dust cup to the bit as shown in the figure.
Blow-out Bulb (optional accessory): After drilling, use the blow-out bulb to clean dust out of the hole.
Hammer Drilling Operation: Set the action mode changing knob to the "hammer" symbol. Position the bit at the desired location and pull the trigger. Do not force the tool; light pressure yields the best results. Keep the tool steady to prevent slipping. If the hole becomes clogged, run the tool at idle and partially remove the bit several times to clear the hole.
Chipping/Scaling/Demolition: Set the action mode changing knob to the "chisel" symbol. Hold the tool firmly with both hands. Turn on the tool and apply slight pressure to prevent bouncing. Excessive pressure will not increase efficiency.
Drilling in Wood or Metal:
Diamond Core Drilling: When performing diamond core drilling, always set the change lever to the "rotation only" position.
General Maintenance: Always ensure the tool is switched off and unplugged before performing any inspection or maintenance. To maintain product safety and reliability, repairs, carbon brush inspection and replacement, and any other maintenance or adjustment should be performed by Makita Authorized Service Centers, using genuine Makita replacement parts.
Torque Limiter: The torque limiter will actuate when a certain torque level is reached, disengaging the motor from the output shaft and stopping the bit.
Handles: Keep handles dry, clean, and free from oil and grease.
Screws: Under normal operation, the tool is designed to produce vibration, which can cause screws to come loose. Check the tightness of screws carefully before operation to prevent breakdowns or accidents.
Cold Weather Operation: In cold weather or after long periods of disuse, operate the tool under no load for a while to warm it up and loosen the lubrication. Without proper warm-up, hammering operation may be difficult.
| Input power | 780 W |
|---|---|
| Power source | AC |
| Impact rate | 4500 bpm |
| Impact energy (max) | 2.4 J |
| Drilling diameter in wood (max) | 32 mm |
| Drilling diameter in steel (max) | 13 mm |
| Drilling diameter in concrete (max) | 24 mm |
| Reverse | Yes |