[3] DISASSEMBLY/ASSEMBLY
[3]-3 Crank shaft section (Helical gear 40, Ball bearings, Sealing screw (cont.)
DISASSEMBLING
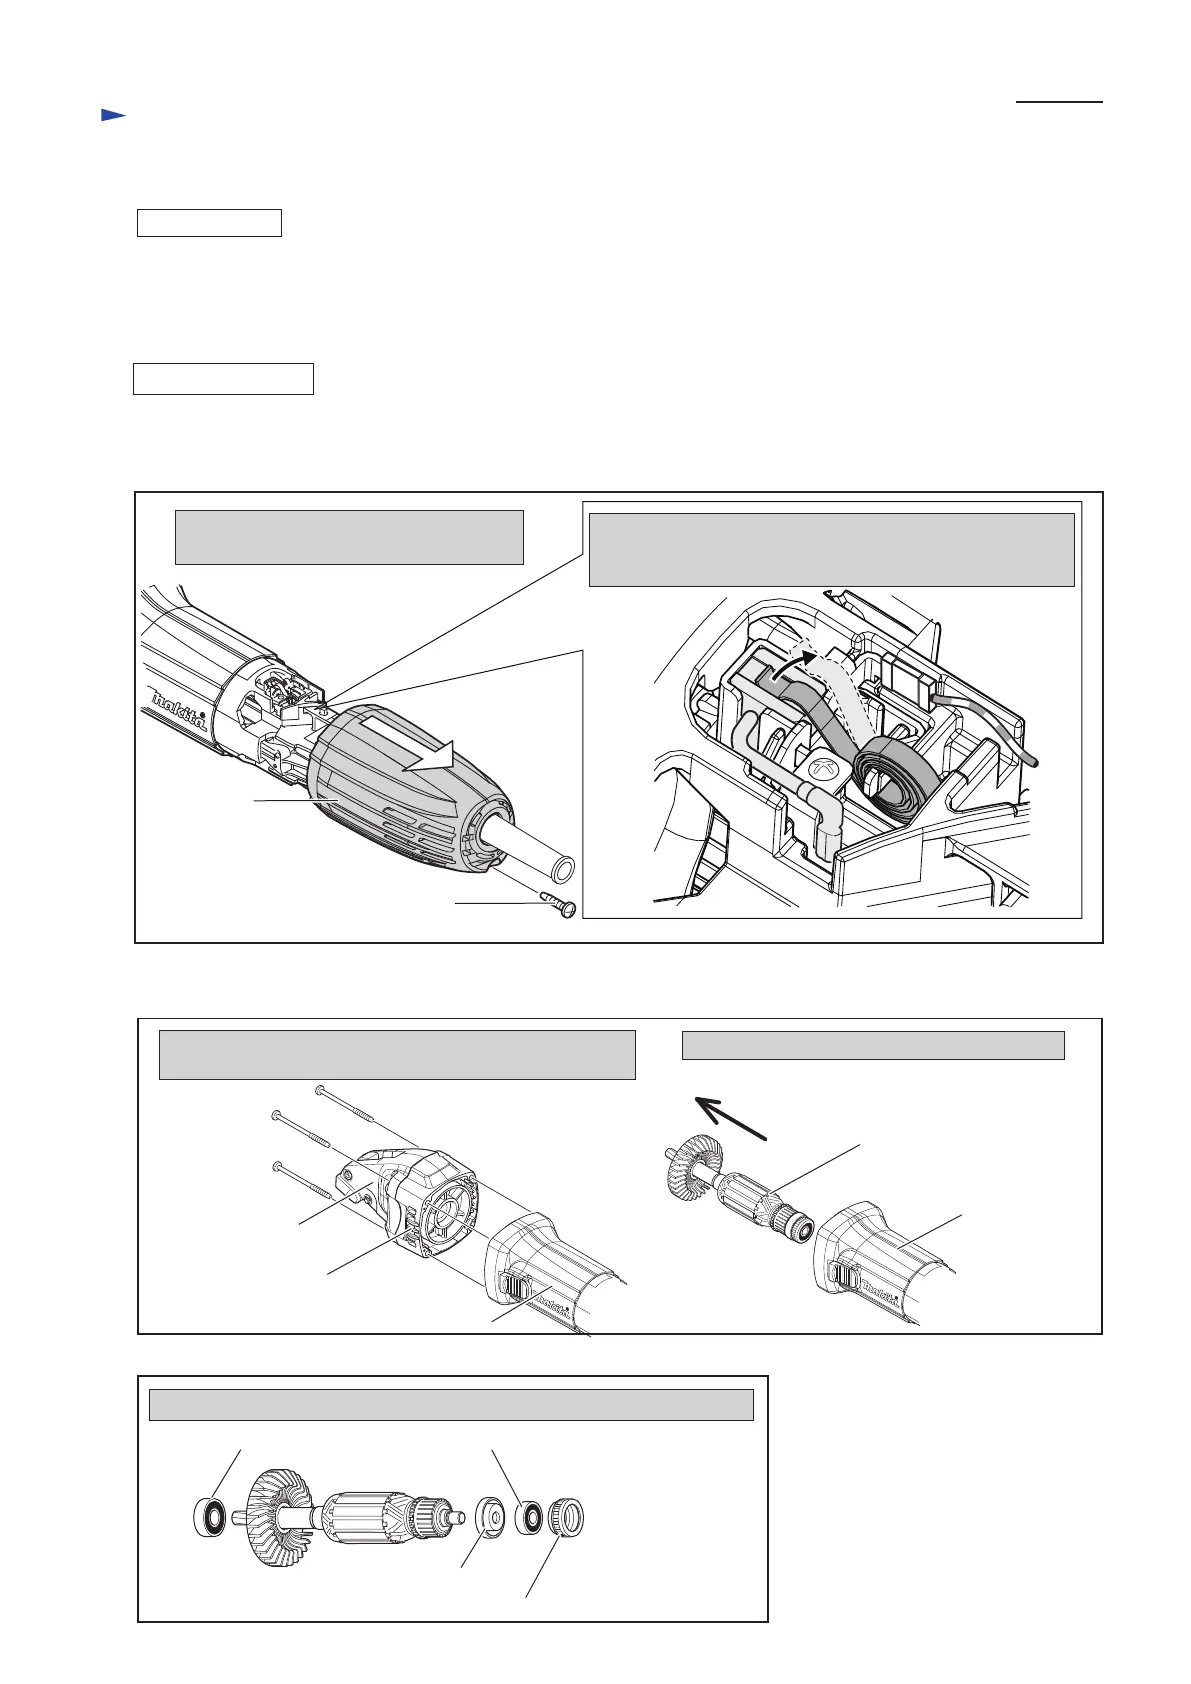
1. Disassemble Rear cover by loosening
4x18 Tapping screw.
2. Shifting the tails of Spiral springs from Carbon brushes,
disconnect the carbon brushes from Armature’s commutator
by pulling up halfway.
Fig. 12
Fig. 13
Fig. 11
Removing four 4x50 Tapping screws, separate Gear
housing complete and Crank housing as illustrated below.
4x18 Tapping screw
(1) Removing Rear cover, disconnect Carbon brush from Armature’s commutator to protect the Commutator against
scratching by Carbon brush, as illustrated in Fig. 11.
(2) Disassemble Armature as illustrated in Figs. 12 and 13.
Rear cover
Gear housing
complete
Crank housing
complete
Motor housing
Ball bearing 608ZZ
Ball Bearing 608ZZ and Ball bearing 607ZZ can be removed with 1R269.
Ball bearing 607ZZ
Insulation washer
Labyrinth rubber ring 19
Motor housing
Armature
Armature can be removed as illustrated below.
4x50 Tapping
screws (4pcs.)
Repair
P 5/ 12
[3]-4 Armature
ASSEMBLING
Assemble Crank shaft section by reversing the disassembling step. Refer to Fig. 10, 9 and 8.
Do not forget to mount Flat washer 7 to Crank shaft, before assembling Ball bearing 627ZZ.
Refer to Fig. 8.
 Loading...