6
FUNCTIONAL
DESCRIPTION
CAUTION:
• Always be sure that the tool is switched off and unplugged before
adjusting or checking function on the tool.
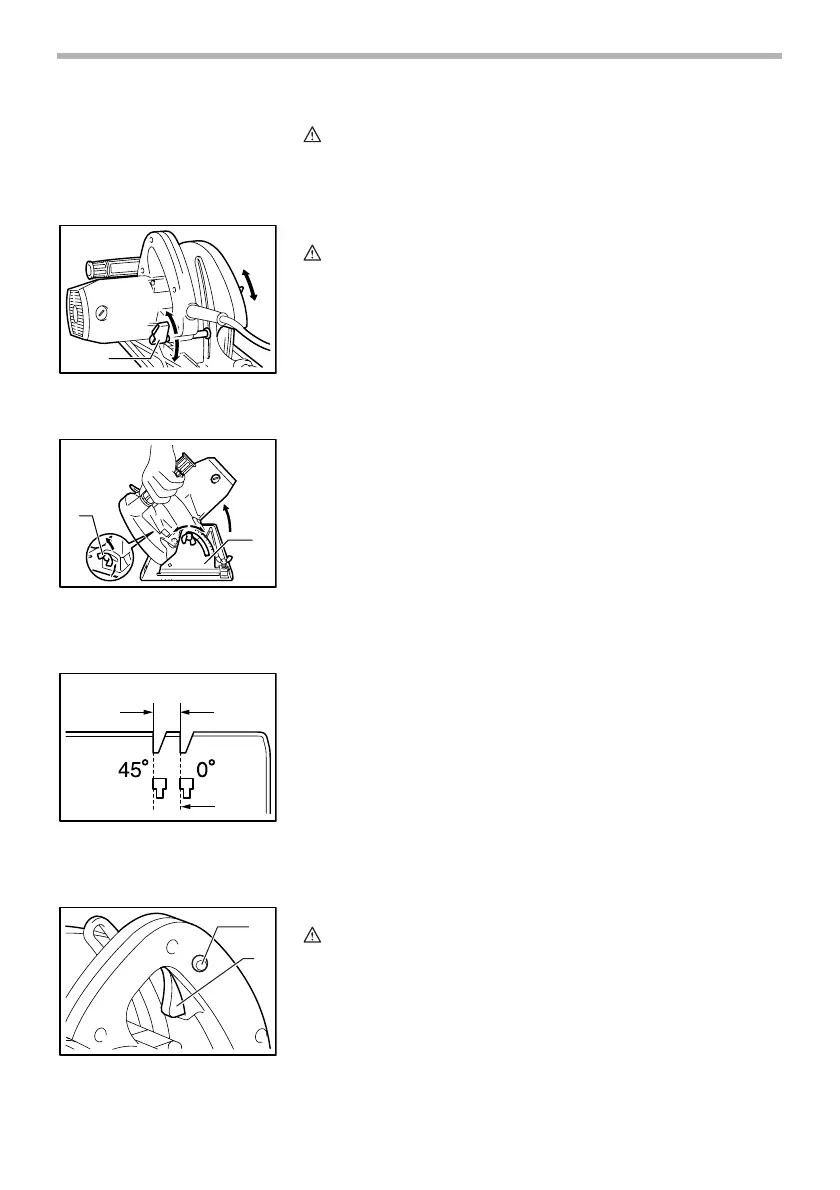
Adjusting depth of cut
CAUTION:
• Use a shallow depth of cut when cutting thin workpiece for cleaner, safer
cutting.
• After adjusting the depth of cut, always tighten the lever securely.
Loosen the lever on the depth guide and move the base up or down. At the
desired depth of cut, secure the base by tightening the lever.
Bevel cutting
Loosen the clamping screws in front and back, and tilt the tool to the desired
angle for bevel cuts (0° - 50°). Secure the clamping screws tightly in front and
back after making the adjustment.
Sighting
For straight cuts, align the A position on the front of the base with your cutting
line. For 45° bevel cuts, align the B position with it.
Switch action
CAUTION:
• Before plugging in the tool, always check to see that the switch trigger
actuates properly and returns to the “OFF” position when released.
For tool with lock button
To start the tool, simply pull the switch trigger. Release the switch trigger to
stop.
For continuous operation, pull the switch trigger and then push in the lock but-
ton.
To stop the tool from the locked position, pull the switch trigger fully, then
release it.
1. Lever
1
004322
1. Wing nut
2. Bevel scale plate
1
2
004323
1. Base plate
2. Cutting line
BA
1
2
004324
1. Lock button
2. Switch trigger
1
2
004325

 Loading...