P 3 /10
Repair
[3] DISASSEMBLY/ASSEMBLY
[3] -1. Lubricating Mechanism (cont.)
Fig. 4 Fig. 5
Fig. 6
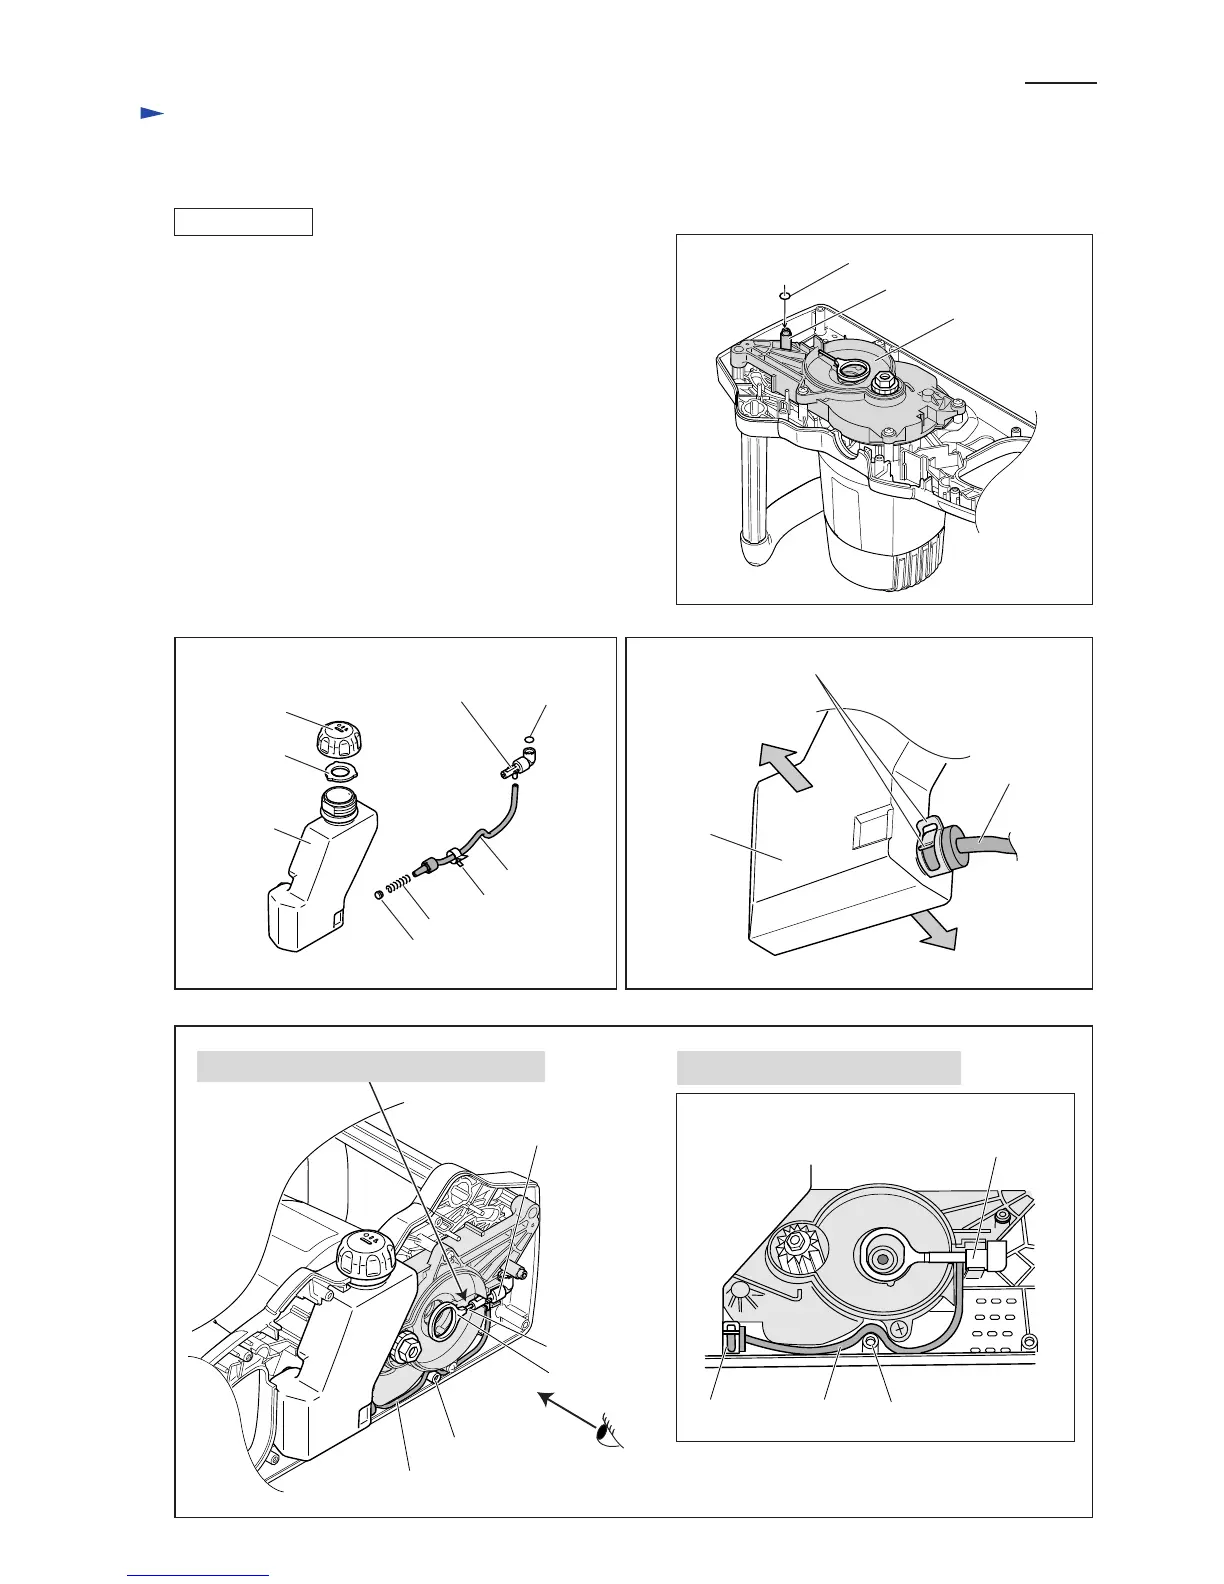
Fig. 3
ASSEMBLING
1) Mount O ring 6 to the boss of Bearing holder. (Fig. 3)
2) See Fig. 4.
Before connecting Oil tube to Oil tank, make sure that:
1. Packing is mounted between Oil tank cap and Oil tank.
2. O ring 6 is mounted to Oil pump complete.
3. Clamp is put through Oil tube.
4. Cap and Spring are assembled to in Oil tube.
3) Push Oil tube into Oil tank deeply until it stops, and secure
with Clamp.
Note: Make sure that the tabs of Clamp is positioned on the
Housing (R) installation side as illustrated in Fig. 5.
Then connect the other end of Oil tube securely to Oil pump
complete.
4) Assemble the lubricating mechanism to the machine. (Fig. 6)
5) See Figs. 21 and 22 on page 10 for assembling of electrical
parts.
Oil tank cap
Packing
Oil tank
Cap
Spring
Oil tube
Oil pump complete
O Ring 6
Clamp
tabs of Clamp
O Ring 6
Bearing holder
boss on Housing (L)
Route Oil tube as illustrated below.
Oil tube
pin of Crank
Oil pump complete
Crank
Housing (R)
installation side
Housing (L) side
boss
Oil tank
Oil tube
[A]
View from [A]
Insert pin of Crank into Oil pump complete.
boss on Housing (L)Oil tubeClamp
Oil pump complete
 Loading...