6 ENGLISH
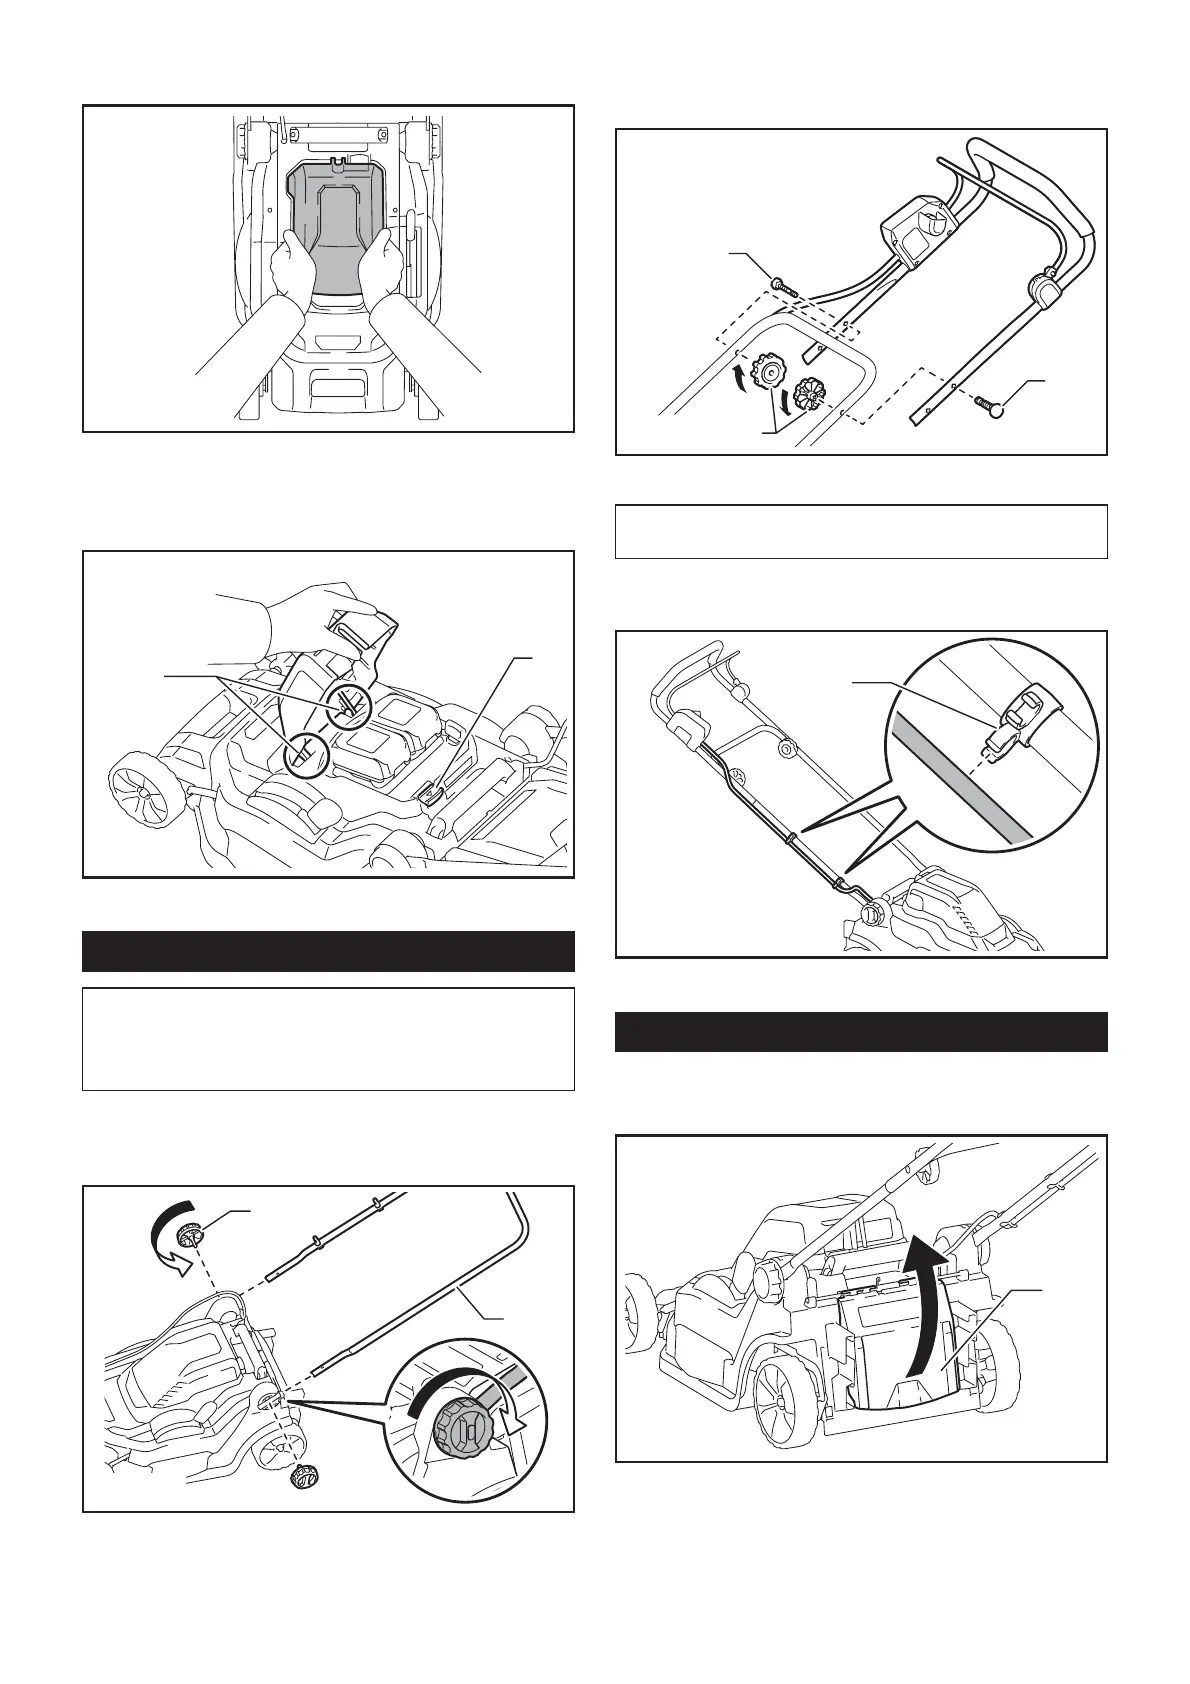
2. 3ODFH\RXUKDQGVLQWKHPLGGOHRIWKHEDWWHU\
cover and push it.
3. %HIRUHWKH¿UVWRSHUDWLRQFKHFNWKDWWKHSLYRW
SRLQWRIWKHEDWWHU\FRYHULVDWWDFKHGSURSHUO\,IWKH
EDWWHU\FRYHULVLQVWDOOHGFRUUHFWO\LWZLOOQRWRSHQXQWLO
WKHEDWWHU\FRYHUORFNLQJOHYHULVSXOOHG
1
2
Ź1. Pivot point 2.%DWWHU\FRYHUORFNLQJOHYHU
Installing the handle
NOTICE: When installing handles, position the
cords so that they are not caught by anything
between the handles. If the cord is damaged, the
mower switch may not work.
1. Slide the both ends of lower handle into the
JURRYHVRIWKHPRZHUWKHQIXOO\WLJKWHQWKHFODPSLQJ
screws.
1
2
Ź1. Clamping screw 2. Lower handle
2. Align the screw holes of upper handle and lower
handle. Secure them with the clamping screws and
nuts.
2
2
1
Ź1. Clamping nut 2. Clamping screw
NOTE:+ROGWKHXSSHUKDQGOH¿UPO\VRWKDWLWGRHV
QRWGURSRII\RXUKDQG
3. Attach the holders to the handle. Position the
SRZHUVXSSO\FRUGDVVKRZQLQWKH¿JXUH
1
Ź1. Holder
Removing the mulching plug
Optional accessory
1. Open the rear cover.
1
Ź1. Rear cover